

15 DIY Shoe Storage Ideas for Small Spaces (No Wall Mounting Required)
Shoes have a way of taking over the smallest rooms first. One pair becomes three by the door, a few more disappear under the bed, and suddenly you’re stepping around sneakers every time you walk through the room.
The good news is that shoe storage doesn’t have to mean drilling into the wall or buying a bulky cabinet. A few crates, a narrow bench, stackable trays, fabric bins, or an over-the-door organizer can create useful storage in spaces that would otherwise go unused.
These DIY shoe storage ideas are specifically for small spaces where floor area is limited and permanent wall mounting isn’t practical. Each one is designed around real shoes, real clearances, and materials you can actually work with.
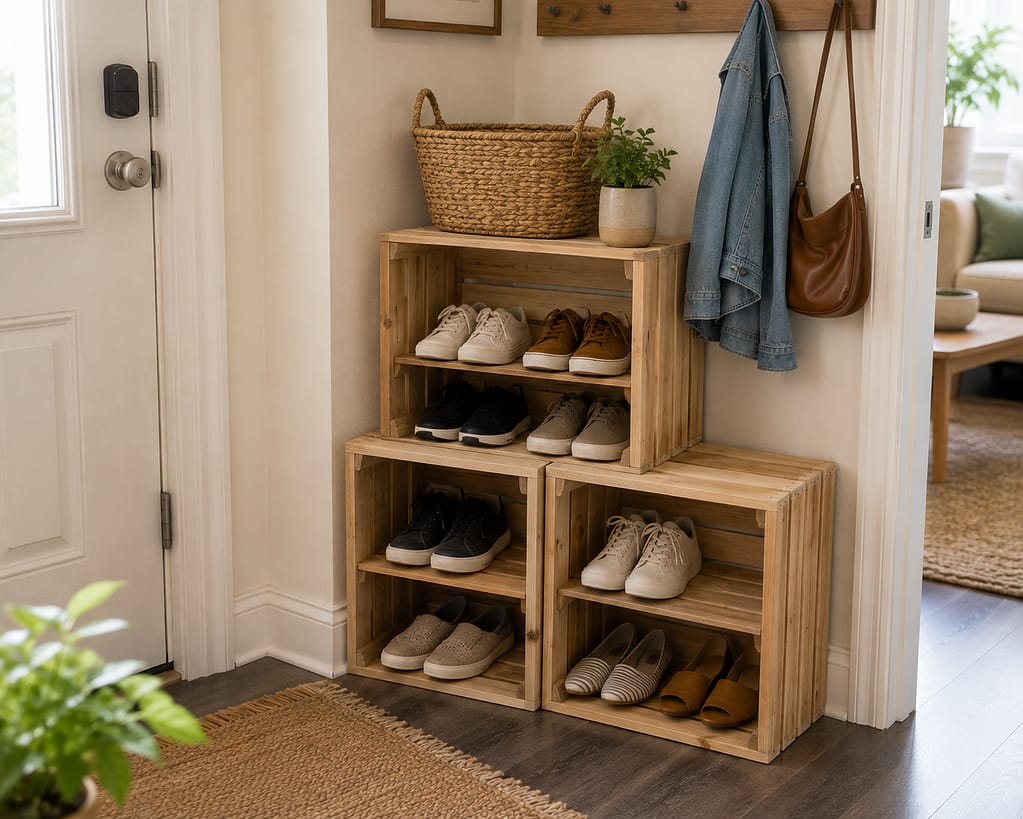
1. Stack Wooden Crates Into a Shoe Cubby
Wooden crates are one of the simplest ways to make a DIY small shoe rack without starting from raw lumber. Turn each crate on its side so the opening faces forward, then stack two or three securely according to the crate design. One medium crate can usually hold a couple of pairs depending on shoe size. Sand rough edges and paint or stain them if you want a cleaner finish. This works well in an entry corner because you can build vertically while keeping the footprint relatively narrow.

2. Build a Low Two-Shelf Pine Shoe Rack
A basic two-level rack is a good first woodworking project because the construction is straightforward. Use pine boards for the two shelves and short side supports or legs at each end, then screw the pieces together into a stable freestanding frame. Make the depth based on your largest everyday shoe rather than guessing. A rack wide enough for three pairs per level can hold roughly six pairs while staying relatively low. It fits nicely beneath a window, console, or coat hooks without needing wall attachment.

3. Turn a Small Bench Into Shoe Storage
If you already need somewhere to sit while putting on shoes, combine the two functions. Build a simple bench from a thick top board with sturdy side panels, then add one low shelf underneath for footwear. Keep the shelf high enough off the floor to make sweeping or vacuuming practical. Depending on width, the lower level can hold three or four pairs without becoming a full-size mudroom bench. This is a useful solution for narrow entrances where every piece of furniture needs to do more than one job.
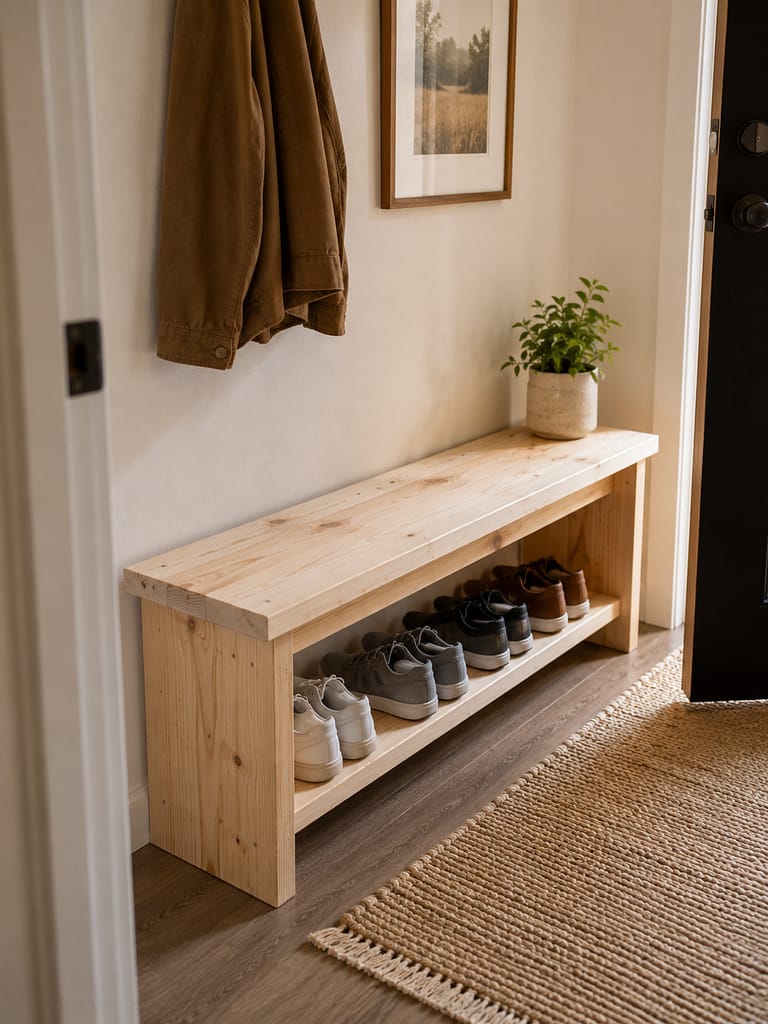
Pro tip: Before cutting wood, line up the shoes you actually plan to store and measure the total width. Shoe sizes and styles vary enough that designing around your own pairs is more useful than copying a generic rack dimension.
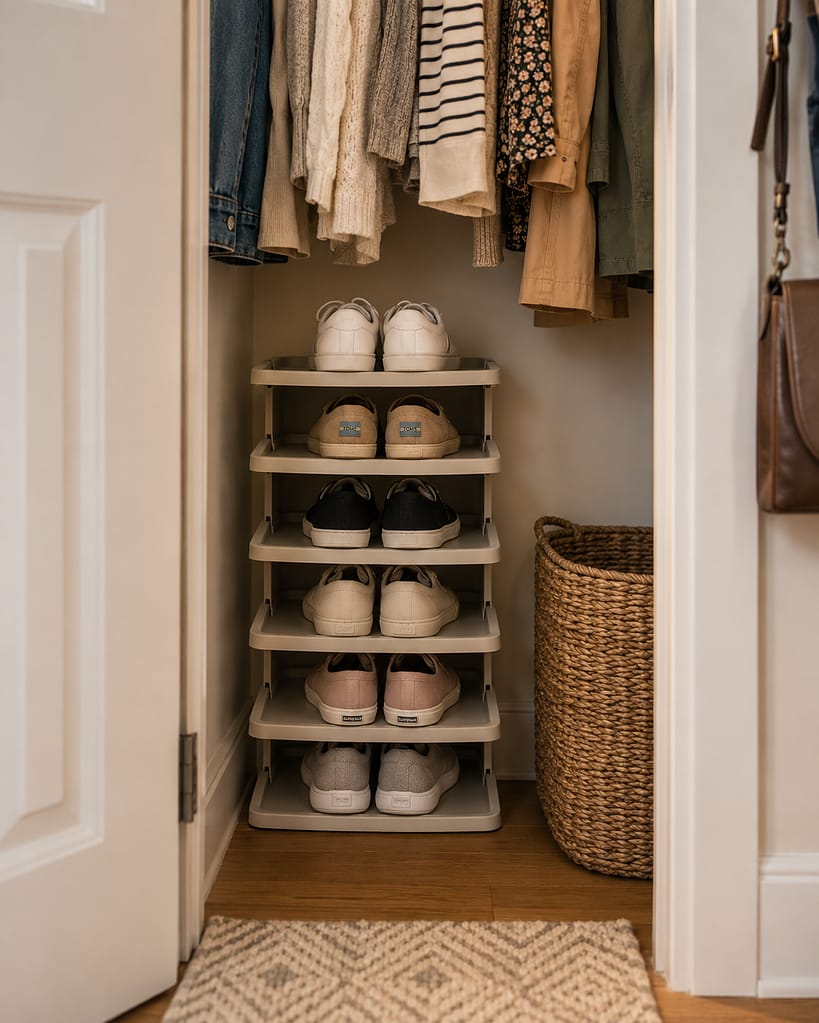
4. Use Stackable Plastic Trays in a Closet
For a closet with a little floor space but not much width, stackable shoe trays can make a tidy vertical system without tools. Choose modular trays designed to sit securely on one another and build only as high as feels stable for the product. Each level generally holds one pair, so a stack of six gives you six easy-to-see spaces. This is particularly practical for renters because the setup can be rearranged or packed easily, and you don’t need to modify the closet itself.
5. Make a Shoe Organizer From Modular Cubes
Open modular cubes can be rearranged to fit awkward spaces better than one long shoe rack. Build a low two-by-two or three-by-two arrangement using sturdy cube units that connect according to their intended assembly method. One cube can hold one larger pair or two smaller pairs depending on the opening. Keep the unit low in a small room so it doesn’t create a visual wall. A basket in one cube can also hold shoe-care supplies while the remaining compartments stay dedicated to footwear.

6. Slide Low Shoe Bins Under the Bed
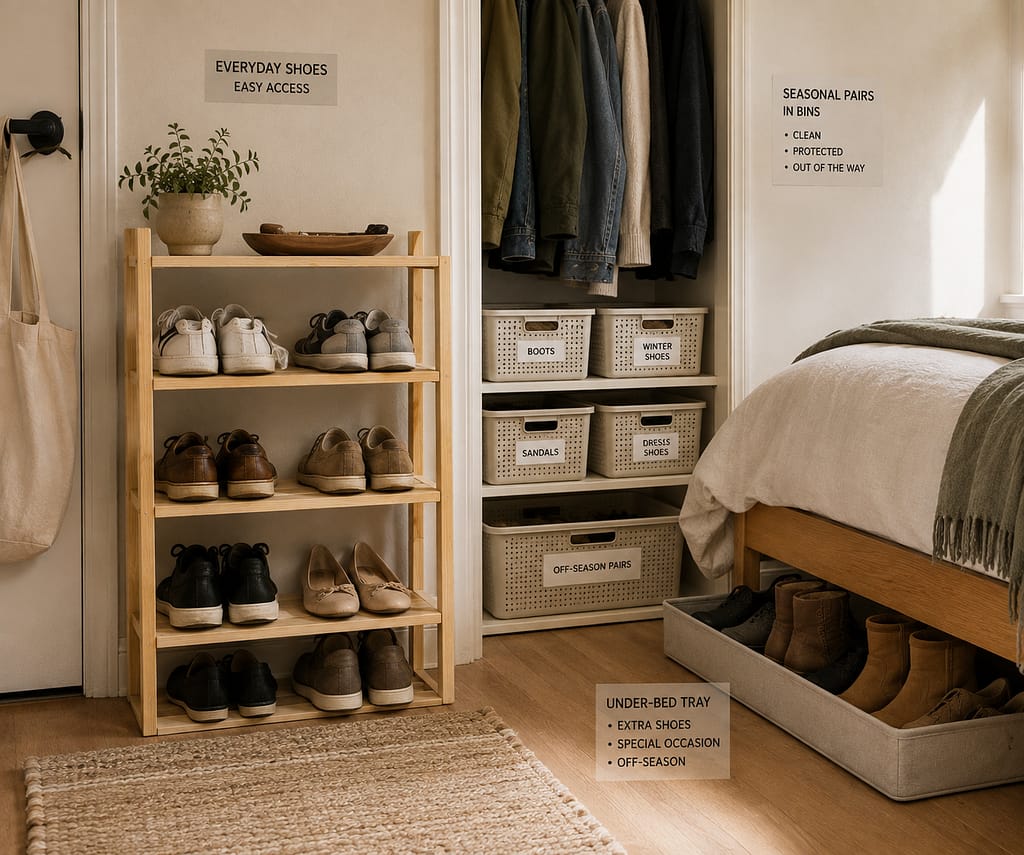
Under-bed space is often large enough to handle seasonal or less frequently worn shoes without using any visible room space. Use shallow lidded bins or make simple low trays from thin plywood with small pull handles. Arrange shoes in a single layer rather than stacking them so pairs are easy to find. Depending on bed height and bin size, one container can hold several pairs. Measure the actual clearance under the bed first, including any center rails or legs that might interrupt where a tray can slide.

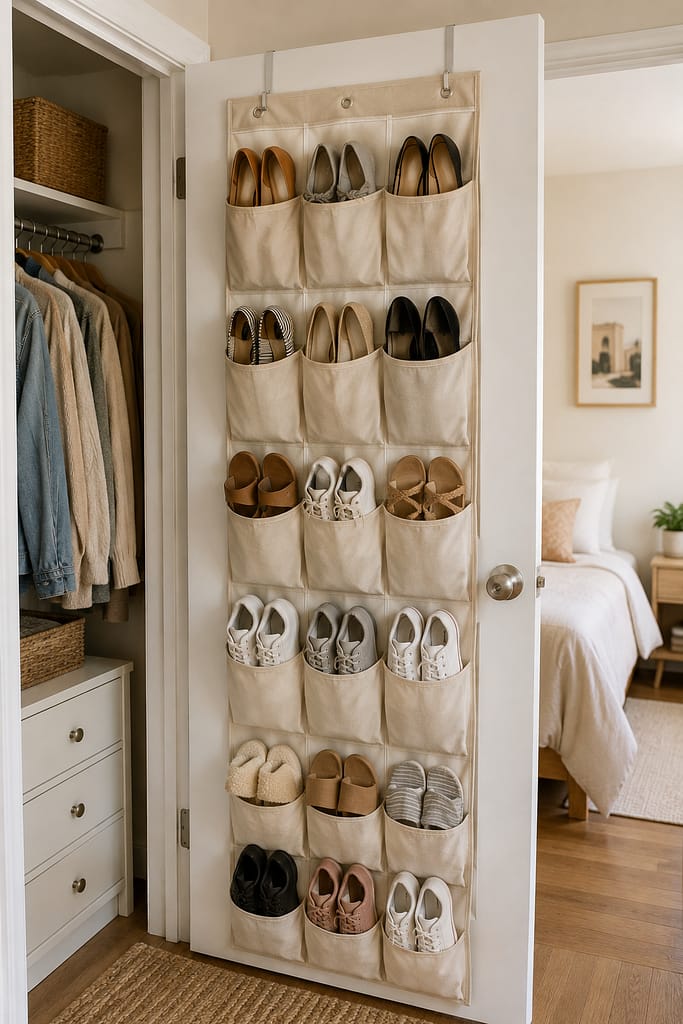
7. Use an Over-the-Door Shoe Organizer
An over-the-door organizer is one of the easiest no-drill solutions because it uses vertical space without becoming a permanent wall installation. Choose one that fits the door width and still allows the door to close normally. Fabric pockets are especially useful for flats, slippers, sandals, and lightweight sneakers; bulkier shoes may fit better in larger open compartments. A single organizer can hold many pairs while taking up virtually no floor space, making it particularly useful in bedrooms and small closets.
Budget tip: If you’re buying bins, crates, or trays, measure the exact space first and take those dimensions with you. A cheap organizer that wastes several inches on each side can hold less than a slightly better-fitting option.
8. Build a Narrow Rolling Shoe Cart
A slim rolling cart can fit between furniture pieces or beside a closet and pull out when you need access. Build a narrow plywood or pine frame with two or three open shelves, then add small casters suitable for the finished load. Keep the cart low enough to stay stable and add a simple handle or finger opening on the side. Depending on width and shelf spacing, it can hold several pairs while disappearing into a gap that would otherwise be wasted.

9. Turn a Storage Ottoman Into a Shoe Box
If you already want a small ottoman at the foot of the bed or beside a chair, use the inside for shoes. A DIY version can be built as a simple plywood box with a removable or hinged padded lid, then lined with easy-to-clean fabric or a removable mat. Use it for clean, dry shoes rather than muddy outdoor pairs. Depending on the dimensions, the box can hold several pairs while appearing to be ordinary furniture, which is ideal when you don’t want footwear visible in a bedroom.

10. Make a Simple PVC Pipe Shoe Cubby
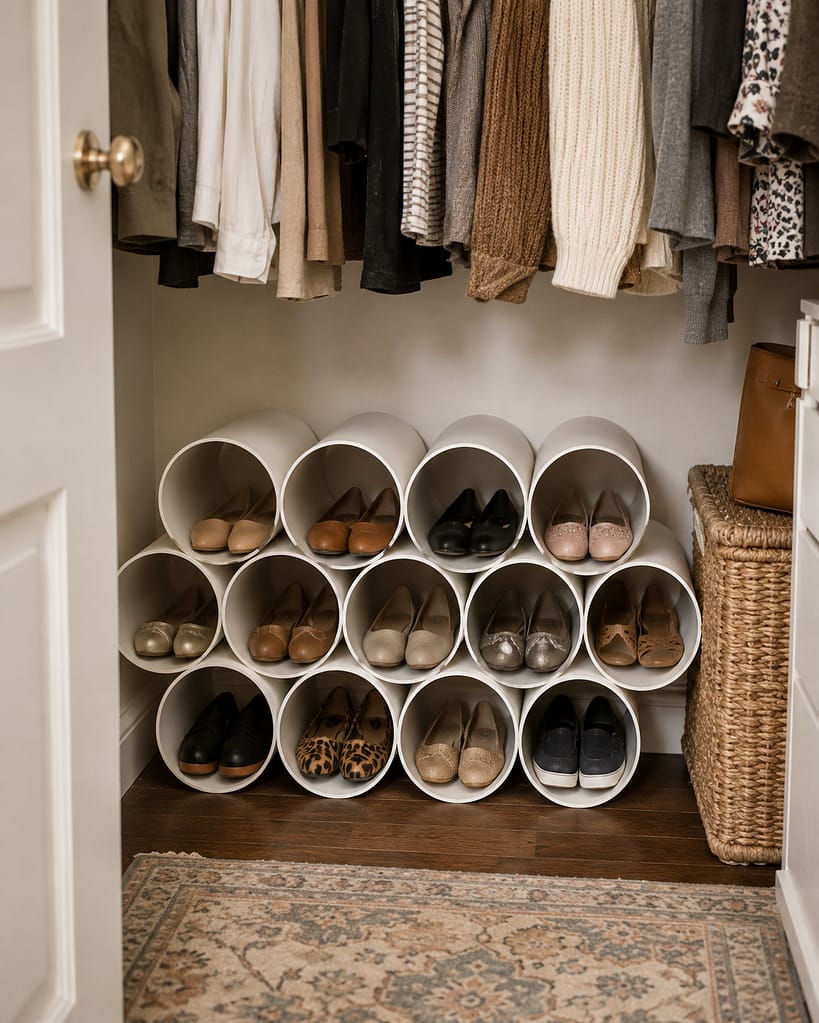
Large-diameter PVC sections can be cut into equal lengths and arranged as individual shoe cubbies for flats, sandals, or some casual shoes. Smooth the cut edges carefully, then join the sections into a stable freestanding cluster using a method appropriate for the material. Keep the arrangement low rather than building a tall tower. Each tube generally creates one shoe compartment, so pairs can occupy adjacent openings. This works best for lightweight footwear and has a playful, compact look in utility spaces or closets.
11. Build a Freestanding Ladder Shoe Rack
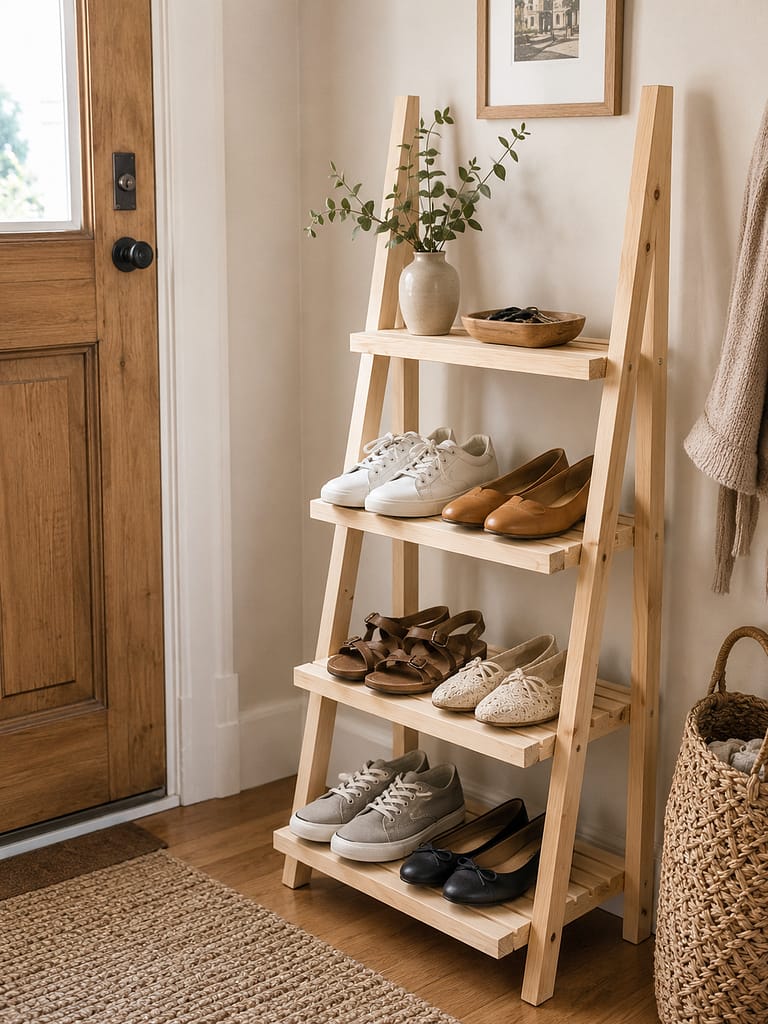
A ladder-style rack uses depth efficiently because the shelves can become slightly narrower toward the top. Build two angled side rails from wood and connect them with horizontal shelves, making sure the finished unit stands securely on its own rather than relying on the wall. Lower shelves can hold larger shoes while upper levels suit flats or sandals. The open sides make the rack feel lighter than a boxy cabinet, which is useful in a small entry where you still want the floor plan to feel open.
Pro tip: For freestanding DIY racks, check for wobble before loading them. Set the empty piece on the actual floor where it will live, then correct uneven legs or joints rather than assuming the floor itself is perfectly level.
12. Create a Closet Shoe Shelf From Wire Racks
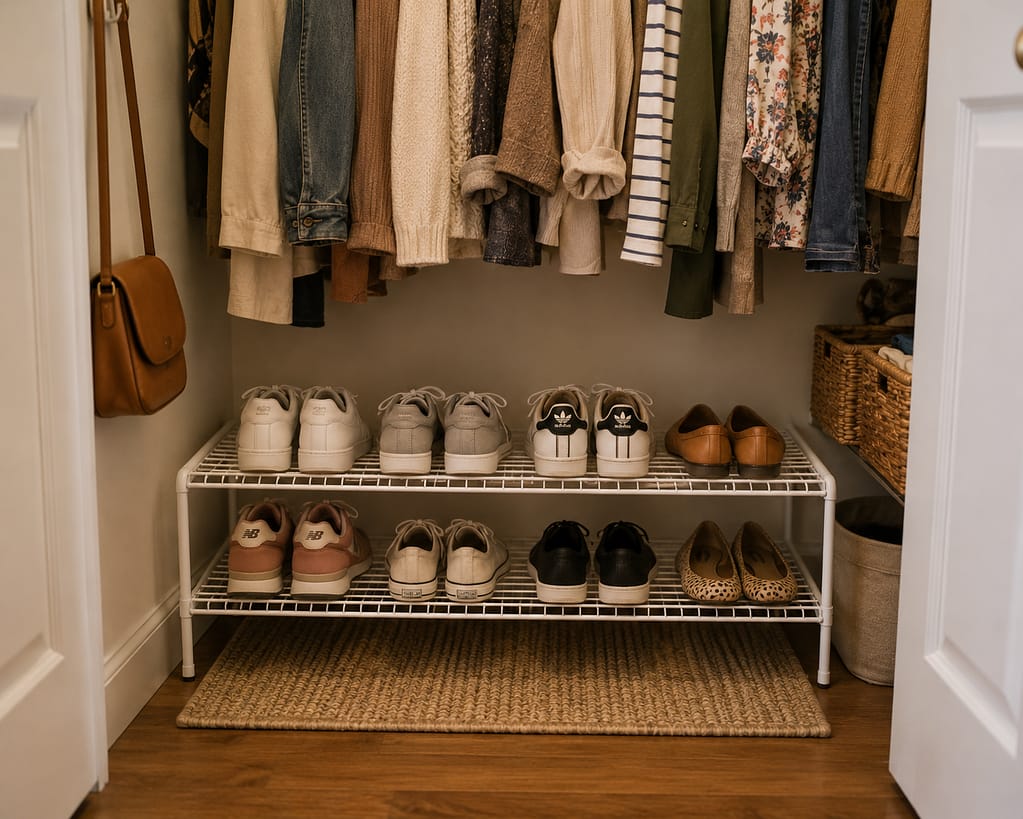
Simple freestanding wire shelves can add a second or third level beneath hanging clothes without building cabinetry. Use short stackable units that fit the closet width and leave enough space above each shelf for easy shoe removal. Open wire lets dust and small debris fall through, so placing a washable mat underneath can make cleaning easier. A two-tier setup can hold several pairs while preserving room for hanging clothes above. It’s a particularly practical choice if your closet layout may change later.
13. Build a Pull-Out Shoe Tray Under a Bench
If you have a bench with an empty cavity underneath, make a shallow pull-out tray rather than leaving shoes loose on the floor. Build a low plywood box with a flat bottom, shallow sides, and a simple front pull, then add small casters or furniture glides if appropriate for your flooring. The tray can hold several pairs in one layer and disappears when pushed back. This is especially useful in an entry because the shoes remain accessible while the bench area looks calmer between uses.

14. Use Fabric Bins for Seasonal Shoes
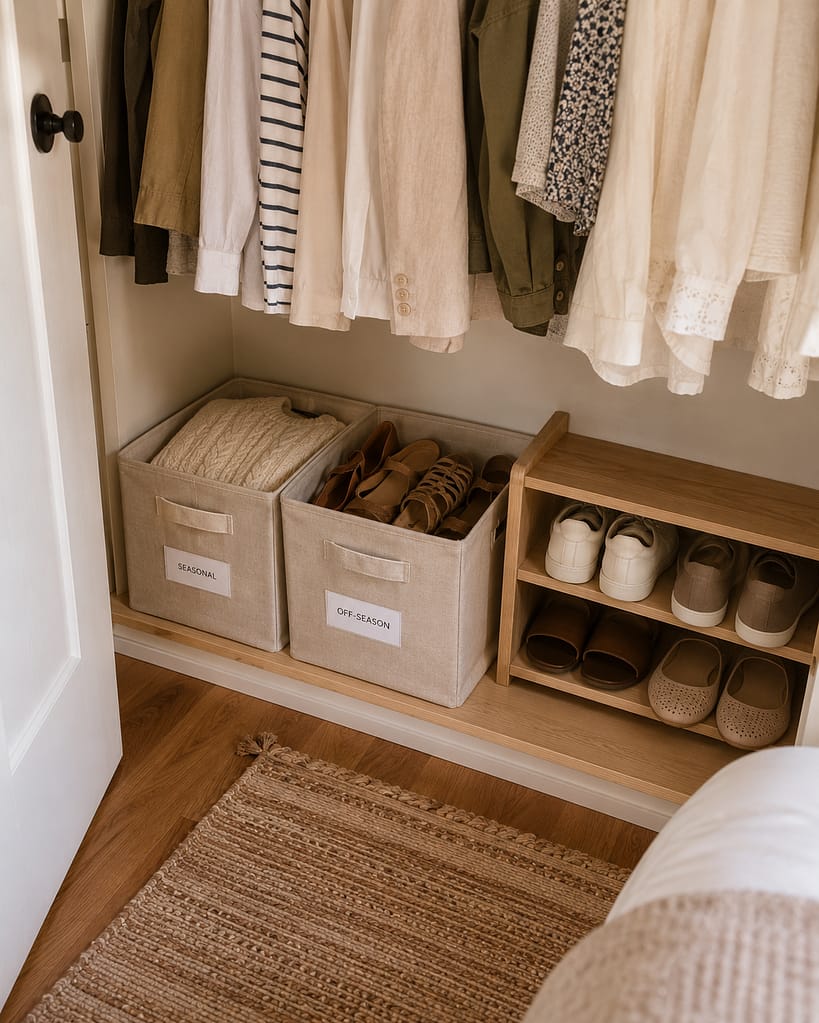
Fabric bins work well for shoes that don’t need daily access, especially on a closet floor or low shelf. Use one bin for sandals, another for athletic shoes, or divide footwear by season. Choose bins that are wide enough to lay shoes naturally rather than crushing them into a narrow container. Labels can help if the bins aren’t transparent. For frequently worn shoes, open shelves are faster; for off-season pairs, bins reduce visual clutter and keep the rest of your small-space shoe storage easier to manage.
15. Make a Stackable Wooden Tray System
A set of shallow wooden trays gives you a flexible alternative to one fixed rack. Build matching rectangular trays from thin plywood bottoms and simple pine side rails, then design them so they stack securely without sliding. Each tray can hold one or two pairs depending on its width. Start with two or three and add more only if necessary. This approach works well for renters because the trays can separate later and serve as closet organizers, under-furniture storage, or general household bins.
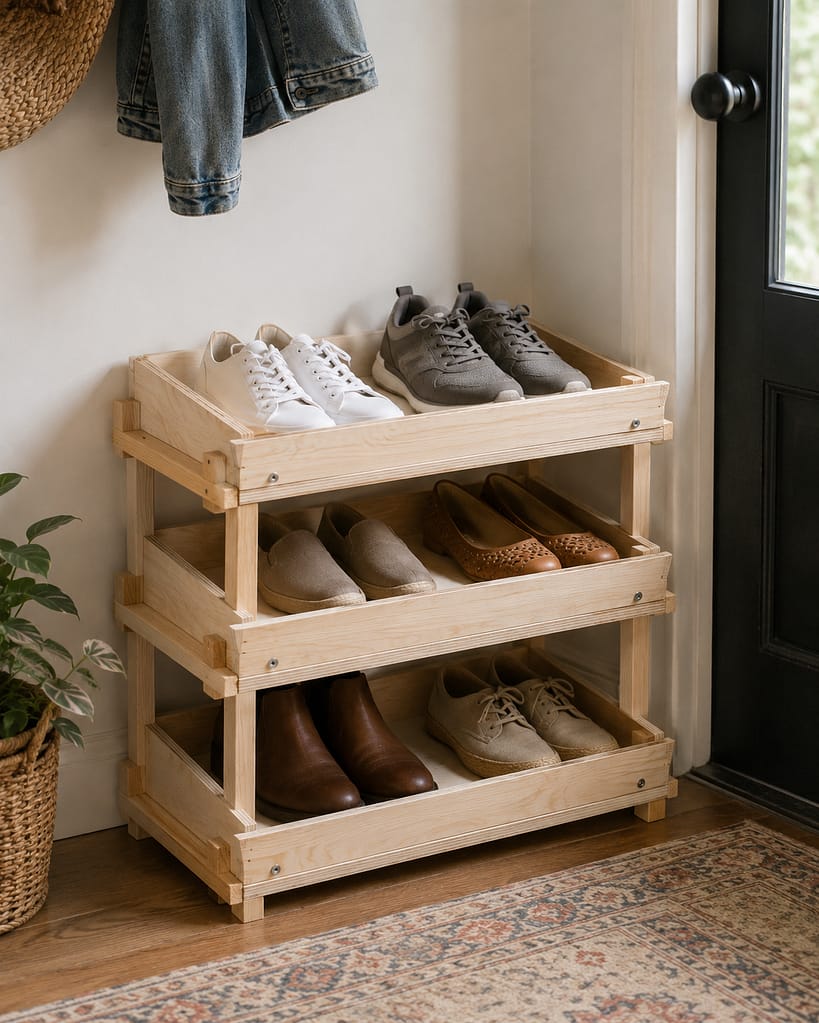
Budget tip: Build repeated pieces assembly-line style. Cut all matching tray sides together, sand them together, and assemble one sample before finishing the rest; it reduces measuring errors and makes a multi-piece project much faster.
Frequently Asked Questions
What is the best material for a DIY shoe rack?
Pine and plywood are beginner-friendly because they’re widely available and easy to cut, sand, and finish. Crates, wire shelves, fabric bins, and modular plastic trays are good alternatives if you’d rather assemble a system than build one from lumber.
How can I keep stored shoes from smelling?
Let damp shoes dry before putting them into closed bins or ottomans, and avoid packing footwear tightly while it’s still moist. Periodically empty enclosed storage so it can be cleaned and aired out, especially for athletic or frequently worn shoes.
What shoe storage works best for renters?
Freestanding racks, crates, under-bed trays, over-the-door organizers, rolling carts, stackable bins, and modular cubbies are all easy to take with you. Since they don’t depend on permanent mounting, they also give you more flexibility if your next home has a completely different layout.
What tools do I need for a basic DIY shoe rack?
A simple wood rack generally calls for a measuring tape, pencil, drill or driver, sandpaper, and a saw if your boards aren’t precut. If you’re working with crates, modular cubes, bins, or stackable trays, you may need little more than measuring tools and whatever hardware the product includes.
How do I keep shoe storage from taking over a small space?
Limit the entry or bedroom area to shoes you actually wear regularly and move off-season pairs into under-bed or closet storage. Building upward with stackable cubes or trays also lets you increase capacity without spreading the rack farther across the floor.
Give Every Pair a Real Home
Small-space shoe storage works best when you stop trying to make one rack hold everything. Keep everyday pairs somewhere easy to reach, move seasonal footwear into bins or under-bed trays, and use awkward gaps for rolling or stackable storage.
You don’t need permanent cabinetry to make the floor feel calmer. A basic pine rack, a few crates, or a well-sized set of trays can be enough.
Save or pin these DIY shoe storage ideas for later, then choose the version that fits the shoes—and the square footage—you actually have.