
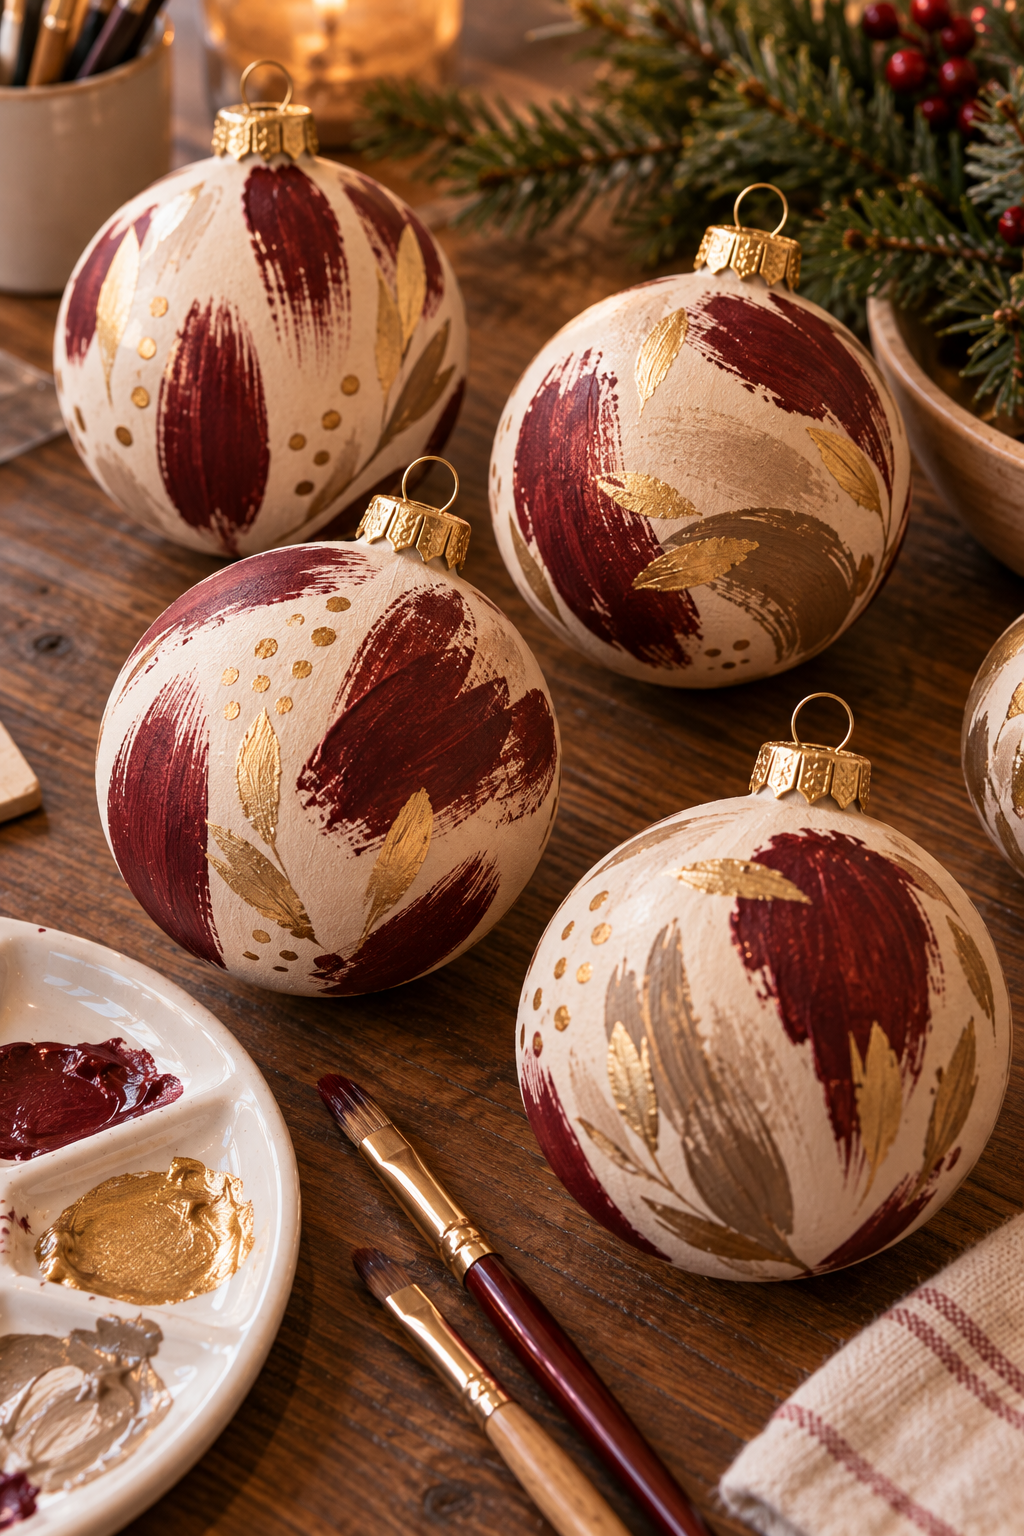
16 Christmas Ornament Painting Ideas for Creative Handmade Decorations
Painting your own Christmas ornaments is one of those crafts that looks suspiciously simple.
Then suddenly you’re sitting at the table at 11:37 p.m., holding a tiny brush and deciding whether your miniature pine tree needs one more branch.
It does not.
Put the brush down. 🙂
These Christmas ornament painting ideas are perfect if you want handmade decorations that feel more personal than another box of identical store-bought baubles.
And you don’t need serious painting skills.
Simple stripes work.
Dots work.
Tiny trees work.
Even an intentionally imperfect brushstroke can look beautiful when you repeat it across several ornaments.
You can paint glass, plastic, ceramic, or wooden ornament blanks, but surface preparation matters. Check what your ornament is made from and choose paint, primer, markers, sealers, and curing methods specifically compatible with that material.
Don’t assume a product intended for unfinished wood will behave the same way on slick glass or plastic.
Also follow manufacturer instructions for ventilation, drying, curing, protective equipment, and heat use.
Ready?
Here are 16 Christmas ornament painting ideas for creative handmade decorations that actually look good hanging on the tree.
1. Paint Warm Cream Christmas Ornaments
Start simple.
Paint ornament blanks in a soft warm cream.
A matte or low-sheen finish gives them a handmade ceramic appearance.
Once the base is completely dry, add several subtle mushroom-colored brushstrokes.
Keep them irregular.
Don’t cover the entire ornament.
You want the cream base to remain dominant.
These look beautiful on trees decorated with wood, evergreen, burgundy, and muted gold.
Make several rather than one.
Repeated handmade ornaments always look more intentional.
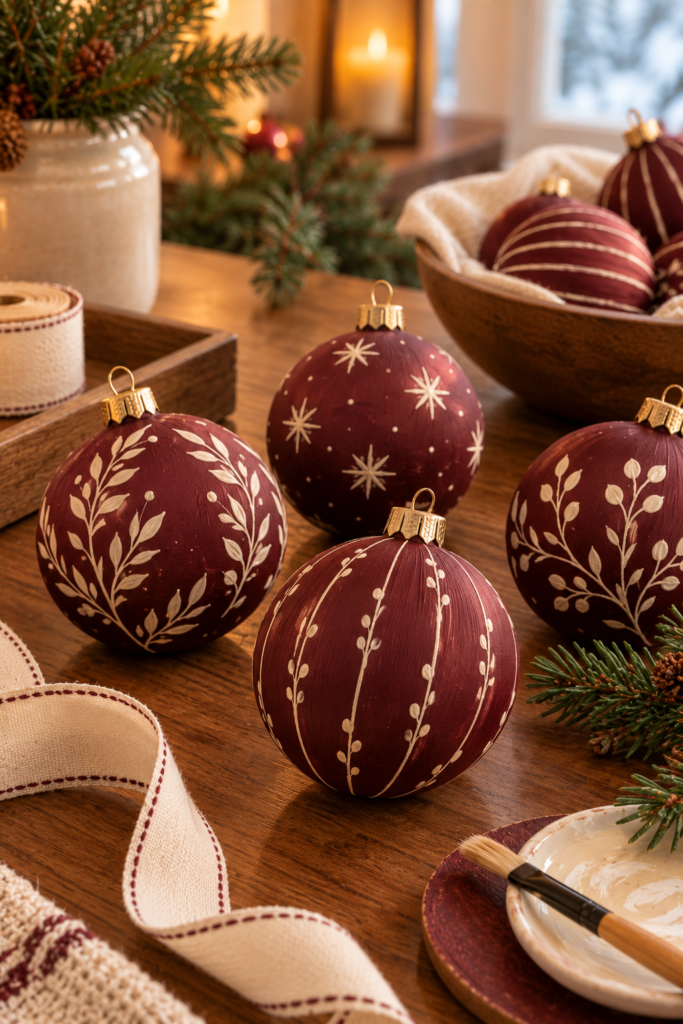
2. Create Burgundy Christmas Ornaments
Deep burgundy looks incredible against evergreen.
Paint several ornaments in a rich muted burgundy.
Let the base dry completely.
Then add a few thin warm-cream lines around each ornament.
They don’t need to be perfectly straight.
In fact, slightly irregular lines make the ornament feel more handmade.
Use a matte or satin finish rather than extremely glossy paint if you want a softer look.
Pair the finished ornaments with warm-cream ribbon.
Simple.
Moody.
Very Christmas without screaming across the room.
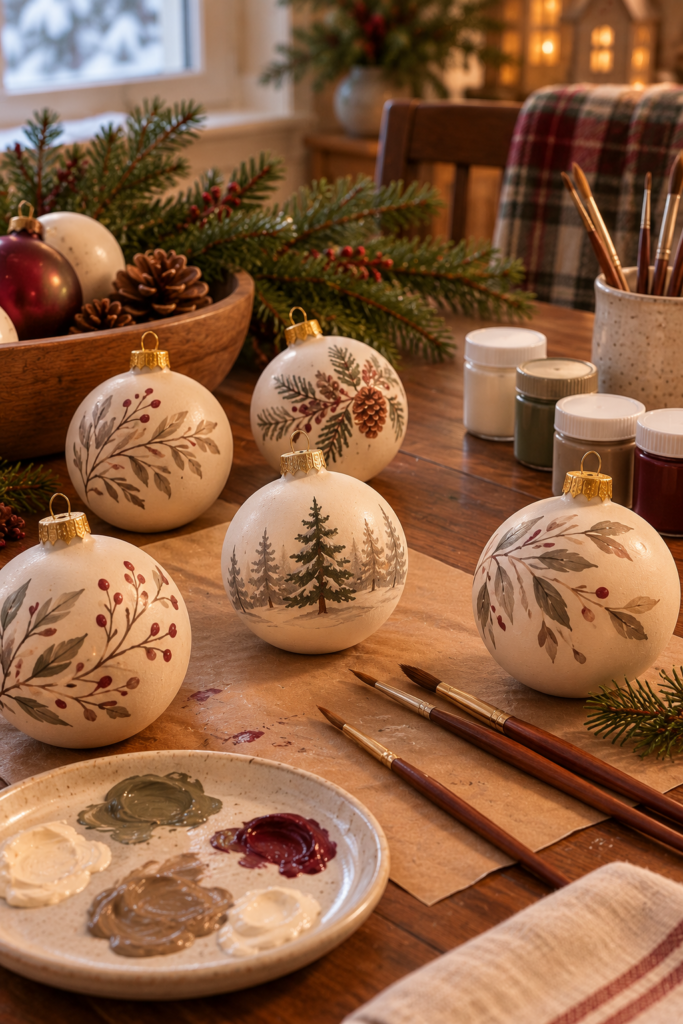
3. Paint Tiny Evergreen Trees on Ornaments
Paint a warm-cream base.
Once dry, add several tiny evergreen trees.
Use muted forest green.
Keep the trees simple.
A trunk.
A few horizontal brushstrokes.
Done.
Don’t attempt botanical accuracy on a three-inch ornament.
The tree just needs to communicate:
“Hello. I am approximately a tree.”
Mission accomplished.
Add tiny muted-gold dots between the trees if you want subtle sparkle without glitter.

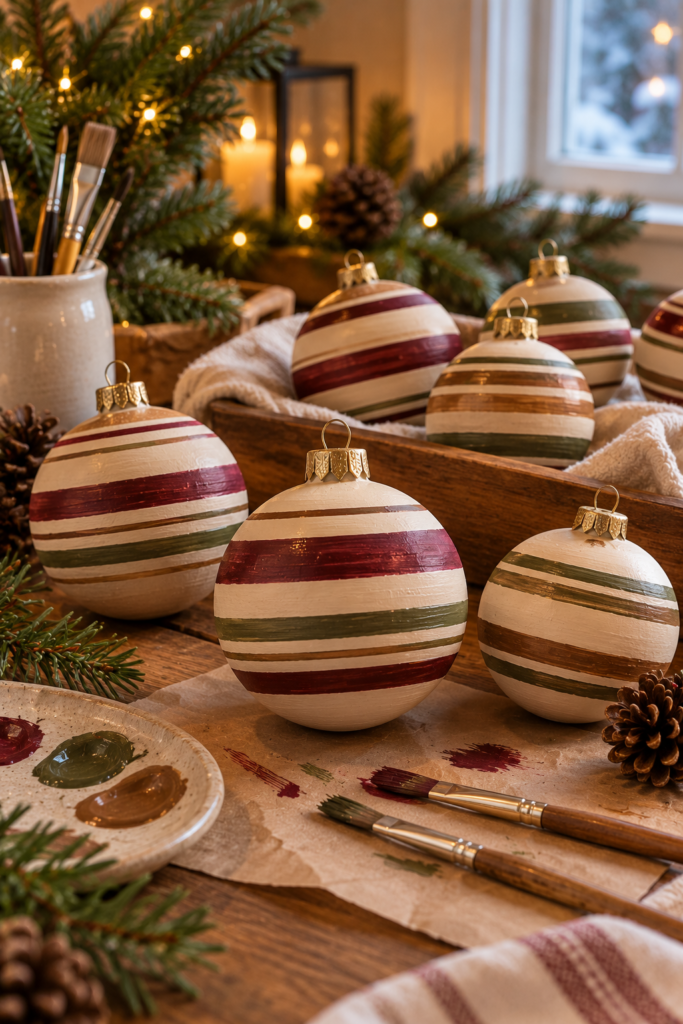
4. Create Painted Christmas Ornament Stripes
Stripes are beginner-friendly.
Paint the ornament warm cream.
Then add horizontal stripes in:
Burgundy.
Muted olive.
Warm brown.
Keep the widths slightly varied.
You could use painter’s tape if it’s appropriate for the ornament surface and base coating.
Or paint freehand for a softer handmade effect.
IMO, slightly imperfect stripes usually look better for this type of ornament.
Perfect factory lines rather defeat the point of making them yourself.
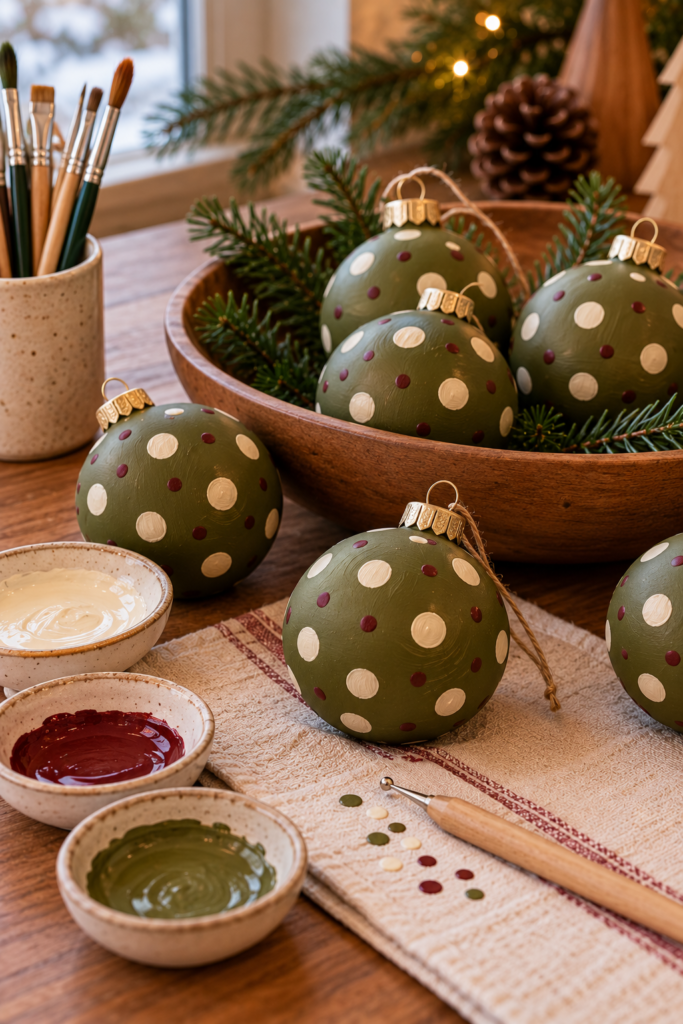
5. Paint Christmas Ornament Polka Dots
Want something even easier?
Dots.
Paint several ornament blanks in muted olive.
Once dry, add warm-cream dots using an appropriate dotting tool or small brush.
Vary the dot sizes slightly.
Add a few tiny burgundy dots for contrast.
That’s it.
This pattern works particularly well when you make several coordinating ornaments.
And unlike miniature landscape painting, dots rarely cause an existential crisis.
Useful.
6. Create Painted Snowflake Ornaments
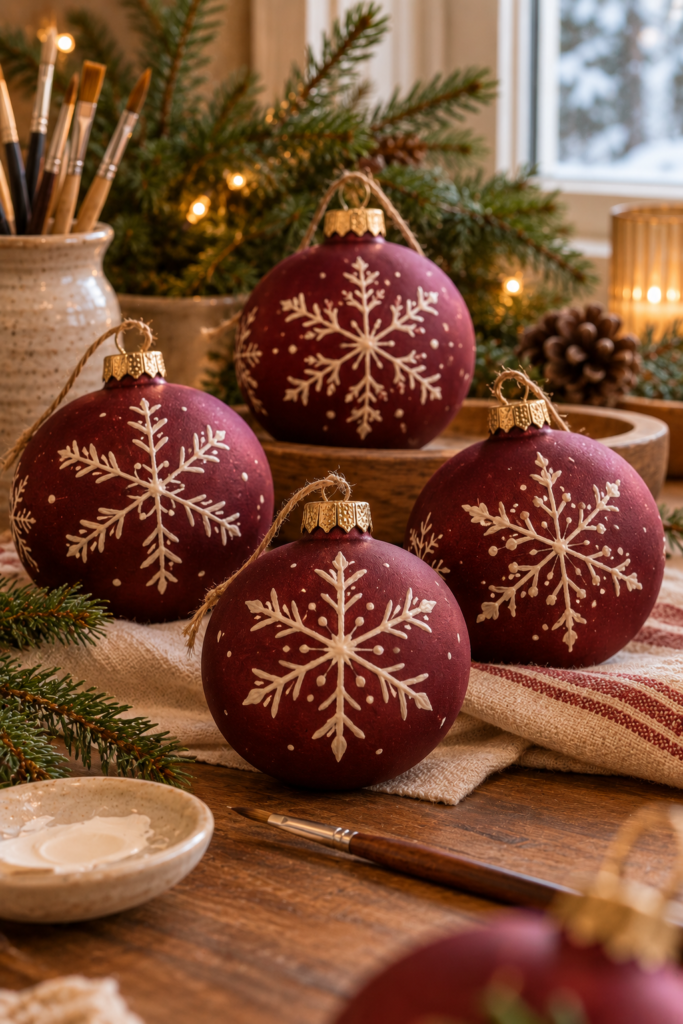
Paint the base deep burgundy.
Add a simple warm-cream snowflake.
Don’t overcomplicate it.
Start with intersecting lines.
Add small branches.
Stop before you decide each snowflake needs 46 individual details.
A simple snowflake will actually be easier to see from the tree.
Try painting several ornaments with slightly different snowflake designs.
They’ll coordinate without looking identical.
7. Paint Winter Botanical Ornaments
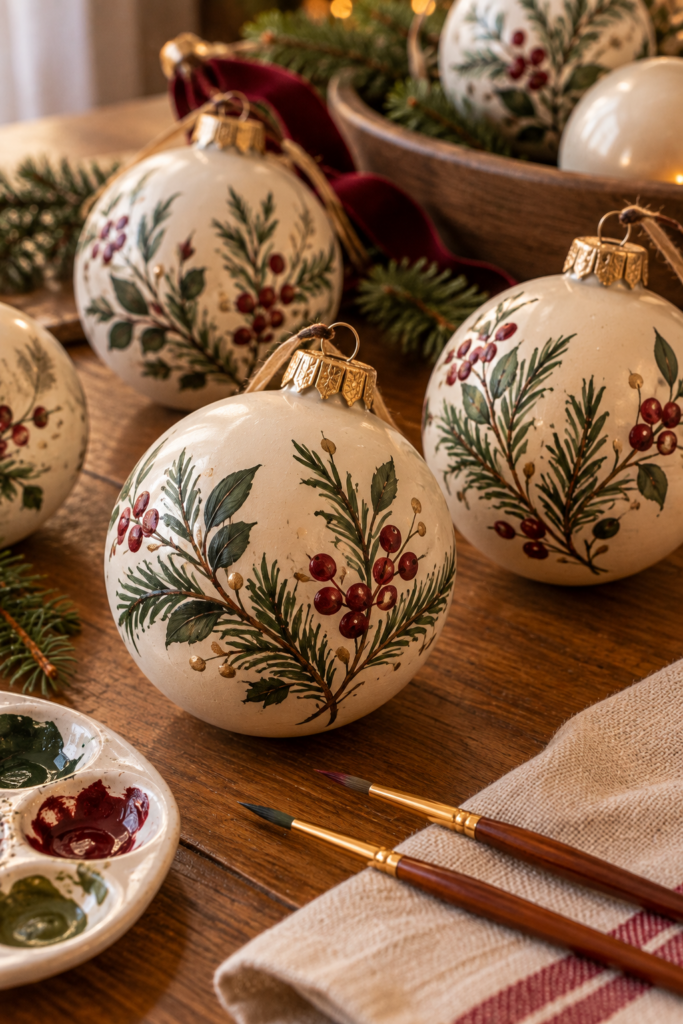
Use warm cream as the background.
Paint delicate evergreen sprigs around part of the ornament.
Add several muted burgundy berry-like dots.
Keep the design asymmetrical.
You don’t need foliage covering every inch.
Negative space helps the painted details stand out.
These ornaments work beautifully with traditional, woodland, vintage, and botanical Christmas decor.
And they’re easier than they look.
A tiny evergreen branch is mostly a line with smaller lines.
We can handle this.
8. Create Checkerboard Christmas Ornaments
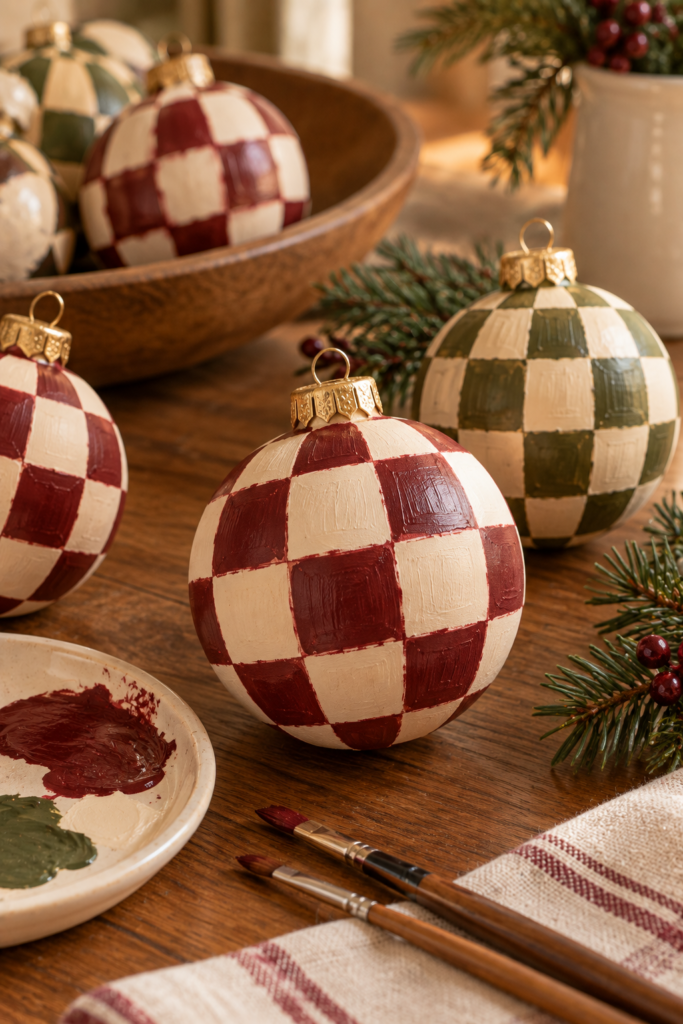
Checkerboard patterns bring a slightly playful look.
Start with a warm-cream base.
Paint a loose checkerboard using deep burgundy.
Keep the squares relatively large.
Don’t worry if every corner isn’t perfectly aligned.
Hand-painted checkerboard should look hand-painted.
You could also try olive and cream for a quieter version.
These ornaments look especially cute mixed with simple solid-color baubles.
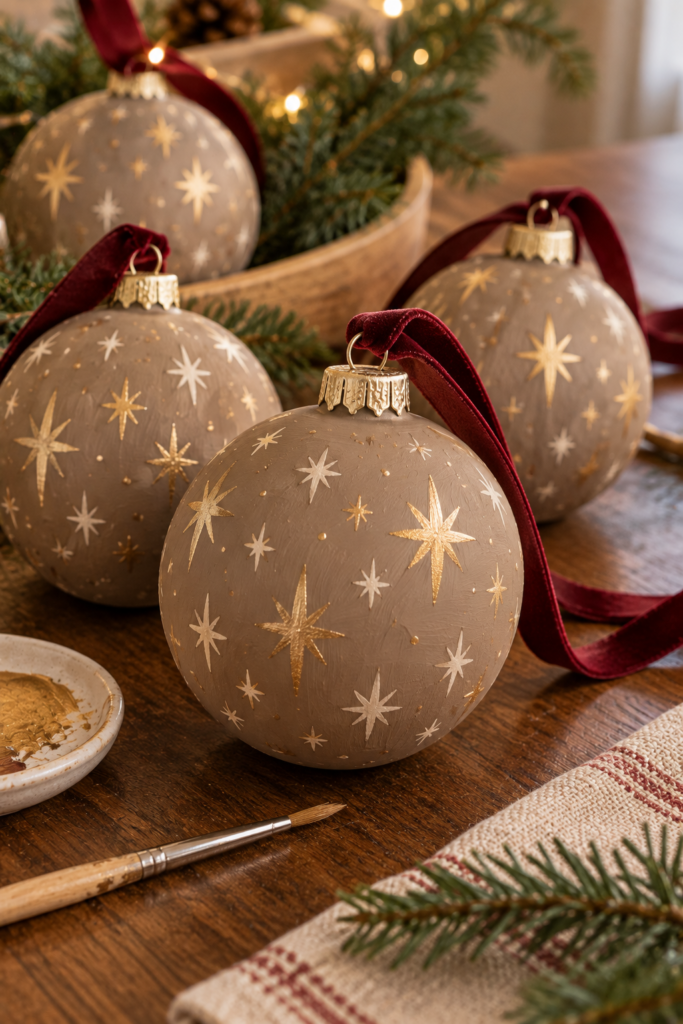
9. Paint Christmas Ornaments With Tiny Stars
Paint the ornament mushroom taupe.
Then scatter tiny stars across the surface.
Use warm cream and muted gold.
Keep the stars different sizes.
Don’t position them in perfect rows.
Random spacing creates a softer celestial effect.
This is a great option if your Christmas decor leans neutral or slightly moody.
Add deep burgundy ribbon when hanging them.
That small contrast makes the entire ornament feel richer.
10. Create Painted Gingerbread Ornaments
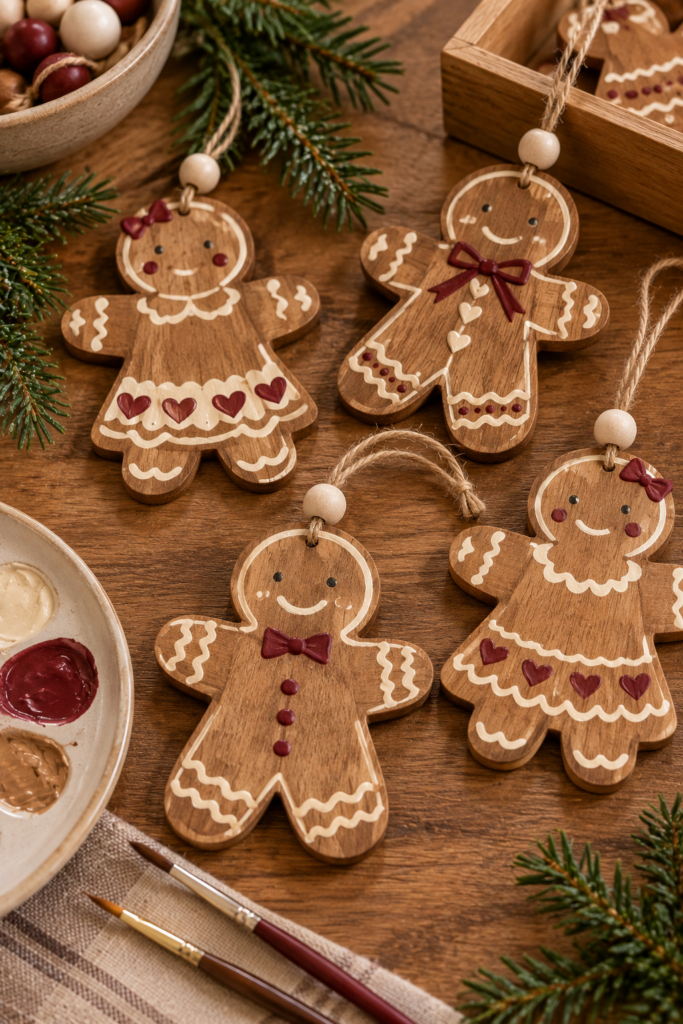
Use wooden ornament blanks shaped like gingerbread people or houses.
Paint them warm brown.
Add warm-cream decorative lines.
Use dots, scallops, and simple borders.
Add tiny burgundy accents.
Keep faces and details minimal.
You don’t need to reproduce the entire emotional range of a gingerbread person with a paintbrush.
A few dots will do.
If children are helping, choose age-appropriate materials and supervise according to product instructions.
11. Paint Christmas Ornaments With Simple Florals
Christmas florals don’t have to look spring-like.
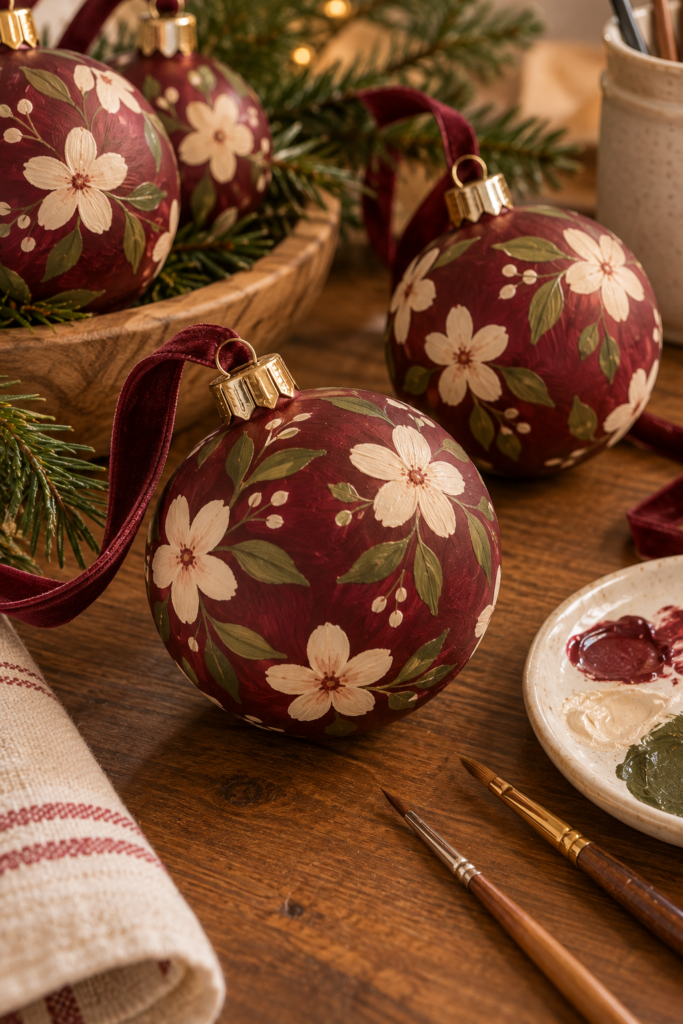
Use a deep burgundy base.
Paint simple warm-cream flowers.
Add muted-olive leaves.
Keep each flower loose.
Five petals.
Small center.
Done.
Leave plenty of burgundy visible.
The darker background makes the cream flowers stand out beautifully.
This is particularly nice for romantic, vintage, and slightly whimsical Christmas trees.
12. Create Plaid Painted Christmas Ornaments
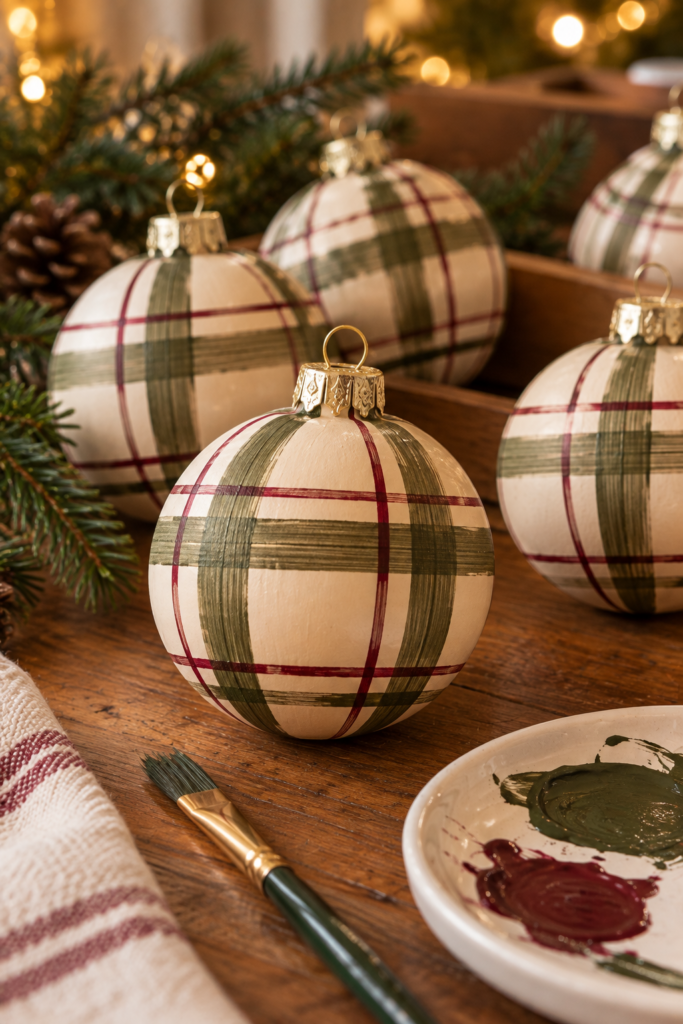
Plaid feels instantly cozy.
Paint the ornament warm cream.
Add broad muted-olive vertical and horizontal lines.
Then add thinner burgundy lines.
Keep the pattern simple.
You don’t need seven intersecting colors.
Three is enough.
If you’re new to painting plaid, practice on scrap material first.
Your first attempt may look less “Christmas tartan” and more “traffic grid designed during an emergency.”
That’s what practice is for.
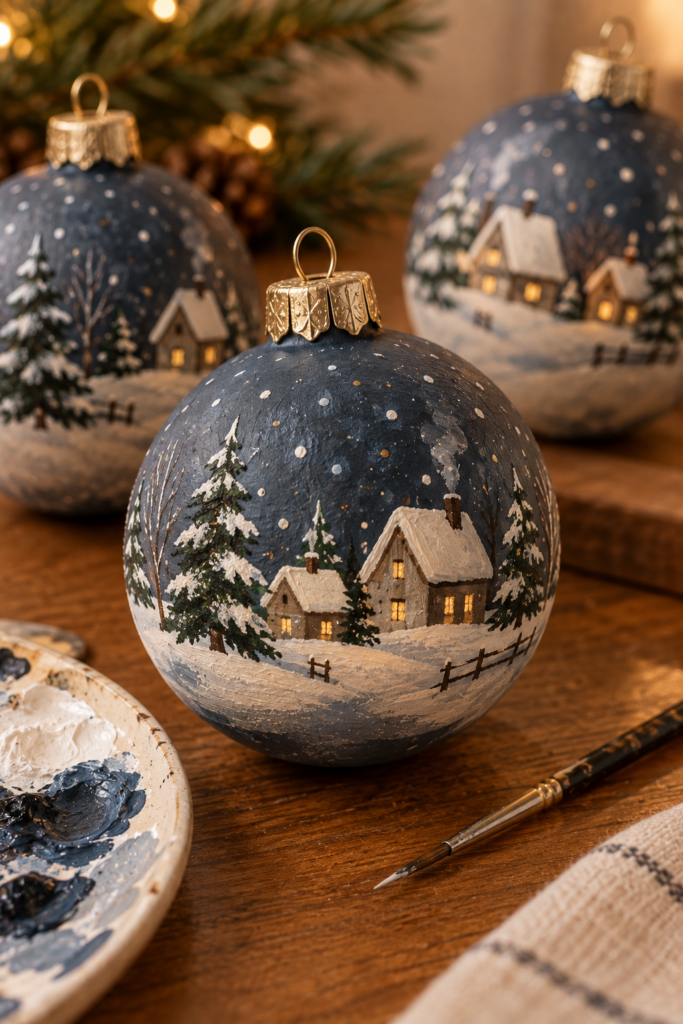
13. Paint a Snowy Christmas Village on Ornaments
Ready for something more detailed?
Paint a simple snowy village scene.
Use a deep blue-gray or charcoal base.
Add two or three tiny warm-cream houses.
Paint snowy roofs.
Add several evergreen silhouettes.
Finish with small warm-cream dots for snow.
Keep the composition simple enough to read at ornament scale.
You are painting a tiny village.
You are not responsible for its municipal infrastructure.
No roads required.
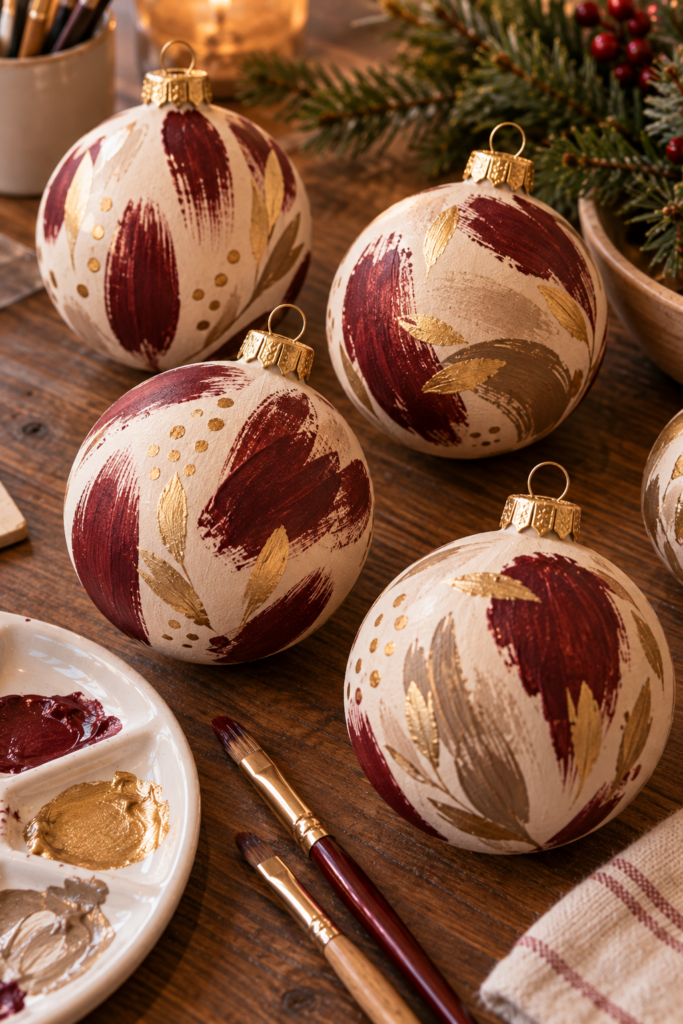
14. Create Abstract Burgundy and Gold Ornaments
Not interested in tiny details?
Go abstract.
Start with a warm-cream base.
Add broad burgundy brushstrokes.
Layer several smaller muted-gold strokes.
Add one or two mushroom-colored shapes.
Rotate the ornament as you work.
Avoid creating an obvious repeating pattern.
The finished ornament should feel loose and painterly.
This is probably the easiest way to create something that looks surprisingly sophisticated without painting a single recognizable object.
Modern art saves Christmas crafting once again.
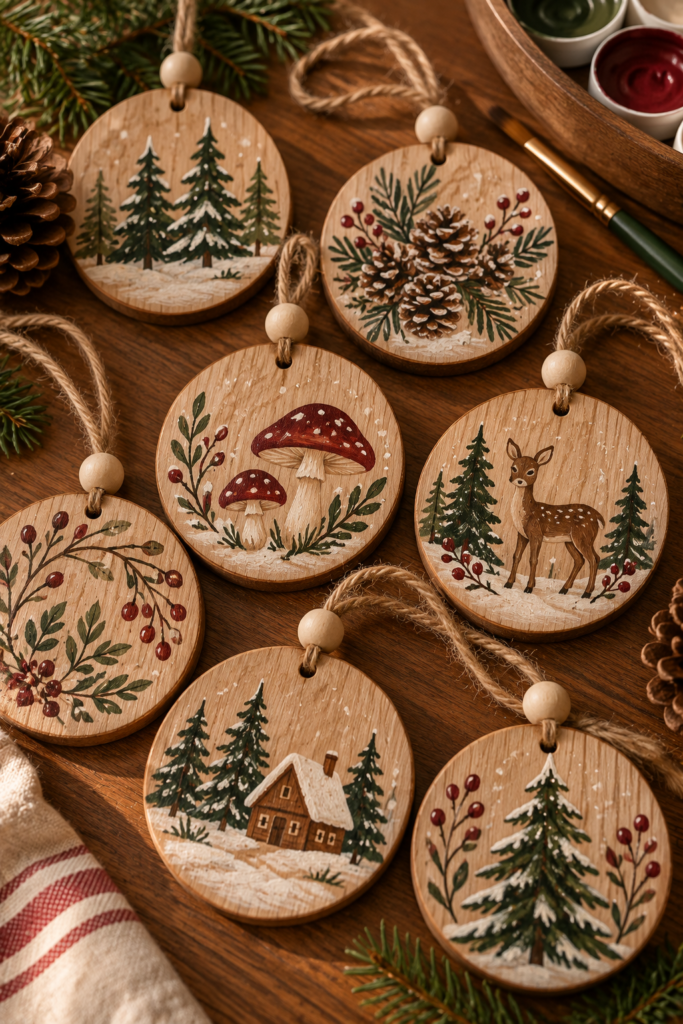
15. Paint Woodland Christmas Ornaments
Use natural wooden ornament blanks.
Leave part of the wood exposed.
Paint small woodland motifs.
Try:
Evergreen trees.
Mushrooms.
Pinecones.
Simple winter branches.
Use muted olive, warm cream, burgundy, and warm brown.
The exposed wood becomes part of the design.
This is particularly good for rustic and woodland Christmas trees.
Just make sure the wooden blank is smooth enough for your chosen painting technique and prepare it according to the coating manufacturer’s instructions.
Splinters are not festive texture.
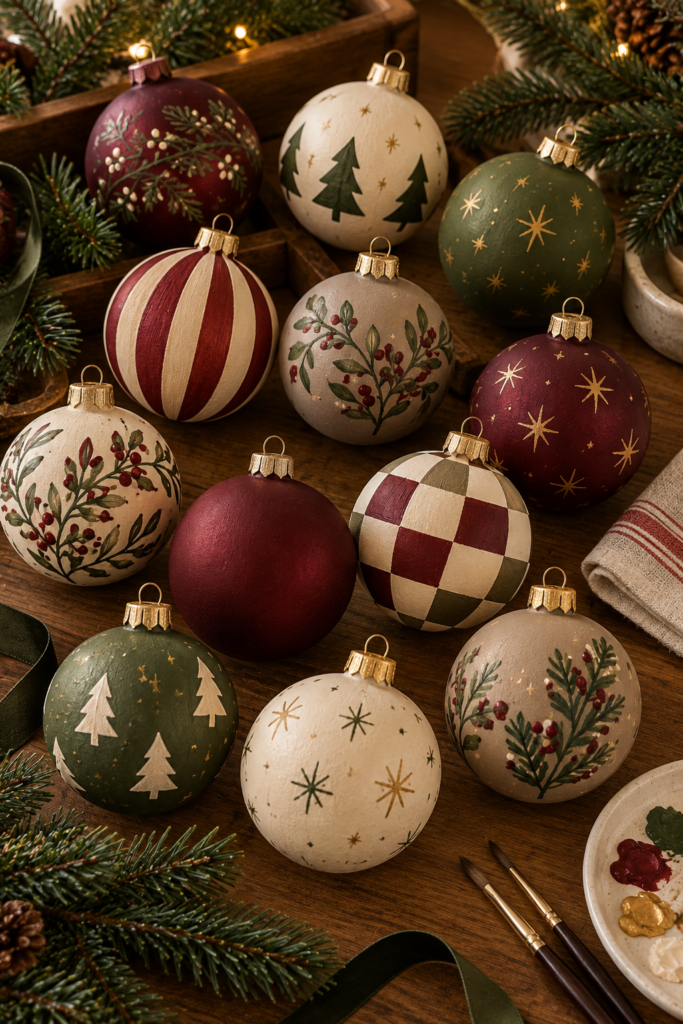
16. Paint a Coordinated Collection of Christmas Ornaments
Finally, create a whole set.
Choose one palette:
Deep burgundy.
Warm cream.
Muted olive.
Mushroom.
Muted gold.
Then paint each ornament differently.
One gets stripes.
One gets stars.
One gets evergreen trees.
One gets botanical branches.
One gets checkerboard.
One stays solid burgundy.
Because the colors repeat, the collection still feels cohesive.
This is my favorite approach if you’re decorating an entire tree.
You get variety without visual chaos.
Basically, every ornament gets its own personality while agreeing to the same dress code.
Very civilized.
What Kind of Christmas Ornaments Can You Paint?
Several ornament materials can potentially be painted.
Common options include:
- Unfinished wood
- Ceramic or bisque blanks
- Previously finished ceramic
- Glass
- Plastic
- Papier-mâché
- Other craft ornament blanks
But the surface matters.
Always identify the ornament material before choosing your paint.
Unfinished wood is porous.
Glass is slick and nonporous.
Many plastics have low surface energy and can be difficult for coatings to grip.
Glazed ceramic behaves differently from unglazed bisque.
Existing coatings may also affect adhesion.
Read the paint or coating manufacturer’s instructions to confirm compatibility.
That five-minute check can save you from discovering that your beautiful burgundy paint can be peeled off the ornament like a sticker.
Christmas Ornament Painting Ideas for Beginners
Start with designs that don’t depend on precision.
Try:
Polka dots.
Stripes.
Large stars.
Simple evergreen trees.
Abstract brushstrokes.
Solid colors.
Checkerboard.
Don’t start with a six-house alpine village containing individual window shutters.
We need to earn our way there.
A set of cream ornaments with burgundy dots can look every bit as beautiful as complicated artwork.
Consistency matters more than complexity.
Easy Christmas Ornament Painting Ideas
The easiest approach is to start with a solid base color.
Let it dry according to product instructions.
Then add one simple pattern.
For example:
Cream + burgundy stripes.
Olive + cream dots.
Burgundy + cream stars.
Mushroom + evergreen trees.
Warm cream + abstract burgundy strokes.
Use a limited palette.
That way, even imperfect designs coordinate.
Christmas Ornament Painting Ideas on Wood
Wooden ornaments are perfect for rustic designs.
Try:
Evergreen trees.
Woodland mushrooms.
Snowflakes.
Stars.
Plaid.
Botanical branches.
Gingerbread-inspired patterns.
You can also leave sections unpainted.
Visible wood grain adds warmth.
Prepare unfinished wood as needed for your chosen paint system.
This may involve light sanding and dust removal.
If sanding, follow appropriate safety guidance, particularly with manufactured wood products or unknown existing finishes.
Use paint and sealer compatible with the material.
Christmas Ornament Painting Ideas on Glass
Glass requires more planning.
Choose paint specifically suitable for glass or the intended nonporous surface.
Clean and prepare the glass according to the product directions.
Avoid touching prepared painting areas excessively.
Allow proper drying and curing.
If a product requires heat curing, only use that method if both the ornament and coating manufacturer specifically allow it.
Don’t assume every glass ornament belongs in an oven.
Please.
Christmas crafting should not unexpectedly become materials testing.
Christmas Ornament Painting Ideas on Plastic
Plastic can be tricky because different plastics behave differently.
Use coatings specifically compatible with the type of plastic or craft blank you’re using.
Clean and prepare the surface according to instructions.
Test the coating in an inconspicuous area if appropriate.
Avoid aggressive solvents or heat unless explicitly supported by the material and product manufacturers.
Plastic ornaments are useful around children and pets because many are more impact-resistant than glass, but painted coatings still need to be fully cured before handling.
Christmas Ornament Painting Ideas on Ceramic
First determine whether the ornament is:
Unglazed bisque.
Glazed ceramic.
Previously painted.
The correct coating system may differ.
Bisque often accepts craft finishes more readily.
Glazed ceramic may require products designed for slick surfaces.
Follow product instructions for preparation, application, curing, and sealing.
And don’t assume a painted decorative ceramic ornament is food-safe.
I know nobody was planning to serve soup inside a Christmas ornament.
But the disclaimer has now been officially issued.
Burgundy Christmas Ornament Painting Ideas
Burgundy is fantastic for painted ornaments because it looks rich against green branches.
Pair it with:
Warm cream.
Muted gold.
Mushroom.
Muted olive.
Natural wood.
Try burgundy as:
A solid base.
Stripes.
Checkerboard.
Tiny berries.
Floral details.
Abstract brushstrokes.
You don’t need bright red for Christmas.
Deep burgundy creates a softer, moodier version of the traditional palette.
Neutral Christmas Ornament Painting Ideas
Use:
Warm cream.
Mushroom.
Taupe.
Natural brown.
Muted olive.
Soft muted gold.
Paint simple stars.
Branches.
Trees.
Stripes.
Abstract shapes.
Neutral ornaments look particularly good on trees with natural wood decorations and warm-white lighting.
They can also transition nicely into general winter decor.
Traditional Christmas Ornament Painting Ideas
Use evergreen, burgundy or classic red, cream, and gold.
Paint:
Trees.
Snowflakes.
Plaid.
Holly-style botanicals.
Ornaments.
Stars.
Simple snowy houses.
Repeat the same colors across several different patterns.
This creates a traditional collection without every ornament looking identical.
Rustic Christmas Ornament Painting Ideas
Use wooden blanks whenever possible.
Keep some wood visible.
Paint with:
Warm cream.
Muted olive.
Brown.
Burgundy.
Add simple evergreen, pinecone, star, or woodland motifs.
Matte finishes usually work especially well.
Avoid excessive artificial distressing.
Actual visible wood already provides enough rustic texture.
No need to make a brand-new ornament look like it survived the winter of 1887.
Scandinavian Christmas Ornament Painting Ideas
Keep designs simple.
Try:
Cream ornaments with black or muted-green trees.
Natural wood with cream stars.
Mushroom ornaments with tiny white dots.
Warm-cream ornaments with simple geometric shapes.
Use lots of negative space.
Skip excessive glitter.
A tiny hand-painted tree on a plain wood ornament can be enough.
Vintage Christmas Ornament Painting Ideas
Use slightly muted colors.
Try:
Burgundy.
Forest green.
Warm cream.
Dusty blue.
Warm brown.
Muted gold.
Paint old-fashioned florals, stars, ornaments, snowflakes, or simple botanical patterns.
Use satin or matte finishes for a softer appearance.
You can create vintage character without deliberately making the finish crack or deteriorate.
Cute Christmas Ornament Painting Ideas
Try:
Tiny trees.
Mushrooms.
Gingerbread houses.
Snowmen.
Stars.
Simple bows.
Candy-cane-inspired stripes.
Keep faces minimal.
Two dots and a tiny smile can accomplish a lot.
If children are making the ornaments, choose age-appropriate blanks and craft materials and supervise based on the materials and tools being used.
Christmas Ornament Painting Ideas With Snowflakes
Snowflakes work on almost any base color.
Try:
Burgundy + cream.
Olive + white.
Blue-gray + cream.
Mushroom + warm white.
Use one large snowflake or several tiny ones.
Don’t obsess over perfect symmetry.
Real snowflakes may be mathematically impressive.
Your ornament is allowed to be slightly tired.
Christmas Ornament Painting Ideas With Trees
Paint a row of tiny evergreens around the ornament.
Or paint one larger tree.
Use several shades of green for variety.
Add small burgundy dots as ornaments.
Or leave the trees completely undecorated for a Scandinavian look.
A simple flat brush can create evergreen branches with quick strokes.
Practice once on paper before attacking the ornament.
It prevents the first tree from accidentally becoming broccoli.
Usually.
Christmas Ornament Painting Ideas With Flowers
Florals can work beautifully for Christmas when you control the palette.
Use burgundy, cream, olive, and evergreen.
Paint simple flowers rather than highly detailed bouquets.
Add leaves.
Leave plenty of negative space.
Floral ornaments pair especially well with velvet ribbon and vintage-inspired Christmas trees.
How to Paint Christmas Ornaments
The exact process depends on your ornament and paint, but the general workflow is straightforward.
First, identify the ornament material.
Then read the coating instructions.
Clean and prepare the surface as directed.
Protect your work area.
Apply primer if the chosen coating system requires it.
Paint the base coat.
Allow the recommended drying time.
Add decorative details.
Allow everything to dry or cure completely.
Apply a compatible protective finish if needed and recommended.
Reattach or add hanging hardware only when the finish is ready for handling.
Patience matters here.
Touching paint because it “looks dry enough” has destroyed many promising craft projects.
I have no statistics.
I have confidence.
How to Make Painted Christmas Ornaments Look Professional
Use a limited palette.
Thin, controlled coats usually look better than one extremely heavy coat.
Allow layers to dry properly.
Use appropriately sized brushes.
Repeat colors across the set.
Keep patterns simple.
And embrace small variations.
Hand-painted doesn’t mean sloppy.
But it also doesn’t mean mechanically perfect.
A visible brushstroke can be part of the charm.
How to Make Painted Ornaments Look Expensive
Choose sophisticated colors.
Try:
Burgundy.
Warm cream.
Muted olive.
Mushroom.
Muted gold.
Use matte or satin finishes when appropriate.
Limit each ornament to two or three colors.
Repeat motifs across the collection.
Use beautiful ribbon or simple hanging cord.
And avoid adding every decorative technique to the same ornament.
It does not need paint, glitter, beads, ribbon, sequins, faux snow, rhinestones, and emotional support.
Pick a lane.
How to Display Hand-Painted Christmas Ornaments
Hang them on the Christmas tree.
Display several in a decorative bowl.
Use them on a garland.
Hang a small group from a secure decorative branch.
Add one to a wrapped gift if suitable.
Use several in a tabletop Christmas vignette.
For bowls and tabletop displays, consider shatter resistance and stability.
Keep fragile ornaments away from counter edges and high-traffic areas.
How to Protect Painted Christmas Ornaments
Protection depends on the paint and ornament material.
Some coatings don’t require additional sealer.
Others may benefit from a compatible protective finish.
Follow the paint manufacturer’s instructions.
If using sealer, confirm compatibility with both the coating and substrate.
Allow the ornament to cure fully before packing, hanging, or stacking it.
Don’t assume “dry to the touch” means fully cured.
Those are not always the same thing.
Christmas Ornament Painting Safety
Follow all instructions for paints, primers, sealers, adhesives, markers, and cleaners.
Use adequate ventilation where required.
Wear appropriate protective equipment if specified.
Keep craft products away from food-preparation surfaces.
Wash hands after handling products when appropriate.
Supervise children according to their age and the tools and materials being used.
Keep small ornament caps, hooks, beads, and other detachable pieces away from young children.
Be careful with glass ornaments.
Inspect them for cracks or chips.
If glass breaks, clean the area thoroughly.
Don’t use open flames to accelerate drying.
Don’t improvise heat-curing methods.
Only heat-cure an ornament when both the ornament material and coating instructions specifically support that process.
When displaying finished ornaments, keep them away from open flames, significant heat sources, and locations where they can easily fall.
For homes with young children or active pets, shatter-resistant blanks are generally the more practical choice.
Crafting should end with ornaments.
Not an urgent search for tweezers.
How to Store Hand-Painted Christmas Ornaments
Make sure the paint has fully cured before storage.
Wrap fragile ornaments individually.
Use divided ornament containers if possible.
Don’t stack painted surfaces tightly against each other unless you’re confident the finish won’t stick or transfer.
Keep ornaments dry.
Avoid extreme heat.
Store hanging ribbons or hooks with the ornament.
For glass pieces, use protective compartments.
And label the box.
Hand-painted ornaments deserve better than being dropped into the container labeled:
“Christmas stuff??”
Show them some respect.
Final Thoughts
The best Christmas ornament painting ideas for creative handmade decorations don’t require professional painting skills.
Start with warm cream.
Try deep burgundy.
Paint tiny evergreen trees.
Add stripes.
Create polka dots.
Paint snowflakes.
Try winter botanicals.
Create checkerboard patterns.
Add tiny stars.
Paint gingerbread ornaments.
Try Christmas florals.
Create plaid.
Paint a miniature snowy village.
Experiment with abstract burgundy and gold.
Create woodland ornaments.
Or paint an entire coordinated collection.
The secret is consistency.
Choose a limited color palette, repeat several motifs, and let the handmade brush texture remain visible.
Your lines don’t need to be perfectly straight.
Every tree doesn’t need to match.
And your snowflakes definitely don’t need to pass a geometry exam.
They’re handmade Christmas ornaments.
A little imperfection is exactly what makes them worth keeping.
