
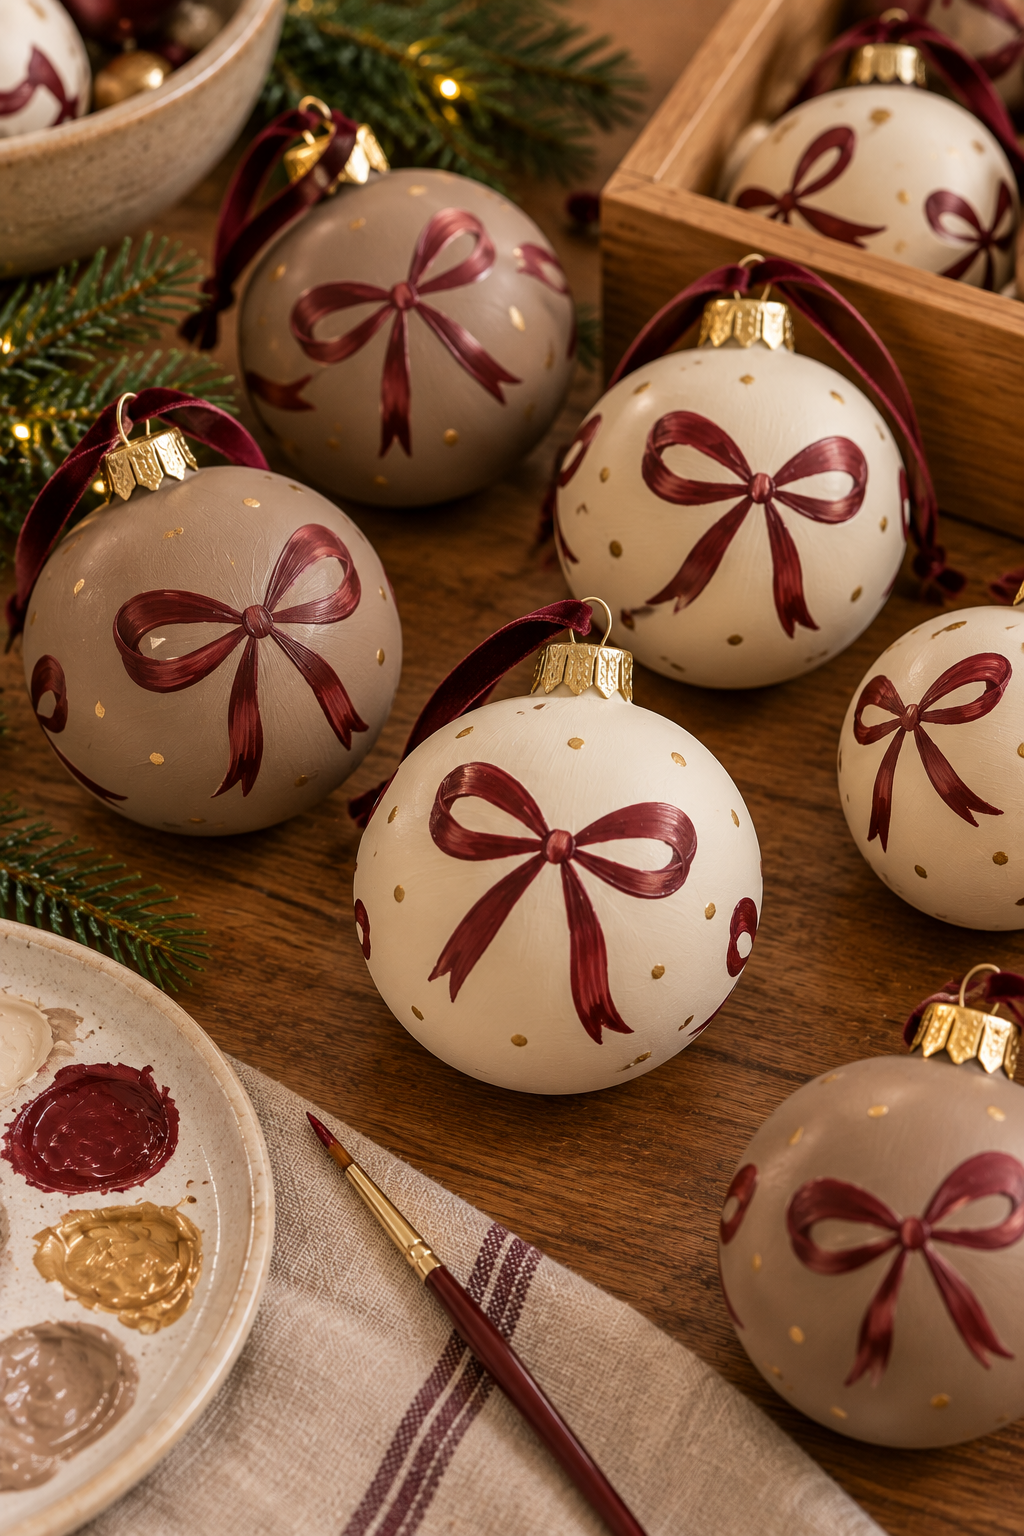
20 Handpainted Christmas Ornaments Ideas for a Creative Holiday Display
Handpainted Christmas ornaments have something store-bought decorations can’t quite fake.
Tiny imperfections.
Visible brushstrokes.
Slightly wonky stars.
That one evergreen tree that somehow looks like broccoli.
And honestly?
That’s the charm.
These Handpainted Christmas Ornaments Ideas are perfect if you want your Christmas tree to feel personal, collected, and a little more creative without needing professional painting skills.
You can work with unfinished wood, ceramic or bisque, suitable glass ornaments, plastic craft blanks, and other paintable ornament surfaces.
The important part is identifying the material before grabbing the paint.
Glass, glazed ceramic, unfinished wood, and plastic don’t behave the same way. Choose paints, primers, markers, and sealers specifically compatible with the ornament surface, and follow the manufacturer’s instructions for preparation, ventilation, drying, curing, and sealing.
Then comes the fun part.
Burgundy botanicals?
Absolutely.
Tiny snowy cabins?
Cute.
Vintage florals?
Yes.
Little mushrooms wearing Christmas colors?
Obviously.
Here are 20 Handpainted Christmas Ornaments Ideas for a Creative Holiday Display.
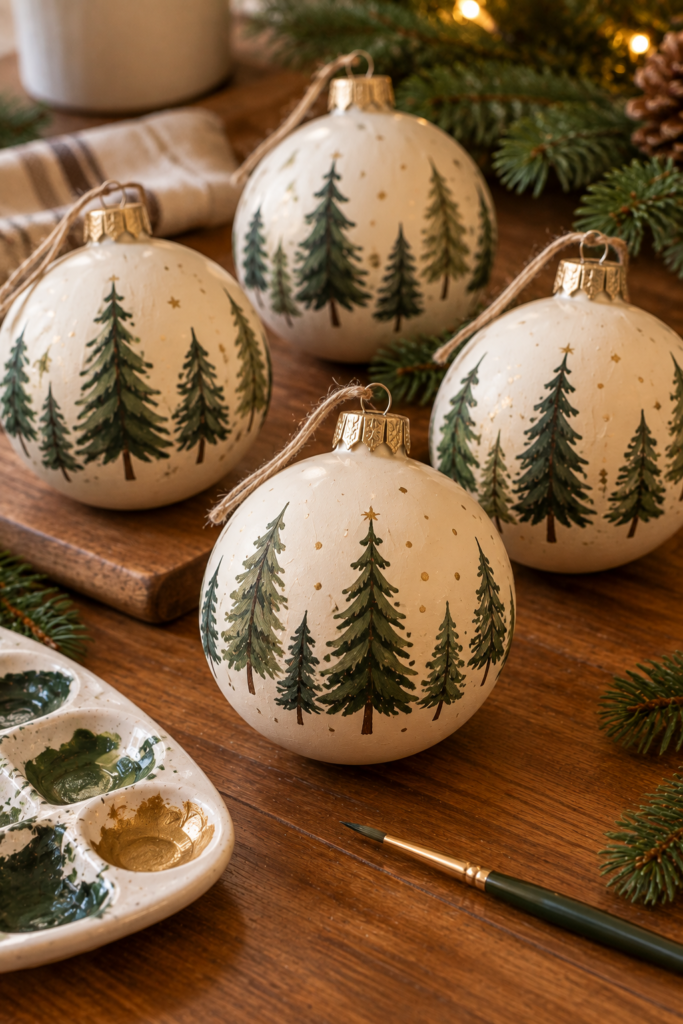
1. Handpaint Tiny Christmas Trees
Start with a warm-cream ornament.
Paint several tiny evergreen trees around the surface.
Use muted forest green rather than extremely bright green.
Create each tree with one thin vertical trunk and short angled brushstrokes.
Vary the heights.
Add a few tiny muted-gold dots between them.
Don’t make every tree identical.
Real forests don’t use copy and paste.
Your Christmas ornament doesn’t need to either.
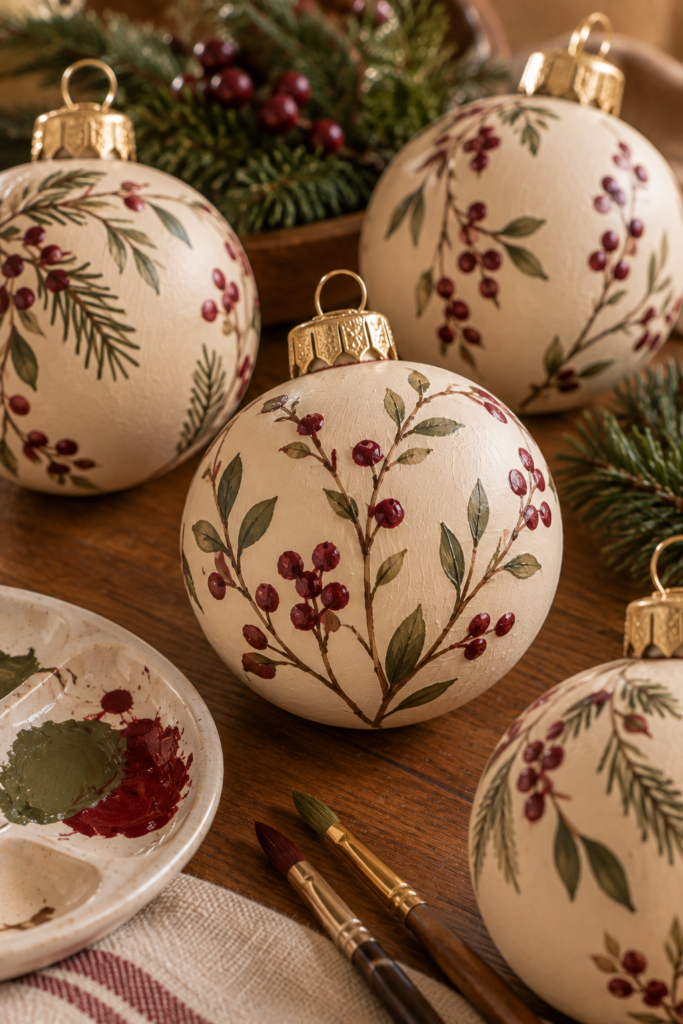
2. Paint Burgundy Winter Botanicals
Give a warm-cream ornament a moodier botanical design.
Paint thin warm-brown branches.
Add muted-olive leaves.
Finish with deep burgundy berry-like dots.
Keep the composition asymmetrical.
Let plenty of cream remain visible.
This makes the ornament feel delicate rather than crowded.
Create several with slightly different branch arrangements.
Together, they’ll look coordinated without being identical.
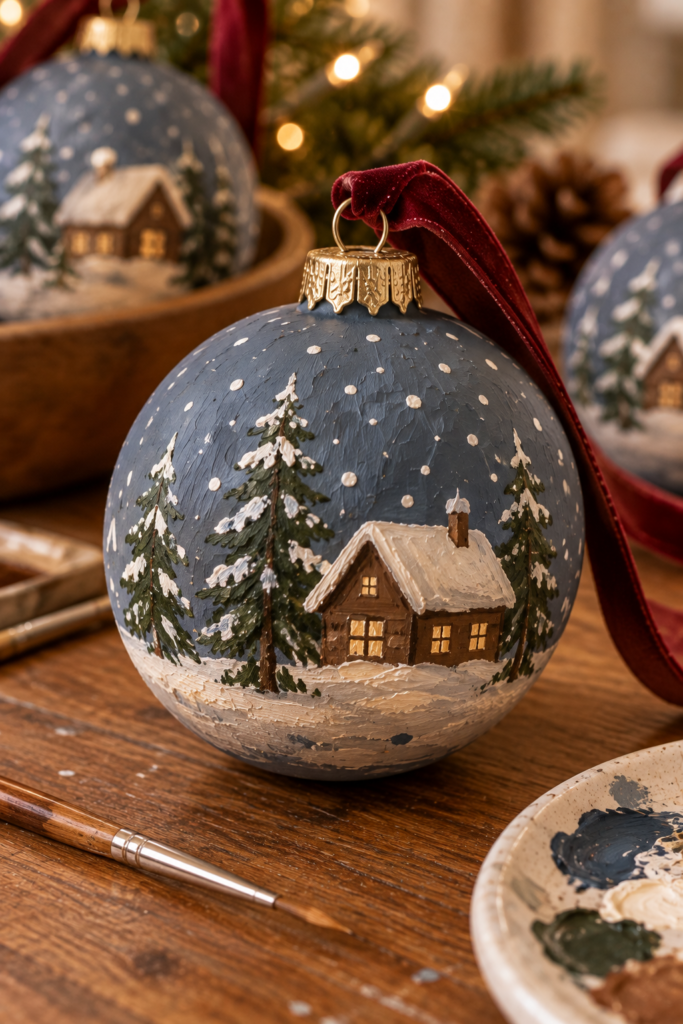
3. Create Handpainted Snowy Cabins
Use a blue-gray ornament as the background.
Paint one tiny warm-cream cabin.
Add a warm-brown roof.
Paint a little snow along the roofline.
Surround the cabin with two or three evergreen trees.
Add tiny cream dots for falling snow.
Keep everything simple.
We’re painting a Christmas ornament.
Nobody needs to know whether the cabin has an en-suite bathroom.
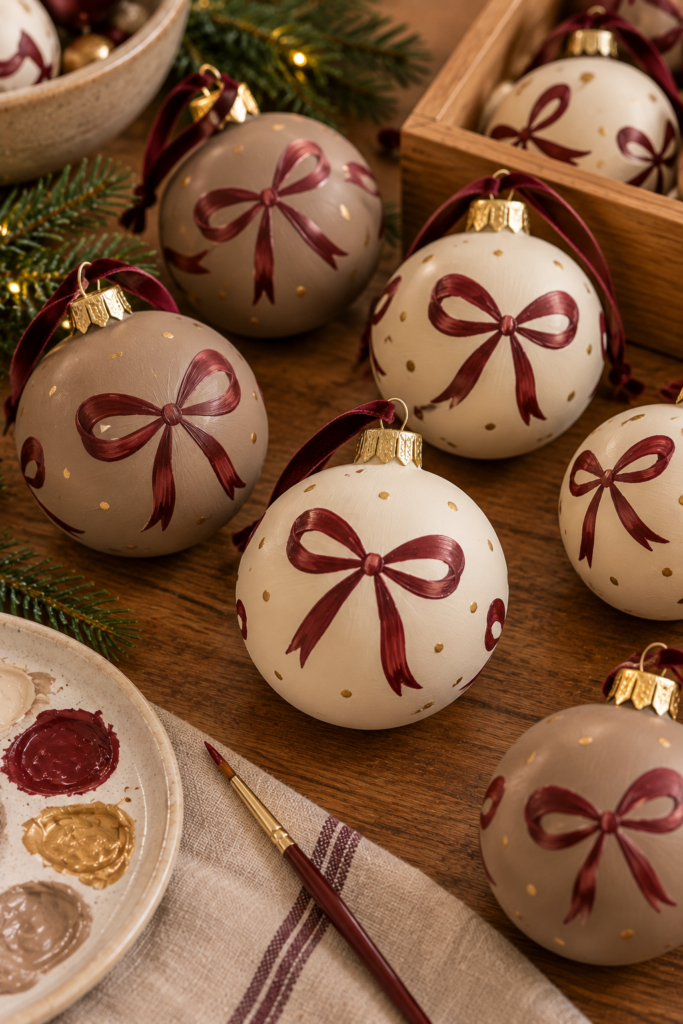
4. Paint Simple Burgundy Bows
Bows make surprisingly pretty ornaments.
Start with a mushroom or warm-cream base.
Paint small burgundy bows around the ornament.
Keep each bow loose.
Two loops.
Two short tails.
Done.
Add tiny muted-gold dots between selected bows.
This pattern feels playful without becoming overly cute.
It’s also much easier than attempting to attach seventeen actual bows to a three-inch ornament.
Sometimes paint is the practical option.
5. Create Handpainted Pinecone Ornaments
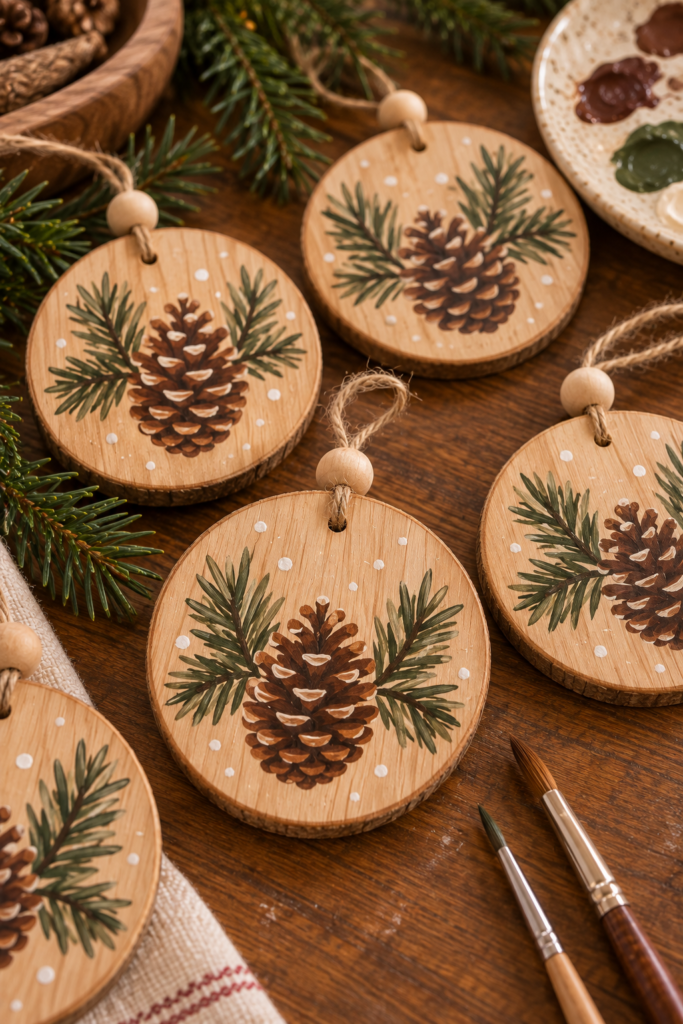
Use a natural wooden ornament blank.
Leave most of the wood visible.
Paint one simple pinecone in warm brown.
Add two muted evergreen sprigs behind it.
Finish with tiny warm-cream snow dots.
The exposed wood makes the design feel rustic and handmade.
You can paint several different pinecone arrangements for a full woodland set.
Just resist the urge to paint every individual pinecone scale with microscopic precision.
Christmas should not require magnification equipment.
6. Paint Tiny Christmas Houses
Create a miniature neighborhood.
Use warm-cream ornaments.
Paint tiny houses in:
Burgundy.
Muted olive.
Warm brown.
Keep the shapes simple.
Square house.
Triangle roof.
Two tiny windows.
Add small evergreen trees between the houses.
Make each ornament slightly different.
One can have a burgundy house.
Another gets olive.
Another gets two tiny houses.
Congratulations.
You are now responsible for Christmas urban planning.

7. Create Handpainted Candy Cane Stripes
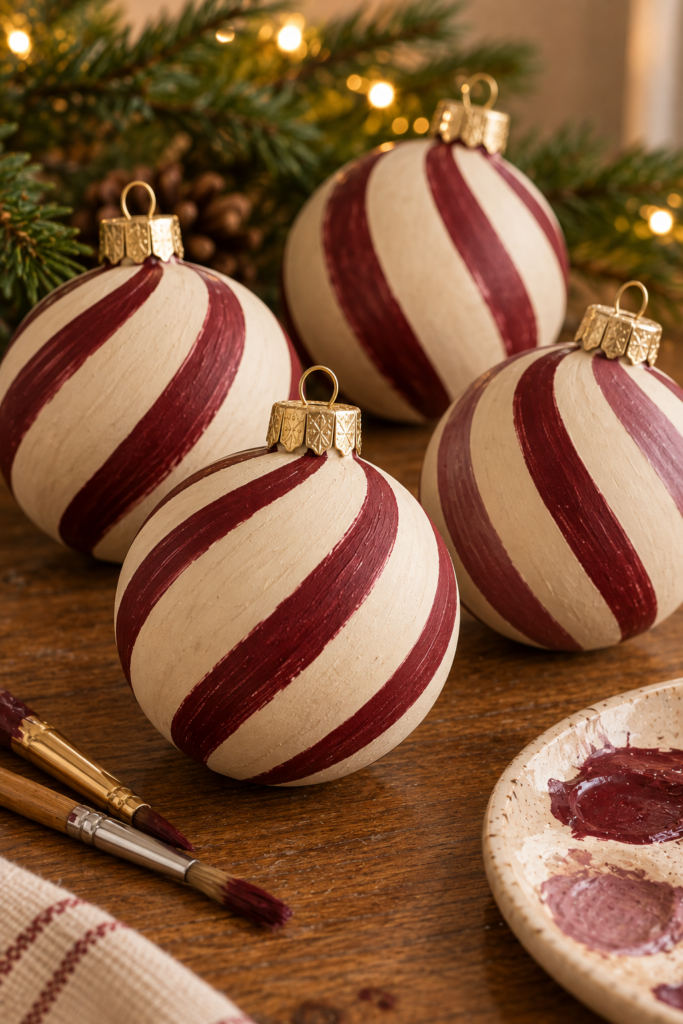
Paint a warm-cream base.
Add diagonal burgundy stripes.
Keep them relatively wide.
Don’t worry about making every stripe perfectly parallel.
A handpainted ornament should still look handmade.
For a softer version, alternate burgundy with muted pinkish-plum.
This gives you the candy-cane idea without the extremely bright red-and-white palette.
It feels festive but slightly more sophisticated.
Basically, the candy cane went to interior-design school.
8. Paint Tiny Christmas Mushrooms
Woodland Christmas decor deserves mushrooms.
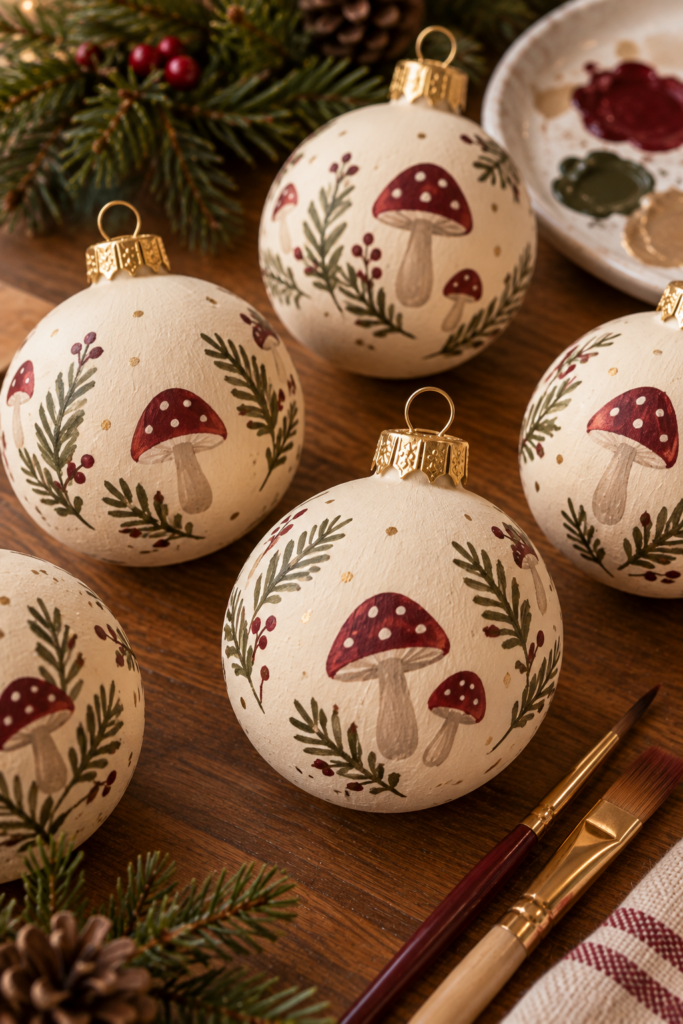
Use a warm-cream base.
Paint several tiny mushrooms.
Use burgundy caps.
Add warm-cream dots.
Paint short mushroom-colored stems.
Add muted-olive evergreen sprigs around them.
Keep the pattern sparse.
These look especially cute mixed with wooden ornaments and pinecones.
Are mushrooms traditionally Christmas?
Debatable.
Do they look adorable next to evergreen?
Case closed.
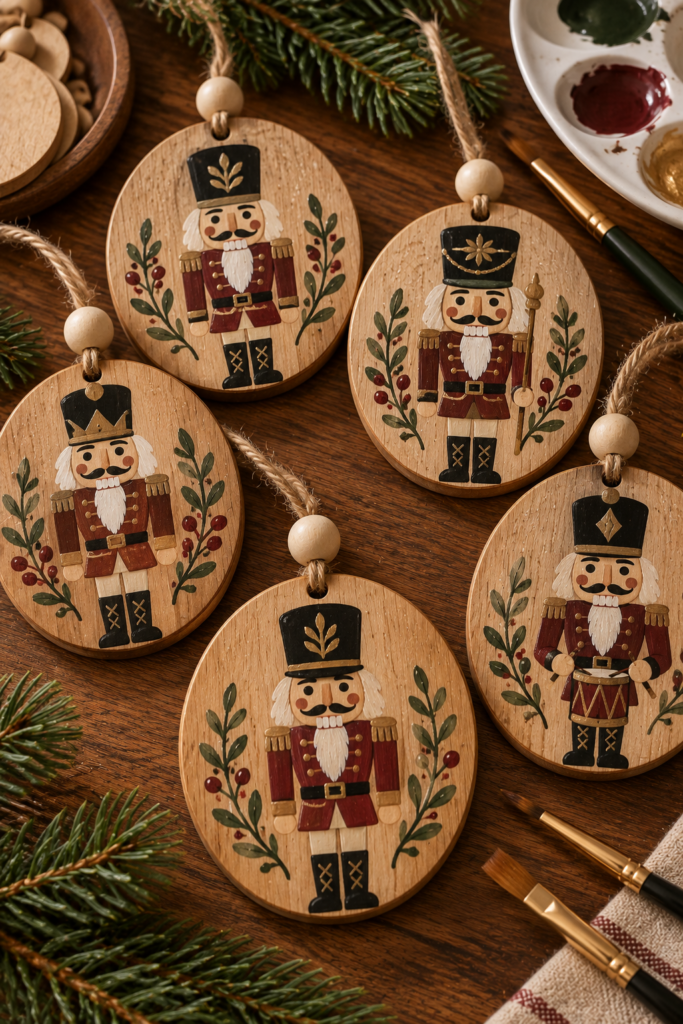
9. Create Handpainted Nutcracker Ornaments
Use flat wooden ornament blanks.
Paint a simplified nutcracker figure.
Choose burgundy for the coat.
Use matte black for the hat and boots.
Add warm cream and muted gold for small details.
Keep the face extremely simple.
Tiny eyes.
Small mustache.
Minimal features.
This is one of those projects where simplicity prevents the nutcracker from developing an expression you did not intend.
We’ve all seen enough haunted craft projects online.
10. Paint Christmas Ornament Florals
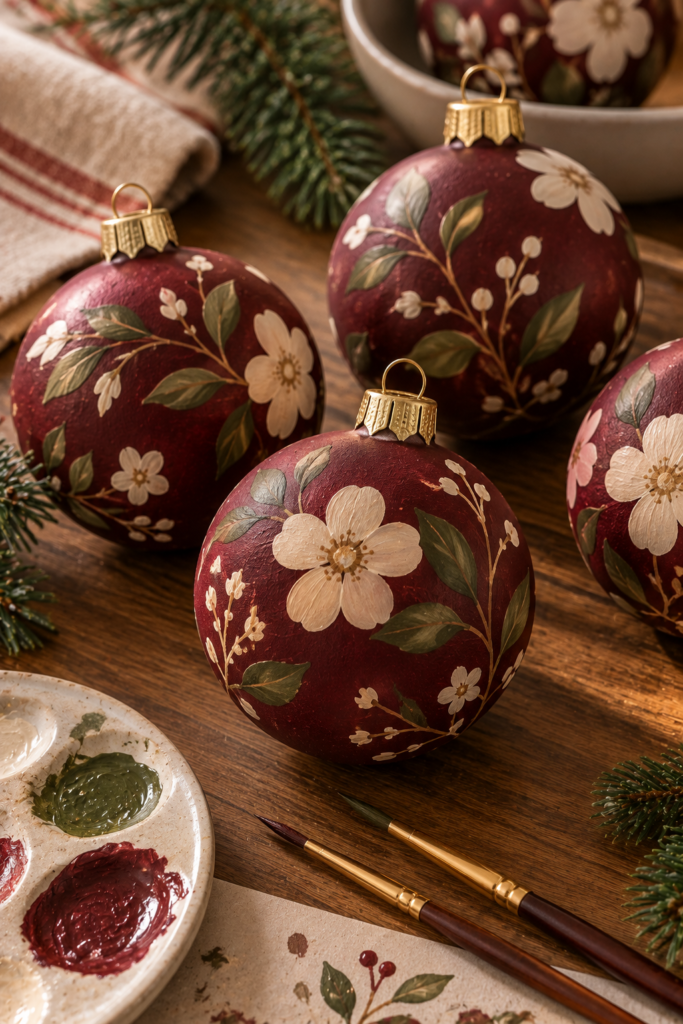
Use a deep burgundy ornament.
Paint loose warm-cream flowers.
Add muted-olive leaves.
Include a few mushroom-colored branches.
Don’t create a full bouquet.
Three flowers are plenty.
Let the burgundy background remain visible.
This creates a romantic, slightly vintage Christmas ornament that works beautifully with velvet ribbon and warm-white tree lights.
Florals aren’t just for spring.
Plants did not sign that contract.
11. Create Handpainted Christmas Stars
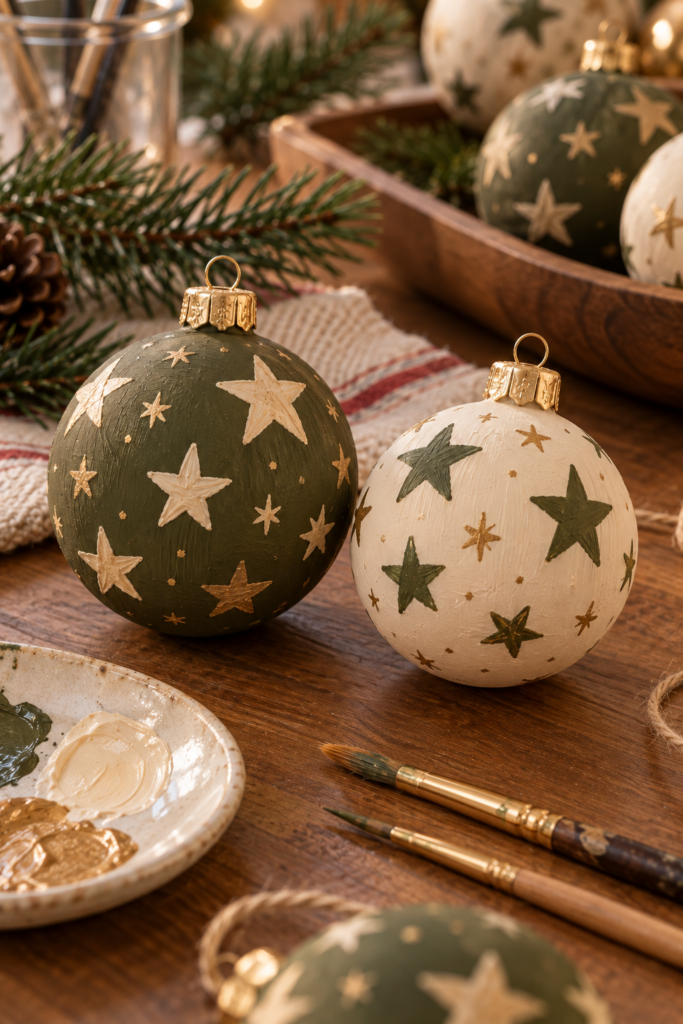
Start with muted olive.
Paint stars in warm cream.
Use different sizes.
Add a few tiny muted-gold stars.
Scatter them naturally around the ornament.
Don’t line them up.
You want a slightly celestial pattern.
For another version, reverse the colors:
Warm-cream base.
Olive stars.
Both versions can hang on the same tree.
It’s the easiest matching set you’ll make all afternoon.
12. Paint a Winter Night Sky
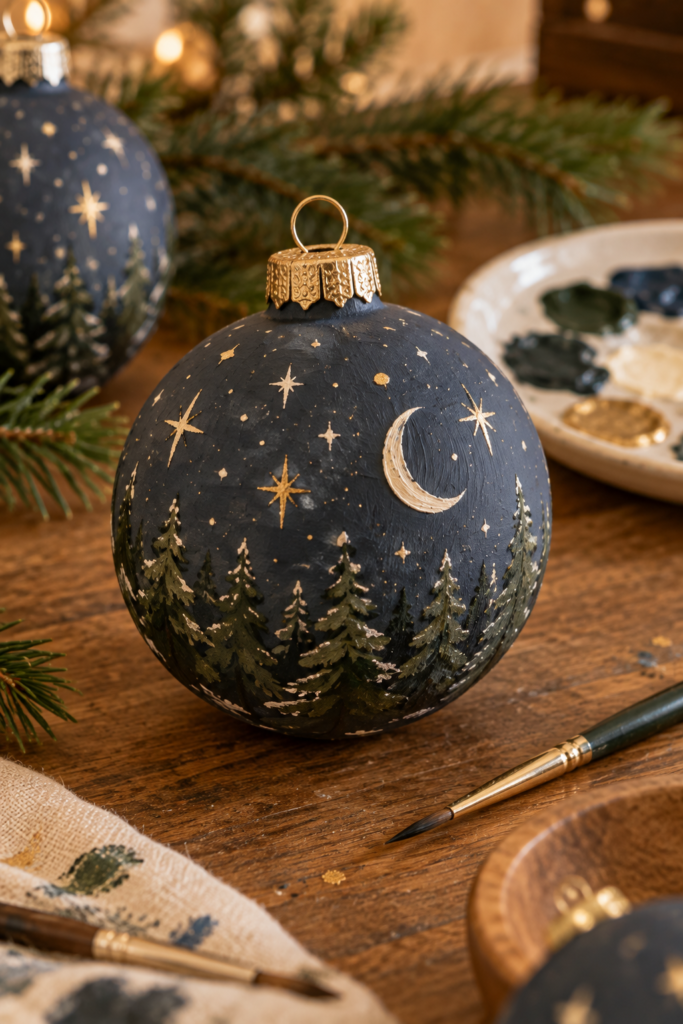
Paint the ornament deep charcoal-blue.
Add tiny warm-cream stars.
Paint a thin crescent moon.
Add several dark evergreen silhouettes around the bottom.
Keep the upper half mostly open.
This gives the ornament depth.
You can add tiny muted-gold stars for warmth.
The finished piece feels more wintery than overtly Christmas, which means it can stay displayed after December.
We love decor with an extended employment contract.
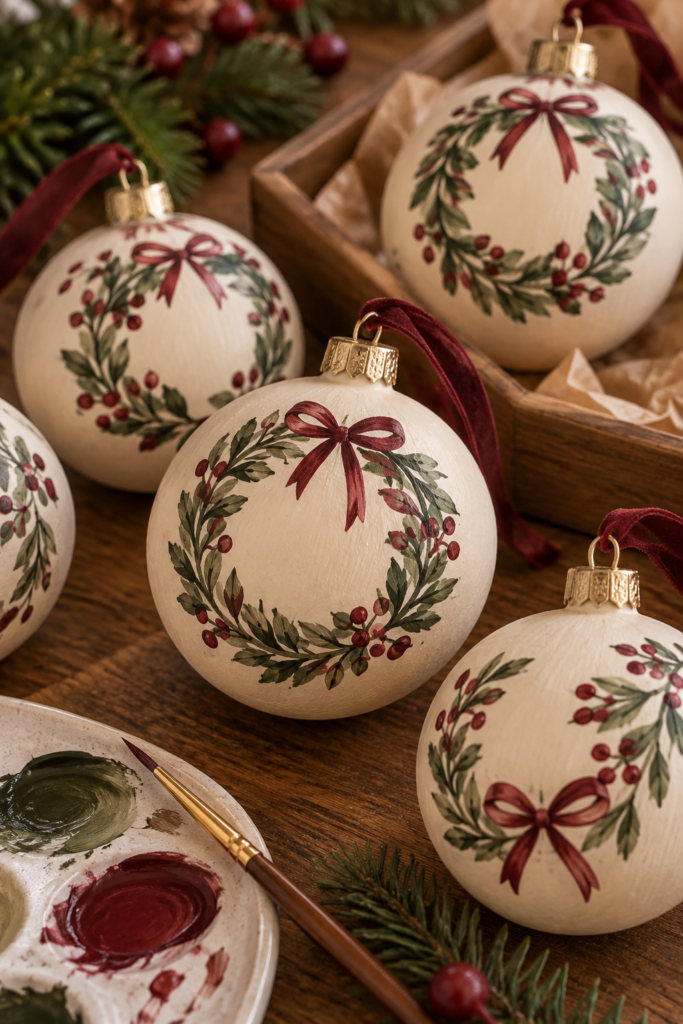
13. Create Handpainted Christmas Wreath Ornaments
Paint a simple wreath directly onto a warm-cream ornament.
Start with a thin circular muted-green line.
Add small evergreen strokes.
Paint several burgundy berry-like dots.
Finish with a tiny burgundy bow.
Don’t make the wreath too large.
Leave cream around it.
You can create a full set with slightly different wreath shapes.
Round.
Loose.
Asymmetrical.
Apparently even miniature painted wreaths get creative freedom.
14. Paint Gingerbread House Ornaments
Use house-shaped wooden blanks.
Leave selected areas of natural wood visible.
Paint warm-cream roof details.
Add burgundy doors.
Use muted-olive decorative dots.
Paint small warm-cream scallops along the roof.
Keep everything flat and graphic.
This works beautifully for a cozy handmade tree.
And unlike real gingerbread houses, these ornaments won’t slowly lose structural integrity while everyone pretends not to notice.
Progress.

15. Create Handpainted Folk-Art Ornaments
Use warm cream as the base.
Paint symmetrical folk-inspired botanical shapes.
Try:
Burgundy flowers.
Olive leaves.
Small evergreen branches.
Warm-brown dots.
Keep the pattern centered.
Use repeated simple shapes rather than tiny details.
This creates a charming handmade ornament that feels traditional without copying a specific historic design.
Use the same palette across several different patterns.
They’ll look fantastic together.

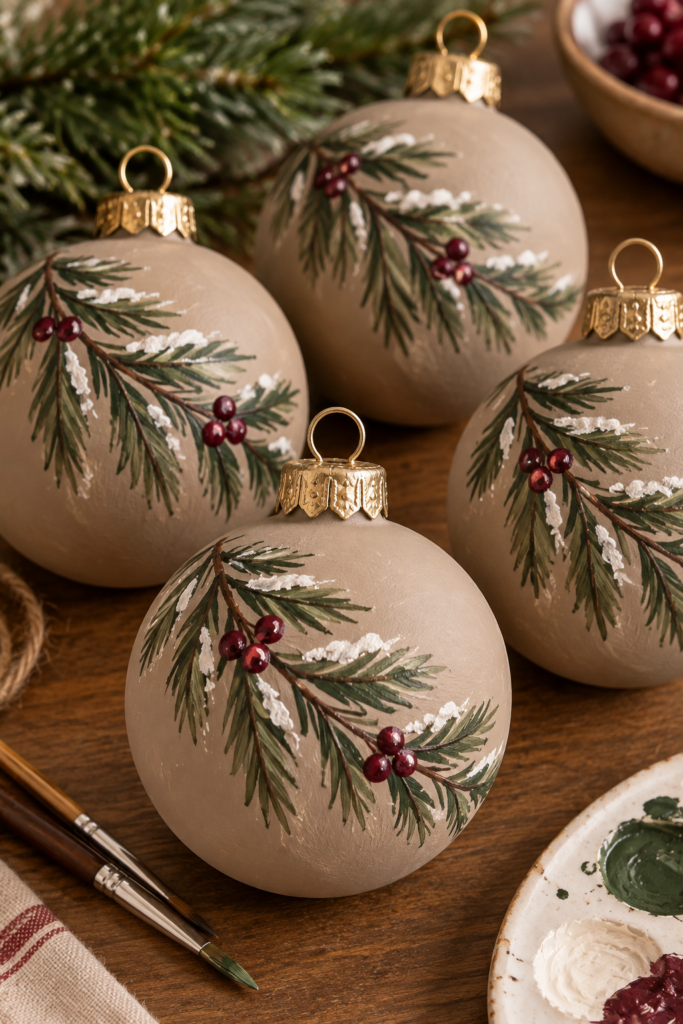
16. Paint Snowy Evergreen Branches
Start with a mushroom-colored ornament.
Paint one sweeping evergreen branch across the surface.
Use muted forest green.
Add small warm-cream strokes along selected needles to suggest snow.
Finish with three burgundy berry-like dots.
Keep the design asymmetrical.
This is an easy way to make an ornament feel elegant without requiring complicated painting.
One branch.
A little snow.
Three berries.
Know when you’ve won.
17. Create Handpainted Woodland Animal Ornaments
Use flat wooden ornament blanks.
Paint simple woodland animals.
Try:
Deer.
Fox.
Rabbit.
Bear.
Keep them stylized and simple.
Use warm brown, cream, muted olive, and burgundy.
Add tiny evergreen branches around the edges.
Avoid extremely detailed faces.
A few basic shapes are enough to make the animal recognizable.
Your painted fox does not need emotional depth.
It needs ears.

18. Paint Abstract Christmas Brushstrokes
Not everything needs to be recognizable.
Paint the ornament warm cream.
Add broad burgundy strokes.
Layer muted-olive shapes.
Add small muted-gold marks.
Leave sections of the cream background visible.
Rotate the ornament while painting.
Stop before the entire surface becomes covered.
Abstract ornaments are fantastic for beginners because there is very little opportunity to paint something “wrong.”
Was that burgundy blob intentional?
Absolutely.
It’s composition.

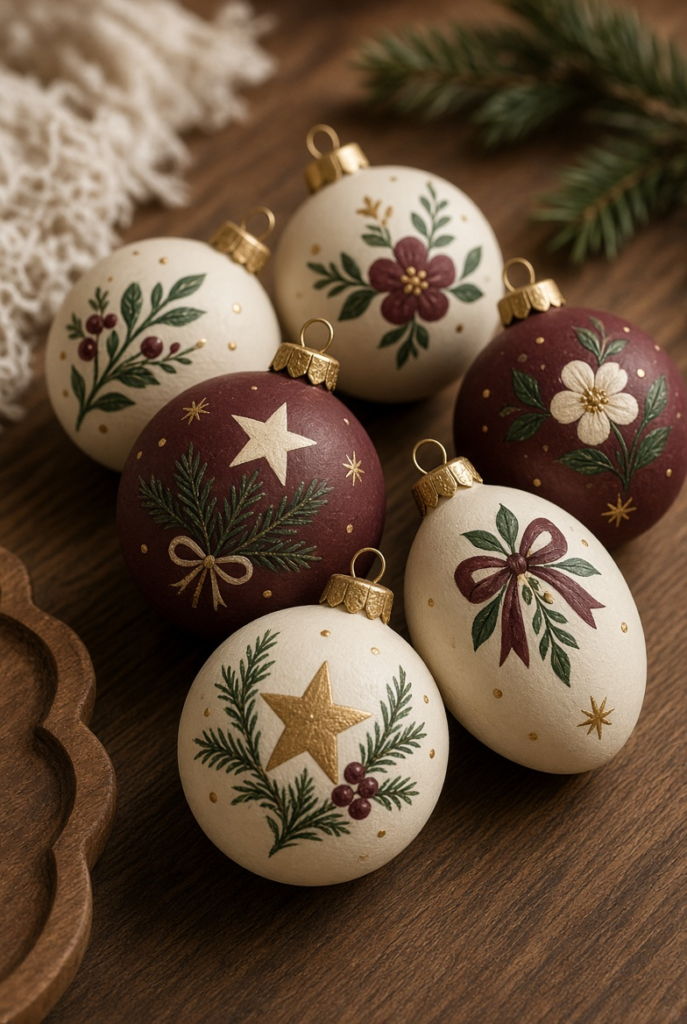
19. Create Handpainted Vintage-Inspired Ornaments
Use slightly muted colors.
Start with warm cream or dusty burgundy.
Paint simple vintage-inspired motifs such as:
Stars.
Flowers.
Evergreen sprigs.
Small bows.
Ornament shapes.
Use muted gold sparingly.
Choose satin or matte finishes when compatible with your materials.
The goal is nostalgic.
Not artificially damaged.
You don’t need to crack, chip, or aggressively distress a perfectly good ornament to convince anyone it has a past.
Let the colors do the work.
20. Paint a Coordinated Handpainted Ornament Collection
Finish with a full collection.
Choose one palette:
Deep burgundy.
Warm cream.
Muted olive.
Warm brown.
Mushroom.
Muted gold.
Then vary the designs.
Paint one with tiny trees.
One with botanicals.
One with stars.
One with a snowy cabin.
One with mushrooms.
One with florals.
One with abstract brushstrokes.
One with a wreath.
Because the same colors repeat, every ornament belongs together.
This is the trick to making handmade Christmas ornaments look polished.
They don’t need identical designs.
They just need to look like they’re attending the same party.

What Are the Best Ornaments for Hand Painting?
The best blank depends on the finish you want.
Common options include:
- Unfinished wood ornaments
- Ceramic or bisque ornaments
- Glass ornaments suitable for crafting
- Plastic craft ornaments
- Papier-mâché blanks
- Other manufacturer-designated paintable ornament surfaces
Always identify the material first.
Unfinished wood is porous.
Glass is nonporous.
Glazed ceramic is slick.
Bisque is much more absorbent.
Plastic varies significantly by formulation.
A paint that adheres beautifully to wood may perform terribly on glass.
Choose a coating system designed for the specific surface.
Handpainted Christmas Ornaments Ideas for Beginners
Start simple.
Paint:
Dots.
Stars.
Stripes.
Tiny trees.
Loose bows.
Abstract brushstrokes.
Simple branches.
You don’t need detailed illustrations.
A warm-cream ornament with five burgundy stars can look beautiful.
The biggest beginner mistake is trying to paint too much.
Choose one motif.
Repeat it.
Done.
Easy Handpainted Christmas Ornaments Ideas
Use a solid base color.
Then add one contrasting detail.
Try:
Burgundy + cream stars.
Cream + evergreen trees.
Olive + cream dots.
Mushroom + burgundy bows.
Natural wood + cream snowflakes.
You can paint an entire coordinated set using this formula.
It keeps the project manageable and creates visual consistency.
Handpainted Christmas Ornaments Ideas on Wood
Wood is perfect for rustic designs.
Leave part of the natural grain exposed.
Paint:
Pinecones.
Evergreen trees.
Woodland animals.
Mushrooms.
Stars.
Gingerbread houses.
Folk-inspired botanicals.
Prepare the surface according to the paint system you’re using.
Unfinished wood may need light sanding.
Remove sanding dust before painting.
If you’re working with manufactured wood or an unknown previously finished surface, follow appropriate safety precautions before sanding.
Handpainted Christmas Ornaments Ideas on Glass
Glass requires compatible paint.
Clean and prepare the surface according to the coating instructions.
Try:
Botanicals.
Stars.
Florals.
Simple trees.
Abstract brushstrokes.
Snowflakes.
Work carefully because glass ornaments can be fragile.
If the paint requires curing, follow its exact instructions.
Only use heat curing when both the ornament and coating manufacturer explicitly allow it.
Do not improvise.
Your oven is not a Christmas craft laboratory.
Handpainted Christmas Ornaments Ideas on Ceramic
First determine whether you’re painting:
Unglazed bisque.
Glazed ceramic.
Previously painted ceramic.
These surfaces may require different preparation and coatings.
Bisque can be quite absorbent.
Glazed ceramic is much slicker.
Choose compatible products.
Follow drying and curing directions.
If using decorative ceramic ornaments, don’t assume paints or sealers are food-safe simply because they’re used on ceramic.
They’re decorations.
Keep them decorations.
Handpainted Christmas Ornaments Ideas on Plastic
Plastic ornaments are practical because many are more impact-resistant than glass.
They’re especially useful in active households.
However, coating adhesion can be tricky.
Different plastics behave differently.
Choose paint or primer specifically compatible with the blank.
Follow preparation instructions.
Test first when appropriate.
Avoid aggressive solvents or improvised heating methods unless specifically approved.
Handpainted Christmas Ornaments Ideas With Acrylic Paint
Acrylic-style craft coatings are commonly used for many decorative projects, but compatibility depends on the surface and specific product.
Don’t assume any acrylic paint will adhere properly to every ornament.
Read the label.
Some products are designed for porous craft surfaces.
Others are formulated for glass, ceramic, plastic, or multi-surface use.
Use the product that matches your blank.
That little label on the bottle is more useful than our collective Christmas optimism.
Handpainted Christmas Ornaments Ideas With Paint Pens
Paint markers can make tiny details easier.
They’re useful for:
Stars.
Dots.
Branches.
Snowflakes.
Simple linework.
Small geometric patterns.
Again, check surface compatibility.
Some markers work well on nonporous surfaces while others don’t.
Test when appropriate.
Allow the marks to cure fully before handling.
Burgundy Handpainted Christmas Ornaments Ideas
Burgundy is one of the easiest colors to build a collection around.
Use it for:
Bows.
Flowers.
Berries.
Stripes.
Stars.
Mushrooms.
Abstract brushstrokes.
House details.
Pair it with warm cream, muted olive, mushroom, natural wood, and muted gold.
Burgundy gives traditional Christmas red a slightly moodier cousin.
And IMO, that cousin has excellent taste.
Neutral Handpainted Christmas Ornaments Ideas
Use:
Warm cream.
Mushroom.
Taupe.
Natural brown.
Muted olive.
Soft gold.
Paint simple designs.
Try bare branches.
Evergreens.
Stars.
Snowflakes.
Geometric patterns.
Neutral ornaments are especially effective when the tree already has strong textures such as pinecones, wood garland, or velvet ribbon.
Traditional Handpainted Christmas Ornaments Ideas
Use familiar Christmas motifs.
Trees.
Wreaths.
Bows.
Snowflakes.
Houses.
Stars.
Evergreen branches.
Choose burgundy or red, forest green, cream, and muted gold.
Repeating those colors will make different designs feel connected.
Rustic Handpainted Christmas Ornaments Ideas
Choose wooden blanks.
Leave visible wood grain.
Paint simple evergreen branches.
Add pinecones.
Use warm cream.
Add burgundy sparingly.
Choose matte finishes when suitable.
The natural wood should remain part of the design.
Don’t paint every millimeter.
If you wanted to hide the wood entirely, the tree did all that growing for nothing.
Bit rude.
Scandinavian Handpainted Christmas Ornaments Ideas
Keep everything minimal.
Try:
Natural wood + cream stars.
Warm cream + olive trees.
Mushroom + white snowflakes.
Cream + simple black branches.
Use plenty of negative space.
Avoid complicated patterns.
Simple designs are particularly effective when repeated across the entire tree.
Vintage Handpainted Christmas Ornaments Ideas
Use muted colors.
Dusty burgundy.
Forest green.
Warm cream.
Dusty blue.
Brown.
Muted gold.
Paint small florals.
Stars.
Bows.
Botanicals.
Classic ornament motifs.
Use softer matte or satin finishes where appropriate.
You can create nostalgia without artificial cracking or unsafe distressing techniques.
Cute Handpainted Christmas Ornaments Ideas
Try:
Mushrooms.
Tiny houses.
Gingerbread houses.
Woodland animals.
Little trees.
Bows.
Snowmen.
Keep faces simple.
Use round shapes.
Choose warm, muted colors.
Cute doesn’t automatically require neon red, googly eyes, and six pounds of glitter.
Restraint remains available.
Handpainted Christmas Ornaments Ideas for Kids
Keep the project age-appropriate.
Use larger, durable ornament blanks.
Shatter-resistant materials are usually more practical than fragile glass.
Simple projects include:
Finger-sized dots.
Broad stripes.
Large stars.
Loose trees.
Abstract brushstrokes.
Choose child-appropriate craft products and follow their age guidance.
Supervise as appropriate.
Keep small caps, hooks, beads, and detachable parts away from young children.
And protect the table.
Seriously.
Protect more table than you think you need.
Paint has ambition.
Handpainted Christmas Ornament Color Palettes
A limited palette makes a handmade collection feel intentional.
Try:
Burgundy + warm cream + evergreen + muted gold
for a rich traditional look.
Try:
Warm cream + mushroom + natural wood + muted olive
for a neutral Christmas tree.
Try:
Dusty burgundy + forest green + cream + brown
for vintage-inspired ornaments.
Or:
Blue-gray + cream + evergreen + warm brown
for a winter woodland collection.
Choose one palette before you start painting.
That way even completely different motifs will coordinate.
How to Paint Christmas Ornaments by Hand
Start by identifying the ornament material.
Read the paint instructions.
Prepare the surface as directed.
Protect your workspace.
Apply primer if your coating system requires it.
Paint the background.
Allow it to dry properly.
Sketch lightly only if appropriate for the surface and paint system.
Add larger shapes first.
Then add smaller details.
Let each layer dry as needed.
Apply a compatible protective coating only if recommended or necessary.
Allow the finished ornament to cure fully before hanging or storing it.
The hardest part?
Waiting.
The second-hardest part?
Not touching the paint to see whether it’s dry.
How to Paint Tiny Details on Christmas Ornaments
Use a small brush.
But don’t automatically use the tiniest brush available.
A slightly larger pointed brush can sometimes hold paint and maintain a cleaner line.
Stabilize your hand.
Rotate the ornament rather than twisting your wrist into impossible positions.
Practice the motif on paper first.
And simplify.
At ornament scale, tiny details disappear quickly.
A pine tree does not need 73 branches.
Give it eight.
Nobody will audit it.
How to Make Handpainted Christmas Ornaments Look Professional
Use a consistent palette.
Repeat several motifs.
Apply controlled coats.
Let layers dry properly.
Use appropriately sized brushes.
Keep hanging ribbons consistent.
Leave negative space.
Most importantly, don’t attempt to correct every tiny imperfection.
Overworking an ornament can make it worse.
Sometimes the slightly crooked star is finished.
Accept its personality.
Move on.
How to Make Handpainted Christmas Ornaments Look Expensive
Use sophisticated colors.
Burgundy.
Warm cream.
Muted olive.
Mushroom.
Natural wood.
Muted gold.
Choose two or three colors per ornament.
Use matte or satin finishes when appropriate.
Keep designs relatively simple.
Use good-quality ribbon or understated hanging cord.
Create sets rather than isolated designs.
A collection of eight coordinated handmade ornaments almost always feels more polished than eight completely unrelated experiments.
How to Display Handpainted Christmas Ornaments
Obviously, hang them on the Christmas tree.
But you can also:
Fill a decorative bowl.
Create an ornament garland.
Hang them from a secure decorative branch.
Display them in a clear vase.
Add one to wrapped gifts.
Hang a small collection in a window where appropriate.
Use shatter-resistant ornaments in active areas.
Keep fragile glass pieces away from edges and places where they can be knocked down.
How to Protect Handpainted Christmas Ornaments
Some paints need protective finishes.
Others don’t.
Follow the paint manufacturer’s recommendations.
If using a sealer, confirm that it is compatible with both the paint and ornament material.
Apply it according to the instructions.
Allow full curing time.
Don’t confuse dry to the touch with fully cured.
Your fingerprint does not improve the design.
Usually.
Handpainted Christmas Ornament Safety
Identify the ornament material before painting.
Use paints, primers, markers, cleaners, and sealers appropriate for that material.
Follow manufacturer instructions for:
Ventilation.
Protective equipment.
Application.
Drying.
Curing.
Cleanup.
Keep craft materials separate from food-preparation areas.
Supervise children according to their age and the materials being used.
Keep small hooks, caps, beads, and detachable parts away from young children.
Handle glass ornaments carefully.
Inspect them for cracks or chips.
Clean broken glass thoroughly.
Don’t use open flames or improvised heat sources to accelerate drying.
Only heat-cure an ornament when both the blank and coating manufacturer specifically permit the method.
When displaying finished ornaments, keep them away from open flames and significant heat.
For households with young children or active pets, shatter-resistant ornament blanks are usually the practical option for lower tree branches.
Beautiful decorations are nice.
Beautiful decorations that survive December are nicer.
How to Store Handpainted Christmas Ornaments
Wait until the finish is fully cured.
Wrap fragile ornaments individually.
Use divided ornament containers.
Keep painted surfaces from rubbing tightly against one another.
Store everything somewhere dry and protected from extreme temperatures.
Keep hanging ribbon with each ornament.
Place especially delicate handmade pieces in individual compartments.
And label the box.
These are the ornaments you’re actually going to want next year.
Don’t let them disappear into a storage container between an extension cord and the inflatable snowman.
They deserve better.
Final Thoughts
The best Handpainted Christmas Ornaments Ideas for a Creative Holiday Display aren’t necessarily the most complicated.
Paint tiny evergreen trees.
Create burgundy botanicals.
Try snowy cabins.
Paint little bows.
Create pinecone ornaments.
Paint Christmas houses.
Add candy-cane-inspired stripes.
Try woodland mushrooms.
Create nutcrackers.
Paint florals.
Add stars.
Create a winter night sky.
Paint wreaths.
Make gingerbread houses.
Try folk-inspired botanicals.
Paint snowy evergreen branches.
Create woodland animals.
Experiment with abstract brushstrokes.
Try vintage-inspired motifs.
Or build one complete coordinated collection.
The trick is simple:
Choose a limited color palette and let the handmade texture show.
Your stars can be slightly uneven.
Your evergreen trees can lean.
And one of your woodland animals may end up looking suspiciously unlike the species you originally intended.
Hang it on the tree anyway.
That’s exactly why handmade Christmas decorations are worth making.
