
14 Winter Door Decorations for School Ideas for a Creative Classroom
Once December is over, classroom doors can feel a little… confused.
The Christmas tree comes down.
The Santa cutout disappears.
The red-and-green paper gets packed away.
And suddenly the classroom door is staring at everyone like, “So that’s it until Valentine’s Day?”
Absolutely not.
There are plenty of Winter Door Decorations for School Ideas that work throughout January and February without looking like leftover Christmas decor.
Think:
Snowflakes.
Snowmen.
Winter trees.
Penguins.
Mittens.
Snowy villages.
Woodland animals.
Winter books.
Icy blue.
Warm cream.
Muted burgundy.
And lots of student-made paper details.
The best part?
Many of these ideas can be created with basic classroom craft supplies.
Before decorating, though, check your school’s rules. Classroom doors may be fire-rated, part of an exit route, or subject to limits on combustible decorations. Never interfere with handles, locks, hinges, closers, vision panels, accessibility hardware, required signage, alarms, or the door’s full operation.
Creative?
Yes.
Turning the door into a building-code side quest?
No thanks.
Here are 14 Winter Door Decorations for School Ideas for a Creative Classroom.
1. Create a Giant Winter Snowman Door
Start with a classroom classic.
A snowman.
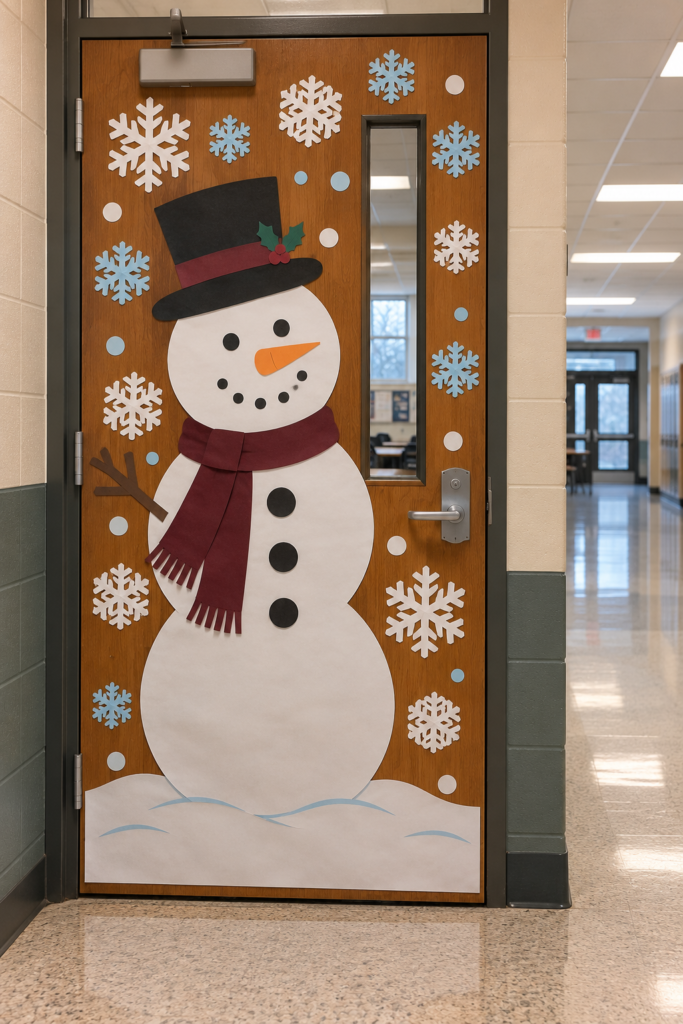
Use large white paper shapes to create the body across the main door surface where school policy allows.
Add simple black paper circles for buttons.
Use a muted orange paper nose.
Add a burgundy paper scarf.
Keep the design flat.
Avoid bulky cotton, foam, or dimensional pieces around the door edges and hardware.
Students can create individual paper snowflakes to place around the snowman.
This gives everyone a small part of the project.
And unlike building a real snowman, nobody ends up with wet gloves.
Major improvement.
2. Make a Paper Snowflake Door
This is one of the easiest winter classroom door ideas.
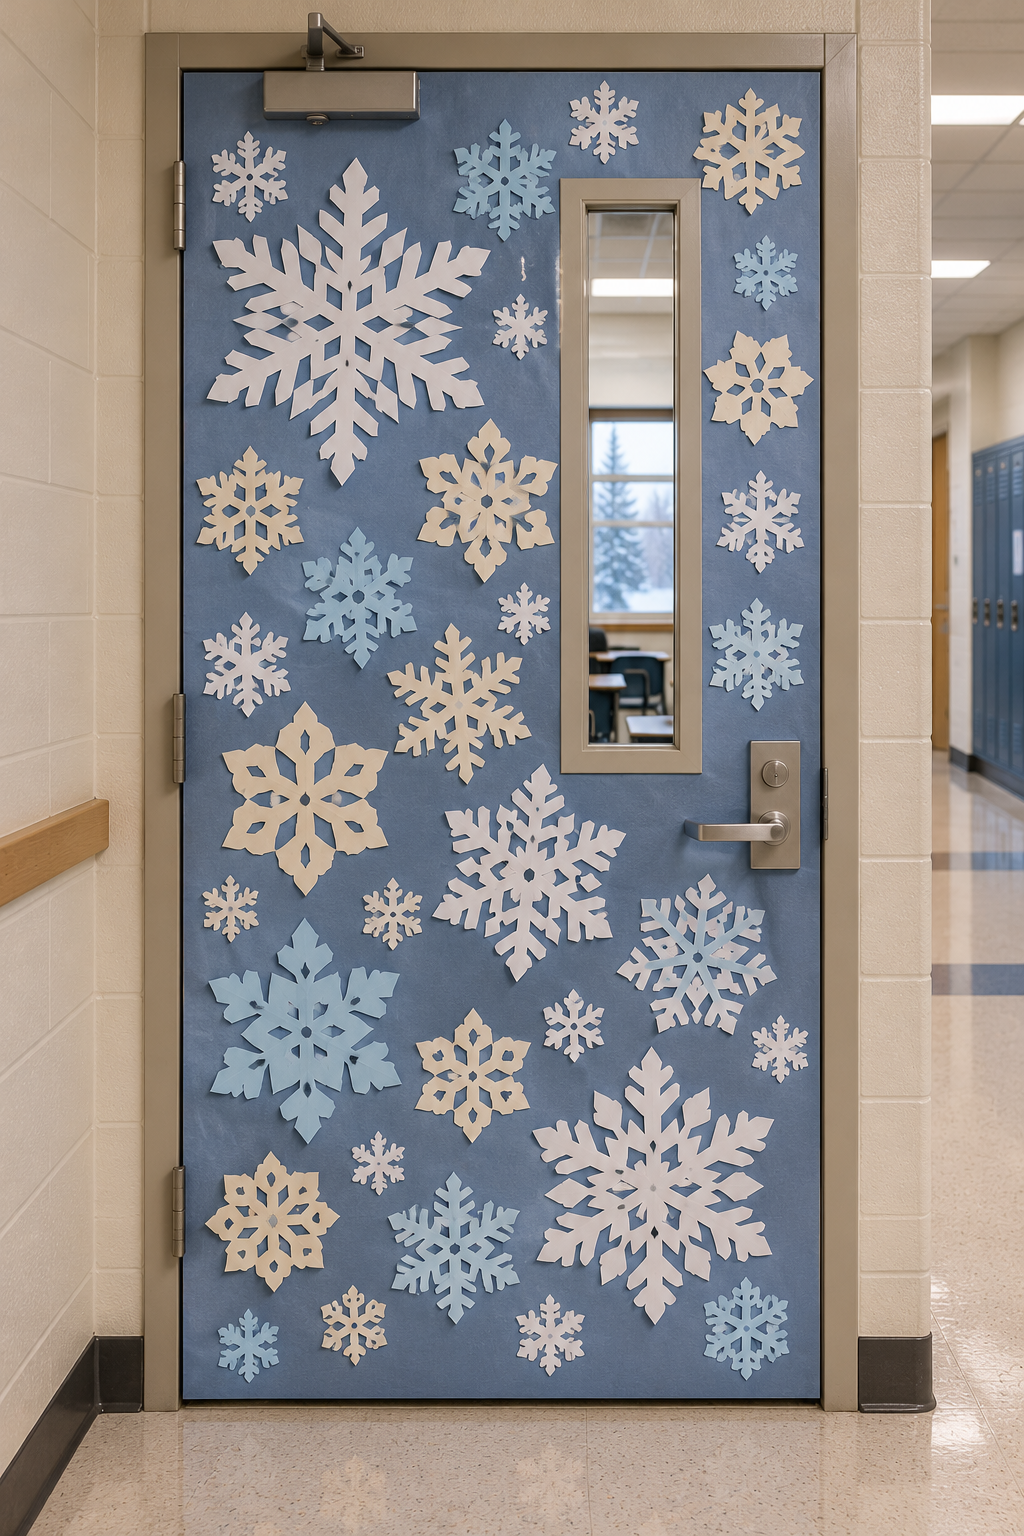
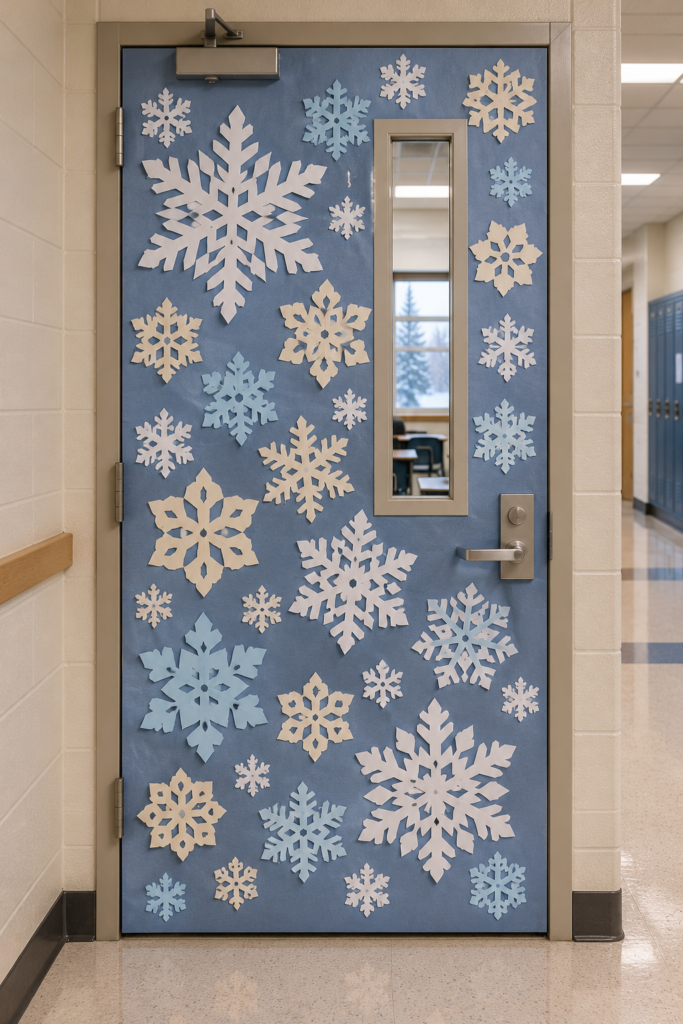
Cover part of the door with a deep muted blue or warm-cream background if school policy permits.
Then add paper snowflakes.
Use different sizes.
Different shapes.
Different patterns.
Have each student create one.
The slight imperfections make the display better.
Seriously.
A door covered in 25 perfectly machine-cut snowflakes feels like a store display.
A door covered in 25 slightly chaotic student snowflakes?
That’s a classroom.
Keep snowflakes flat and securely attached.
And keep all functional door components clear.
3. Create a Snowy Winter Forest Door
Turn the door into a quiet winter forest.
Use warm-cream or pale blue paper as the background.
Cut several simple tree silhouettes from muted olive, charcoal, and medium-brown paper.
Add white paper snow along the branches.
Place smaller trees toward the top to suggest distance.
Add larger trees lower down.
This creates a surprisingly nice sense of depth.
Students can make individual trees.
Then combine them into one class forest.
Which is also a convenient way to turn 28 separate craft projects into one display.
Efficiency.
Teachers understand.
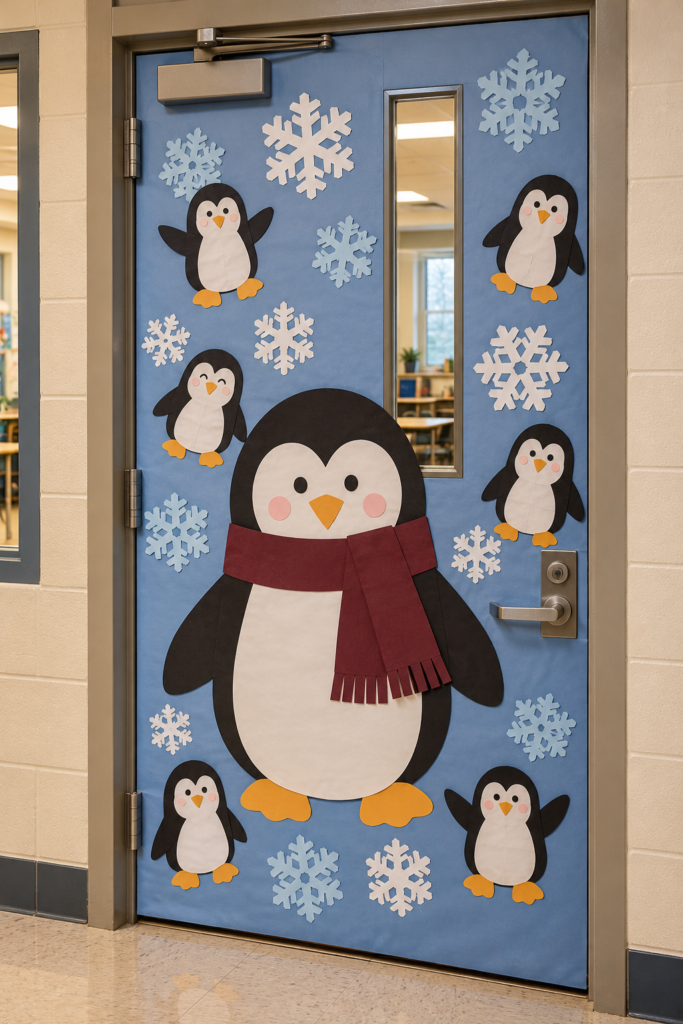
4. Make a Winter Penguin Door
Penguins are basically built for classroom winter decor.
Create one large black-and-white paper penguin.
Add a muted burgundy scarf.
Use pale blue paper snowflakes around it.
Students can create smaller paper penguins for the surrounding display.
Give each penguin slightly different details.
Different scarves.
Different expressions.
Different poses.
Suddenly the door has an entire penguin class.
Which will probably be quieter than the actual class.
Sorry.
I had to.
5. Create a Winter Mitten Door
This is perfect for student participation.
Give every student a paper mitten template.
Let them decorate it.
Use:
Patterns.
Stripes.
Dots.
Snowflakes.
Geometric shapes.
Muted winter colors.
Then arrange the mittens across the door.
Try warm cream, dusty blue, burgundy, muted olive, mushroom, and charcoal.
The result is colorful without relying on Christmas red and green.
And because every mitten is different, the display feels personal.
One rule:
Maybe don’t start judging which mitten has the strongest design concept.
They’re paper mittens.
We can relax.
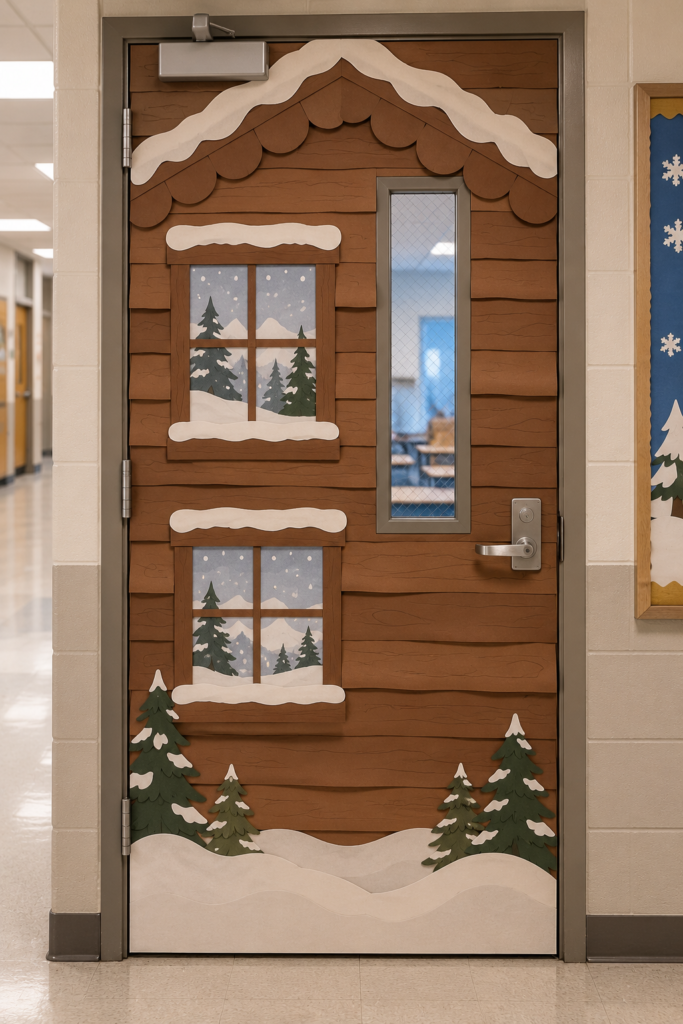
6. Make a Cozy Winter Cabin Door
Turn the classroom door into a little winter cabin scene.
Use warm-brown paper to suggest simple wood siding.
Create two flat paper windows.
Add snowy paper scenery inside them.
Use a paper roofline or snowy trim only where it doesn’t interfere with the door frame or closer.
Add small evergreen tree shapes beside the cabin.
Keep everything flat.
The warm brown and cream palette makes this feel much cozier than the usual bright blue winter display.
Basically, we’re giving the classroom door a tiny cabin vacation.
It deserves one.
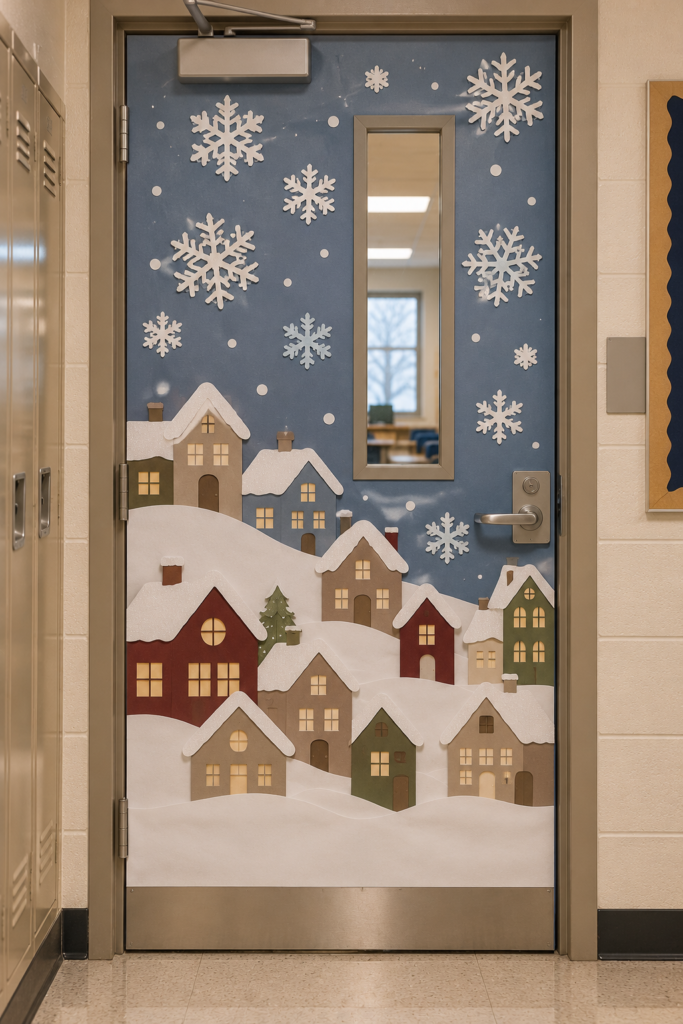
7. Create a Snowy Village Door
Build a little winter town.
Cut simple house shapes from warm cream, mushroom, dusty blue, burgundy, and muted olive paper.
Add white paper roofs.
Use small square paper windows.
Arrange the houses across the lower part of the door.
Add paper snowflakes above.
Keep the design mostly flat.
Students can each decorate one house.
Suddenly your classroom has its own winter village.
Housing market solved.
You’re welcome.
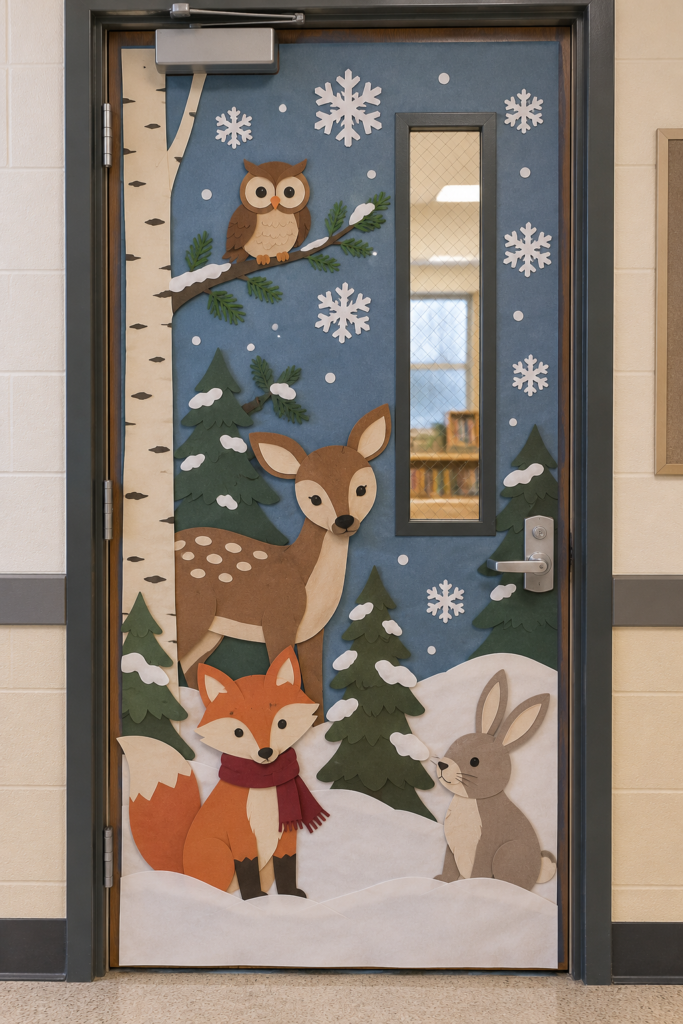
8. Make a Winter Woodland Animals Door
Bring in the forest animals.
Create flat paper:
Foxes.
Deer.
Owls.
Rabbits.
Use warm brown, cream, mushroom, muted orange, and charcoal.
Add paper evergreen trees.
Use white paper snow along the bottom.
Keep the expressions simple and friendly for younger students.
Avoid glitter and tiny loose embellishments.
The result feels wintery without being holiday-specific.
Also, an owl wearing a tiny paper scarf is objectively difficult to dislike.
Science hasn’t officially confirmed this.
But I’m confident.
9. Create a Winter Hot Cocoa Door
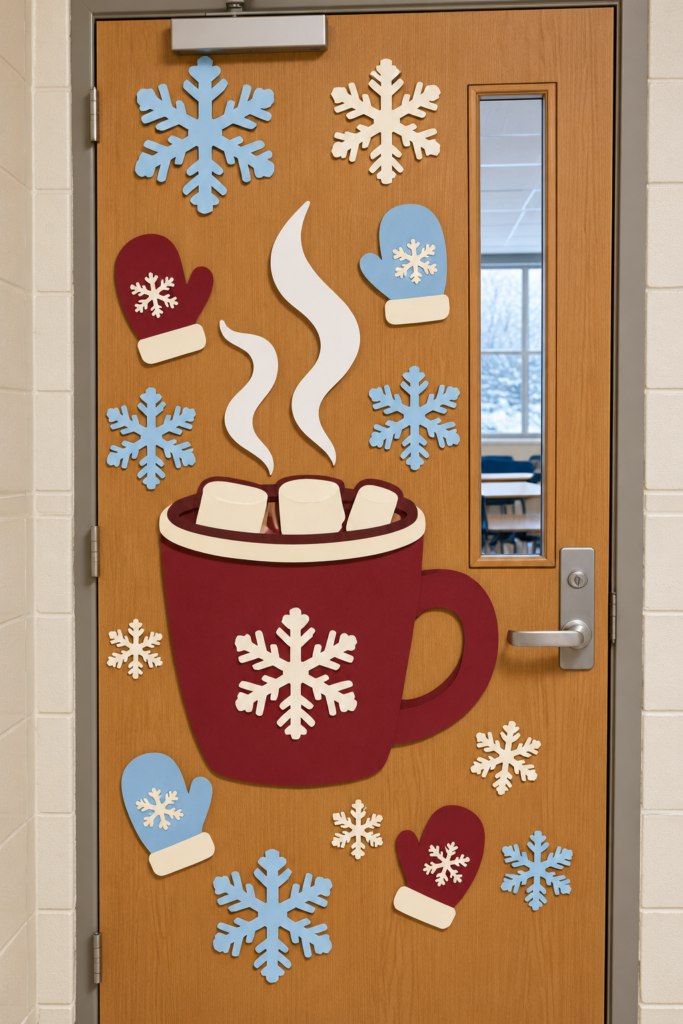
Use a cozy indoor winter theme.
Create one large paper mug shape.
Choose deep burgundy or muted olive.
Add white paper steam curls.
Use cream paper circles or shapes to suggest marshmallows.
Surround the mug with student-created snowflakes or mitten shapes.
Keep everything flat.
You can create the cozy hot-cocoa look without attaching real cups, food, wrappers, or loose objects to the door.
Because actual marshmallows on classroom decor would survive approximately seven minutes.
Optimistically.
10. Make a Winter Books Door
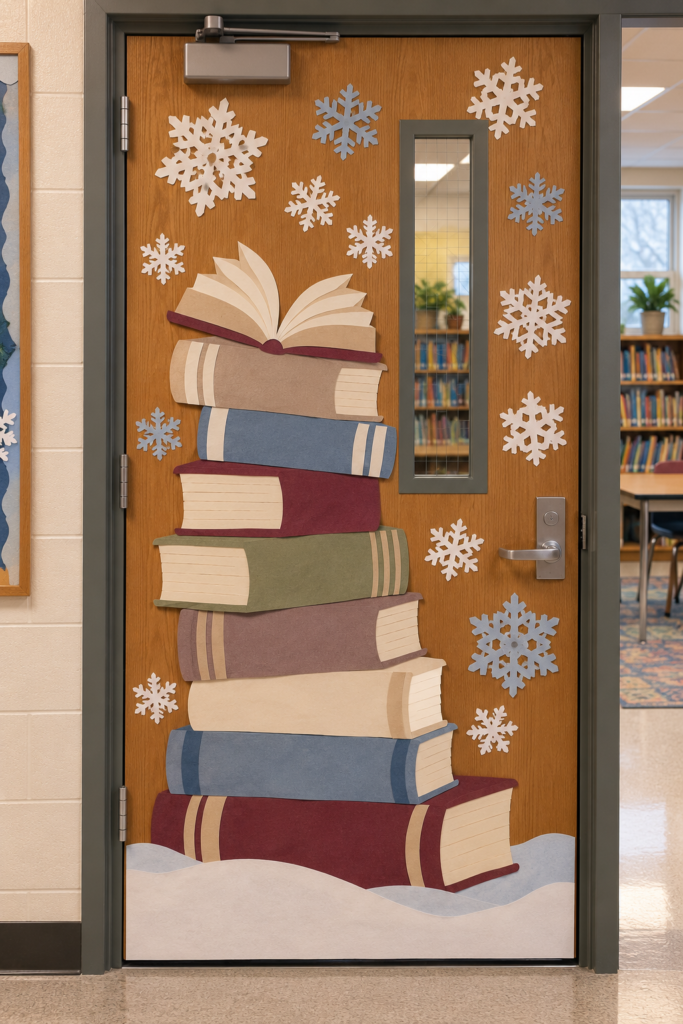
Perfect for a classroom or school library.
Create several large paper book shapes.
Stack them vertically or diagonally across part of the door.
Use winter colors.
Warm cream.
Dusty blue.
Burgundy.
Muted olive.
Mushroom.
Add paper snowflakes around the books.
Keep book covers generic without readable titles.
Students can design their own imaginary winter book covers on separate classroom projects if appropriate.
A winter reading theme works especially well in January.
Cold outside.
Book inside.
Strong strategy.
11. Create a Winter Sweater Door
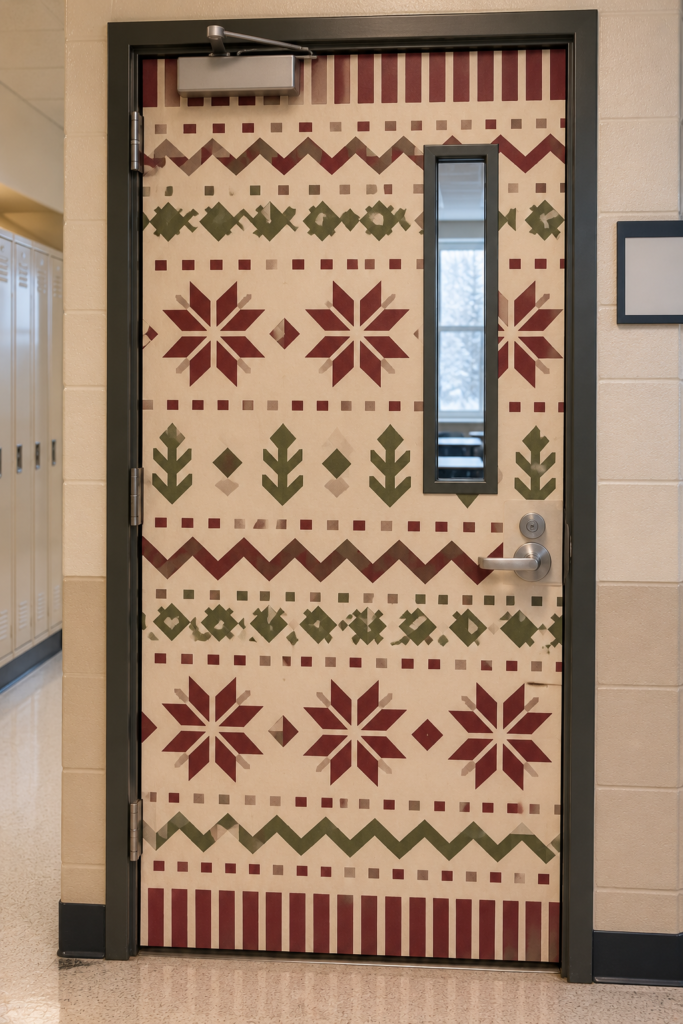
Turn the door into one giant cozy sweater.
Use warm-cream paper as the base.
Add simple burgundy, olive, and mushroom geometric patterns.
Create rows of:
Diamonds.
Snowflakes.
Dots.
Zigzags.
Keep everything graphic and flat.
Avoid copying a Christmas sweater design.
No reindeer.
No ornaments.
No Santa.
Think winter knit pattern instead.
The result feels cozy and surprisingly modern.
Your classroom door is now better dressed than most of us in January.
Fair enough.
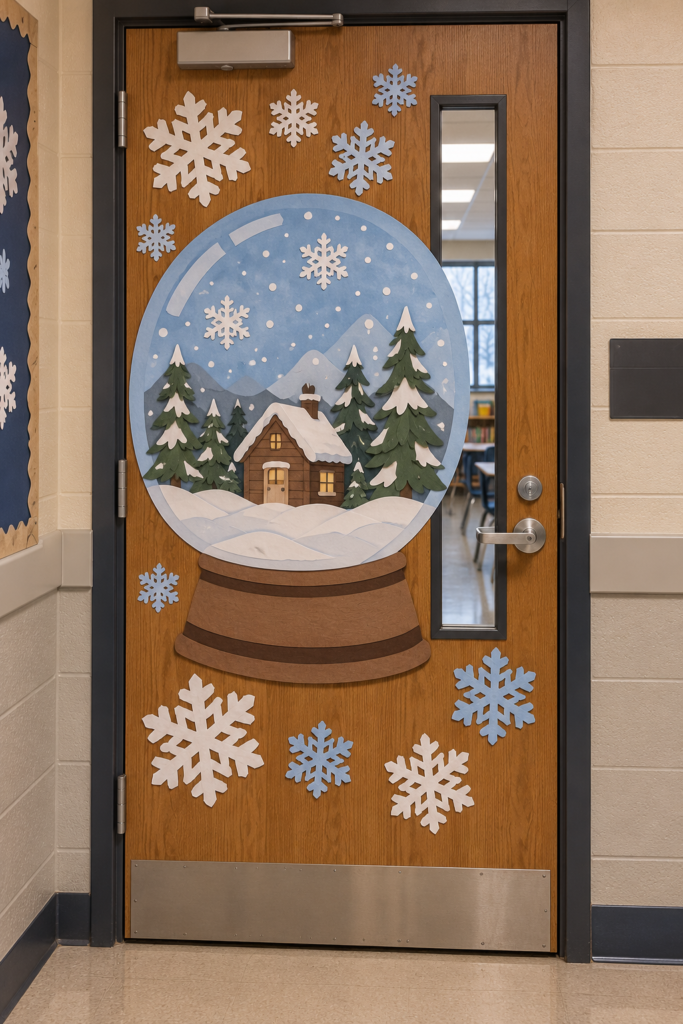
12. Make a Snow Globe Winter Door
Create a giant paper snow globe.
Use a large circle or dome shape.
Inside, make a simple winter scene.
Add:
Snowy trees.
A tiny cabin.
Snowflakes.
Muted blue sky.
Use a warm-brown paper base.
Keep the entire design flat.
Students can make small snowflake shapes for the scene.
Avoid loose glitter.
Because once glitter enters a classroom, it apparently signs a 12-year lease.
Nobody has successfully removed all of it.
Ever.
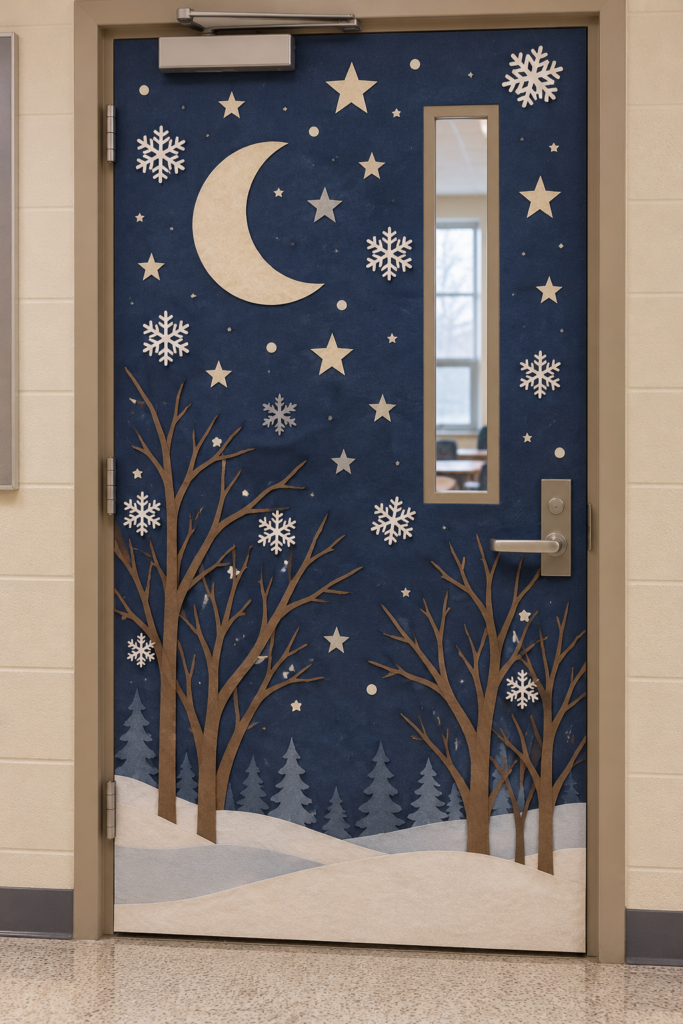
13. Create a Winter Night Sky Door
Go moodier.
Use deep dusty blue paper as the background.
Add cream and pale-gray stars.
Create bare brown tree silhouettes along the bottom.
Add a simple cream moon.
Use tiny paper snowflakes sparingly.
The result feels wintery without relying on snowmen or cartoon characters.
This works particularly well for older elementary students, middle school, libraries, or reading classrooms.
And honestly?
It looks pretty sophisticated for construction paper.
Construction paper deserves more respect.
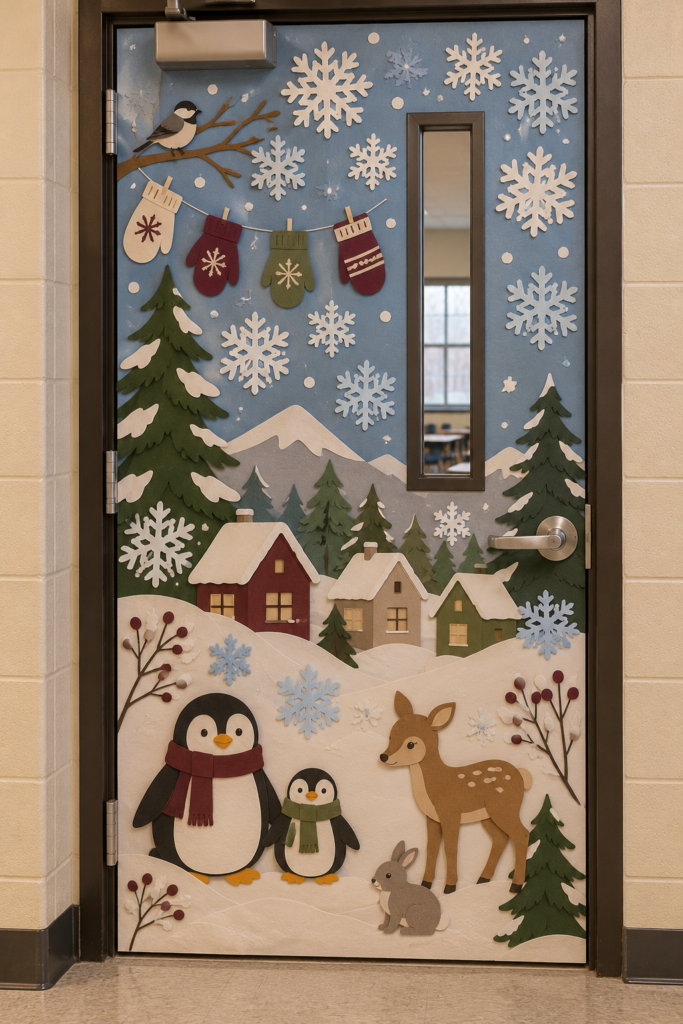
14. Build a Full Student-Made Winter Door
Want the most collaborative version?
Give every student one small winter element to create.
One makes a snowflake.
Another makes a mitten.
Someone makes a penguin.
Someone makes a tree.
Another creates a little winter house.
Combine them into one layered winter scene.
Use a controlled palette to keep everything connected.
Try:
Warm cream.
Dusty blue.
Muted olive.
Deep burgundy.
Mushroom.
Charcoal.
The individual pieces can look different.
That’s the point.
The final door becomes a class project rather than a teacher project that students politely admire for 14 seconds.
Much better.
How Do You Decorate a Classroom Door for Winter After Christmas?
Remove the obviously Christmas-specific pieces.
Put away:
Santa.
Christmas trees.
Ornaments.
Stockings.
Candy canes.
Bright Christmas ribbon.
Holiday wording.
Keep winter elements.
Snow.
Snowflakes.
Snowmen.
Penguins.
Mittens.
Winter forests.
Woodland animals.
Snowy houses.
Books.
You can often reuse the background from a December display and simply replace the holiday-specific pieces.
Which is excellent.
Teachers already have enough work.
Nobody needs to rebuild an entire paper universe every four weeks.
Easy Winter Door Decorations for School Ideas
Keep the design mostly flat.
Paper is your friend.
Try:
Snowflakes.
Mittens.
Paper trees.
Penguins.
Snowmen.
Simple houses.
Books.
Flat materials are easier to secure and generally create fewer protrusions than bulky craft objects.
They’re also easier to store.
And significantly less likely to fall off the door dramatically during math.
Winter Classroom Door Ideas Without Christmas Decor
Focus on the season rather than the holiday.
Use:
Snow.
Winter skies.
Bare trees.
Evergreens without ornaments.
Snowmen.
Penguins.
Woodland animals.
Mittens.
Scarves.
Hot cocoa imagery.
Winter reading themes.
Avoid:
Santa.
Christmas presents.
Ornaments.
Stockings.
Candy canes.
Christmas trees decorated with ornaments.
Holiday sayings.
This allows the display to remain relevant throughout January and February.
Winter Door Decorations for Elementary School
Younger students usually respond well to recognizable shapes.
Try:
Snowmen.
Penguins.
Mittens.
Woodland animals.
Snow globes.
Snowflakes.
Use larger shapes.
Keep details simple.
And include student work whenever possible.
A slightly imperfect door made by the class usually has much more personality than a perfectly coordinated teacher-only display.
Winter Door Decorations for Preschool
Keep the design extremely simple.
Use large flat shapes.
Avoid small detachable pieces.
Try one large snowman.
Large mittens.
Big snowflakes.
Or friendly penguins.
Keep craft materials age-appropriate.
Supervise scissors, staplers, adhesives, and other tools.
Avoid accessible small embellishments that could become choking hazards.
And follow the school’s policies for student artwork and classroom displays.
Winter Door Decorations for Middle School
Go less cartoonish.
Try:
A winter night sky.
Minimal snowy forest.
Winter book theme.
Geometric sweater pattern.
Black-and-white snowflakes.
Muted blue and cream.
Burgundy and charcoal.
Older students can also contribute more detailed paper art.
You don’t need giant smiling snowmen unless your class genuinely wants giant smiling snowmen.
In which case?
Proceed.
The snowman has been elected.
Winter Door Decorations for a School Library
Use books as the main theme.
Create paper book spines.
Add snowflakes.
Use a snowy reading scene.
Create a winter bookshelf illustration.
Or combine books with a cozy cabin theme.
Keep any book titles generic or use school-approved content where appropriate.
And don’t cover library signage or safety information.
A reading theme works beautifully because it stays relevant even after winter ends.
Winter Door Decorations With Snowflakes
Snowflakes are probably the most flexible winter classroom decoration.
They’re inexpensive.
Easy to make.
Easy to customize.
And they don’t belong to a specific holiday.
Use:
White.
Warm cream.
Pale blue.
Light gray.
Let students cut different patterns.
Arrange larger snowflakes around the center.
Use smaller ones to fill gaps.
Just don’t feel obligated to cover every square inch.
Snowstorm?
Cute.
Paper blizzard?
Potentially excessive.
Winter Door Decorations With Snowmen
Use one large snowman.
Or let every student make a small one.
Change scarves and hats to reflect your classroom palette.
Use burgundy, olive, blue, cream, or mushroom.
Avoid Christmas accessories if you want the display to last through February.
A plain winter snowman has impressive seasonal endurance.
Winter Door Decorations With Penguins
Penguins work particularly well for younger classrooms.
Use one large central penguin.
Add smaller student-created penguins.
Use winter scarves.
Add snowflakes.
Keep shapes simple.
And keep all pieces flat and secure.
The result feels playful without requiring Christmas imagery.
Winter Door Decorations With Mittens
Mittens are perfect for collaborative decorating.
Give each student the same basic template.
Let everyone create a different pattern.
Then arrange the mittens together.
Use a limited overall palette if you want visual consistency.
Or let students use lots of colors if the goal is a more playful classroom.
Both work.
The important part is student participation.
Winter Door Decorations With Student Work
Design the display around repeatable shapes.
Snowflakes.
Mittens.
Trees.
Houses.
Penguins.
Books.
This allows each student to contribute one piece.
Before displaying student names, photos, or identifying information, follow your school’s privacy policies and classroom-display practices.
If names aren’t appropriate, display the artwork without them.
The door can still celebrate everyone’s contribution.
Winter Door Decorating Contest Ideas
If you’re decorating for a contest, choose one strong concept.
Don’t combine every winter theme.
Pick:
Winter forest.
Snow globe.
Penguin scene.
Winter books.
Snowy village.
Cozy cabin.
Then make that idea visually clear.
Use a limited palette.
Create one strong focal point.
Add student-made details.
And check contest rules before starting.
The most elaborate design isn’t automatically the best.
Especially if it takes four adults, two ladders, and a structural engineer.
Winter Classroom Door Color Ideas
Try:
Dusty blue + warm cream + charcoal
for a snowy winter look.
Or:
Warm cream + muted olive + medium brown
for a woodland theme.
Or:
Deep burgundy + warm cream + mushroom
for a cozy winter palette.
Or:
Dusty blue + burgundy + warm cream + muted olive
for a colorful but sophisticated classroom display.
You don’t need ten colors.
Three or four usually create enough variety.
Cheap Winter Door Decorations for School
Use basic craft supplies.
Construction paper.
Cardstock.
School-approved background paper.
Reusable paper templates.
Existing classroom art supplies.
Student artwork.
Save reusable pieces at the end of the season if they’re still in good condition.
Paper trees, snowflakes, mittens, and geometric shapes can often be repurposed.
Your supply budget will appreciate the ambition.
DIY Winter Door Decorations for School
Start with a sketch.
Seriously.
Five minutes of planning can prevent 45 minutes of moving paper shapes around the door.
Choose:
One theme.
One background.
Three or four colors.
One focal point.
Then decide which pieces students can make.
Prepare templates if needed.
Build the display away from the door first when practical.
Then attach the pieces according to school rules.
This is much easier than improvising directly on a vertical door while holding tape in your mouth.
We’ve evolved beyond that.
Probably.
How to Make a Classroom Door Look Creative Without Looking Cluttered
Choose one main focal point.
Use repetition.
If your theme is mittens, repeat mittens.
If it’s a forest, repeat trees.
Don’t add snowmen, penguins, books, cocoa, mittens, cabins, and woodland animals just because they’re all technically winter.
Leave some background visible.
Keep the color palette controlled.
And avoid covering functional parts of the door.
Creativity doesn’t require maximum object density.
How to Make Winter Classroom Door Decor Look More Polished
Use consistent colors.
Repeat shapes.
Create clean large silhouettes.
Limit tiny details.
Use contrast.
For example, white snowflakes show clearly against dusty blue.
Burgundy details stand out against cream.
Muted olive works beautifully with warm brown.
Keep spacing intentional.
And trim rough paper edges when appropriate.
Though student-made imperfections?
Keep those.
That’s part of the charm.
How to Attach Winter Decorations to a Classroom Door
Follow your school’s policies first.
Some schools restrict:
Adhesives.
Staples.
Tape.
Hooks.
Coverage of doors.
Combustible materials.
The allowed attachment method may depend on the door material and fire-safety requirements.
Use only school-approved attachment methods.
Secure pieces so they don’t fall into the hallway.
Avoid placing attachment materials on:
Locks.
Handles.
Hinges.
Closers.
Vision panels.
Weather seals.
Accessibility hardware.
Required signs.
Fire labels or other required markings.
And don’t attach decorations to nearby fire-safety or building systems.
The paper snowman does not need access to the door closer.
Winter Classroom Door Decoration Safety
School-door decorating needs more caution than decorating an ordinary interior wall.
Follow school administration, district, facility, and applicable fire-safety rules.
Some classroom doors may be fire-rated assemblies or part of required exit routes.
Rules can limit the type, amount, location, or combustibility of decorations.
Never interfere with the door’s ability to open, close, latch, or lock normally.
Keep clear:
Door handles.
Locks.
Hinges.
Door closers.
Vision panels.
Accessibility hardware.
Required signage.
Fire labels and required markings.
Security equipment.
Emergency equipment.
Keep decorations flat where possible.
Avoid bulky materials that project into hallways.
Don’t allow paper or fabric to extend into the door frame where it could interfere with closing or latching.
Never attach decorations to:
Smoke or carbon-monoxide alarms.
Sprinkler heads or piping.
Fire alarms.
Fire extinguishers.
Exit signs.
Electrical panels.
Vents.
Heating equipment.
Other safety systems.
Maintain required hallway and doorway clearances.
Avoid loose cords.
Avoid open flames entirely.
If electrical lights are permitted at all, use only products and installations approved by the school and follow the applicable rules and manufacturer instructions.
Keep small detachable craft pieces away from young children where they could create choking hazards.
Supervise scissors, staplers, craft knives, adhesives, and similar tools according to age and school policy.
And when displaying student work, follow school privacy rules concerning names, photos, and other identifying information.
If you’re uncertain whether something can go on the door?
Ask the school or facilities staff before attaching it.
A slightly simpler winter display beats explaining to the principal why the classroom door no longer closes.
Every time.
How to Store Classroom Winter Door Decorations
Remove pieces carefully.
Discard torn paper.
Keep reusable templates.
Store larger flat pieces between sheets of cardboard or inside a portfolio-style container.
Separate snowflakes and smaller shapes into labeled folders.
Keep reusable laminated pieces flat.
Don’t store damp materials.
And take a quick photo of the completed design for your own reference if school privacy policies allow it.
Next January, you’ll thank yourself.
Especially when you discover that you already cut 34 paper mittens.
How to Transition a Winter Classroom Door Into Spring
Reuse what you can.
Remove:
Snowflakes.
Snowmen.
Penguins.
Snowy ground.
Keep:
Trees.
Houses.
Books.
Some woodland animals.
Replace bare trees with green leaves.
Swap dusty blue for muted green.
Turn the snowy village into a spring neighborhood.
Replace winter mittens with flowers or leaves.
A good classroom display can evolve instead of being completely rebuilt.
Which means fewer hours cutting construction paper.
I believe that’s what professionals call a win.
Final Thoughts
The best Winter Door Decorations for School Ideas for a Creative Classroom make the classroom feel seasonal without relying on Christmas decor.
Create a giant snowman.
Cover the door with student snowflakes.
Build a snowy forest.
Add penguins.
Display colorful mittens.
Create a cozy cabin.
Make a snowy village.
Add woodland animals.
Try a hot cocoa theme.
Celebrate winter reading.
Create a giant sweater pattern.
Build a paper snow globe.
Design a winter night sky.
Or turn the whole display into a collaborative student project.
Focus on simple materials, strong themes, student participation, clear door operation, and school-approved installation.
The goal isn’t the most complicated door in the hallway.
It’s a winter display your students actually feel part of.
And if it survives until February without half the snowflakes falling off?
That’s basically an engineering achievement.
