

15 Inexpensive Small Walk-In Closet Ideas for a More Organized, Custom-Looking Space
A small walk-in closet can have plenty of wall height and still somehow leave you with nowhere sensible for shoes, bags, folded clothes, or tomorrow’s outfit. That usually happens because the closet has one generic rod-and-shelf setup trying to handle every category at once.
The fix isn’t automatically more baskets or a complete custom renovation. It’s assigning the right kind of storage to the things you actually own, then keeping enough empty space to reach them comfortably. That matters even more in a narrow walk-in where every extra bin, stool, or deep organizer can interfere with the aisle.
These inexpensive walk-in closet ideas focus on practical changes you can make with adjustable shelves, second rods, simple dividers, modular pieces, paint, lighting, and better zoning.

1. Inventory the Closet Before Buying Organizers
Start by sorting what actually needs to return to the closet: short hanging, long hanging, folded clothes, shoes, bags, accessories, seasonal pieces, luggage, laundry, and everyday items. The point isn’t generic decluttering. You’re measuring demand. If most of your wardrobe is short hanging, you need more rod capacity; if shoes are overflowing, another basket won’t solve it. Buying organizers first often creates a closet full of containers while the real storage bottleneck stays exactly where it was.

2. Add a Second Rod for Short Clothes
A second hanging rod can dramatically improve capacity if your wardrobe is mostly shirts, blouses, skirts, and folded trousers. Measure your garments first, then place the rods so the lower clothes don’t drag on the floor or storage beneath them. Double hanging works because one tall bay becomes two usable zones without increasing the closet’s depth. It won’t help with dresses or long coats, though, so don’t convert every section just because two rods look efficient on paper.

3. Keep One Proper Long-Hanging Zone
Dresses, coats, jumpsuits, and long skirts still need uninterrupted vertical space. Group those pieces together and measure the longest garment you regularly wear before setting the rod height. You may find that one relatively narrow long-hanging bay is enough, which frees the rest of the wall for double hanging, shelves, or drawers. This small decision prevents long garments from covering shoe shelves or piling over bins, which is one of the most common frustrations in poorly planned compact closets.
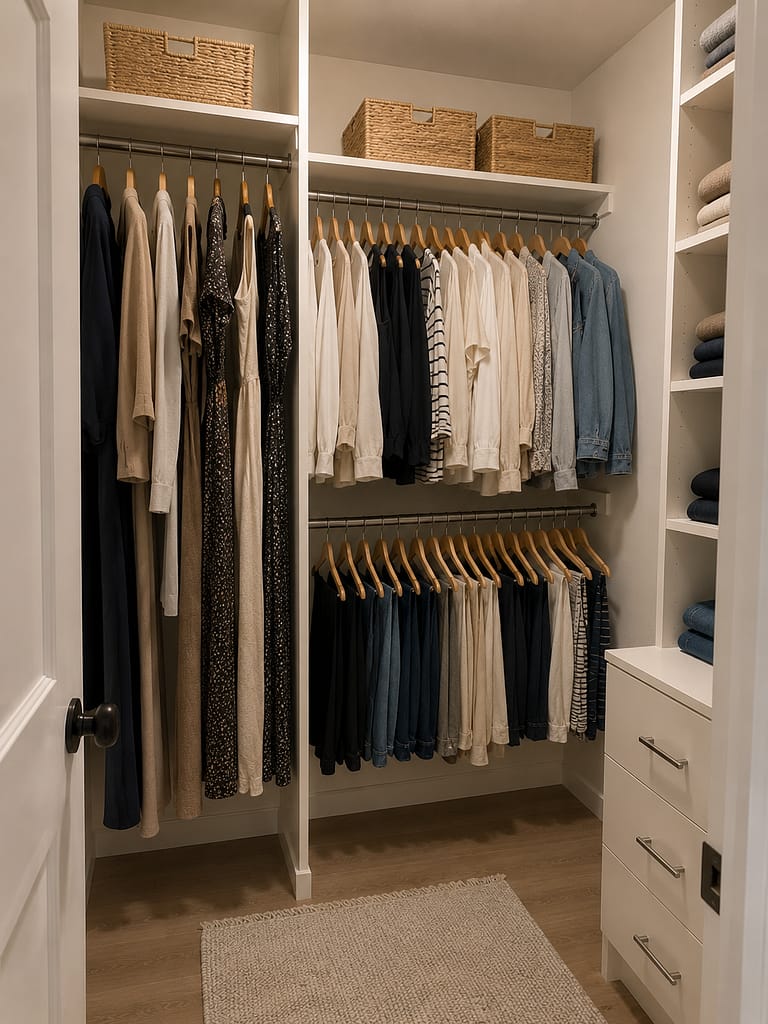
Budget Tip: Before buying a second rod, separate every short-hanging garment and measure how much rod space that category uses. That tells you whether double hanging will actually solve your storage shortage.
4. Upgrade a Basic Rod-and-Shelf Setup Selectively
Builder-grade closets often have one long rod with a shelf above it. You don’t necessarily need to tear that out. Add only what fixes the biggest problem: a second rod beneath one section, a narrow shelf tower for folded clothes, shelf dividers on the upper shelf, or properly sized bins for seasonal pieces. If shoes are the issue, add shoe storage instead of more hanging. Keeping useful existing components can save work and money while still making the closet feel much more intentional.
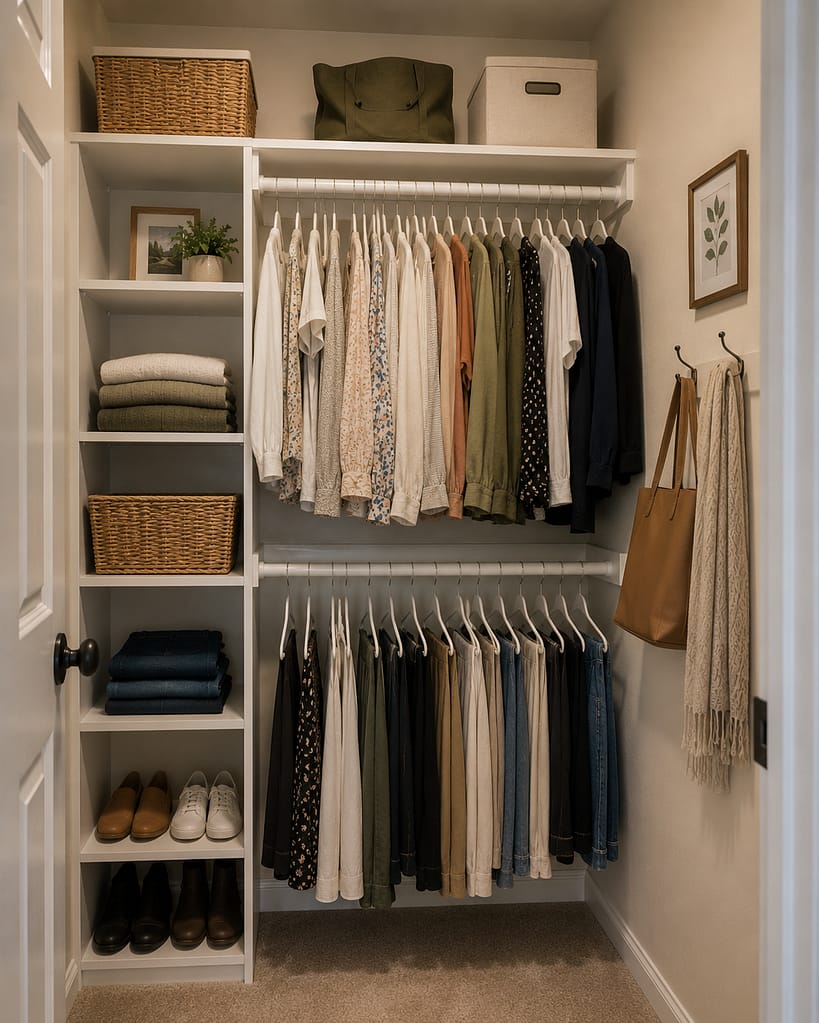
5. Zone a Long Narrow Closet From Front to Back
A long closet becomes frustrating when identical storage repeats down both sides and turns the room into a tunnel. Put your most frequently worn clothing near the entrance, where you can grab it quickly. Use the middle for folded storage, drawers, or bags, then reserve the far end and upper shelves for seasonal or rarely used items. This lengthwise zoning improves access without adding anything to the aisle. Keep the walkway itself free rather than filling the center with hampers or decorative furniture.

6. Adjust Open Shelves Around Folded Clothes
Open shelving works best when the shelf spacing follows the items instead of looking perfectly even. Folded sweaters need enough height to remove one without disturbing the stack above, while T-shirts may need less. Keep stacks short and use shelf dividers when categories tend to fall into one another. Dividers are often more useful than baskets for frequently accessed clothes because you can see and grab the item immediately. Leave a little unused vertical space so the shelves stay practical rather than overpacked.

7. Build Shoe Storage Around the Shoes You Own
Don’t buy a wall of identical cubbies unless your footwear actually fits them. Sneakers, flats, ankle boots, and tall boots need different openings. Flat adjustable shelves are usually inexpensive and flexible, while very deep shelves can waste aisle space. Keep everyday shoes on lower shelves where they’re quick to reach and put special-occasion pairs higher up. Reserve a taller section for boots rather than spacing every shelf for the tallest pair. This makes better use of the vertical wall without expensive custom inserts.

Pro Tip: Use painter’s tape to outline any new shelf tower or drawer unit on both the wall and floor. Walk through the closet afterward to make sure the added depth doesn’t make the aisle uncomfortable.
8. Give Handbags a Defined Shelf Zone
Handbags are difficult to store when they’re piled together because handles tangle and softer bags collapse. Give them one or two dedicated shelves instead. Simple dividers can keep bags upright without using bulky individual boxes, and lightweight bags can use appropriate hooks where they won’t interfere with hanging clothes. Keep your everyday bag close to the entrance and less-used pieces higher or farther back. A defined zone looks calmer and also means you won’t have to pull out five bags to reach one.

9. Use Shallow Storage for Small Accessories
Belts, jewelry, sunglasses, scarves, and small accessories disappear inside deep bins. Shallow storage keeps those items visible and easy to retrieve. Use a slim drawer, compartment tray, narrow organizer, or a few hooks in a dedicated section rather than scattering accessories throughout the closet. Place the things you use while getting dressed around waist or chest height. Deep shelves should be reserved for categories that genuinely need depth; using them for tiny objects usually creates layers of forgotten items at the back.

10. Turn the Upper Shelf Into Real Seasonal Storage
The upper shelf is useful precisely because it’s harder to reach. Store luggage, seasonal clothing, spare bedding, occasion pieces, or clearly labeled bins there—not the sweater you wear every other morning. Measure the shelf depth and the height to the ceiling before buying containers so bins fit the space without becoming impossible to remove. Using a few consistent sizes helps the shelf stay orderly, but you don’t need decorative baskets lined across every inch just to create a finished look.

11. Create an Everyday Zone Near the Entrance
Put the clothes, shoes, and accessories you reach for constantly in the easiest part of the closet. That could mean work shirts on the first rod, everyday sneakers on the lowest shelf, and a daily bag on a nearby divider shelf. The closet becomes faster to use because you aren’t reaching past formal clothes or seasonal pieces every morning. It also stays tidier: frequently used items have short, obvious return paths rather than being shoved into whatever empty spot is closest.

Budget Tip: Before replacing the whole closet system, identify the one category causing the most overflow—usually shoes, folded clothes, or short hanging—and spend only on storage that directly fixes that category.
12. Fit Laundry Storage Without Sacrificing the Aisle
A hamper in the closet is convenient until it becomes something you have to step around. Choose a narrow hamper that fits at the end of a storage run or beneath a suitable open section rather than placing a large basket in the center aisle. A pullout can work if your existing modular system supports one, but it isn’t necessary. If no location leaves a comfortable path, keep the hamper elsewhere. Empty walking space contributes more to an organized closet than squeezing laundry storage into an already cramped floor plan.

13. Make Modular Pieces Look Like One System
Inexpensive modular components feel more intentional when they align. Repeat shelf heights across adjacent towers, keep rods on consistent visual lines, limit the finish palette, and use similar hardware where applicable. If you’re mixing pieces, a white framework with warm wood or neutral accents is one easy combination because it keeps the narrow room visually lighter. Don’t pretend modular storage is custom cabinetry; the goal is simply to plan the pieces as a whole rather than buying unrelated organizers one at a time.

14. Refresh Scuffed Walls and Improve the Light
Closet walls take a beating from hangers, luggage, shoes, and bins. Empty the area enough to clean marks, patch holes, prepare the surface, and repaint with a durable interior finish appropriate for the wall. Light neutral paint can help a windowless closet distribute artificial light more evenly, though a deeper color can work if the room is well lit. Then address weak lighting. Aim to illuminate clothes and shelves rather than installing a decorative fixture that leaves storage towers in shadow.

15. Remove “Organization” That Steals Useful Space
Some popular closet additions solve no storage problem at all. A stool, thick rug, floor plant, leaning mirror, freestanding dresser, or rows of decorative baskets can consume the exact space you need for dressing and circulation. Mount a full-length mirror on a suitable door, narrow blank wall, or end wall instead of putting one on the floor. Leave some shelves partly empty and keep the aisle clear. Empty space isn’t unfinished; it’s the room you need to reach, remove, and return everything comfortably.

Pro Tip: Before buying top-shelf bins, measure the shelf depth, available height, and the objects you intend to store. Choose containers around the contents instead of letting a row of pretty baskets determine how the closet functions.
Frequently Asked Questions
How do I organize a small walk-in closet with too many clothes?
Start by separating your wardrobe into storage types rather than simply adding more hangers. Short garments may benefit from double hanging, folded items from adjustable shelves, and seasonal pieces from upper storage; if the closet is still overfilled after those changes, the total volume may exceed the space available.
What is the cheapest way to improve a walk-in closet?
Keep useful existing rods and shelves, then add one targeted improvement where storage is failing. A second rod, shelf dividers, adjustable shoe shelving, better lighting, or a narrow modular tower can have more impact than replacing every component at once.
How can I make an inexpensive closet system look built-in?
Plan the complete storage wall before buying parts. Align shelf heights and rods, repeat finishes and hardware, and avoid scattered gaps between unrelated components; the result will look more cohesive even though it remains a modular system rather than custom millwork.
What should go on the top shelf of a walk-in closet?
Use the highest shelves for things you don’t need every day, such as luggage, seasonal clothing, spare bedding, occasion pieces, or clearly labeled storage bins. Everyday clothes and accessories belong lower, where you can reach them without repeatedly using a step stool.
How do I organize a long narrow walk-in closet?
Zone it along its length. Keep everyday hanging and shoes near the entrance, use the middle for folded clothes or drawers, and reserve the far end and upper levels for seasonal or less frequently used categories while keeping the central walking path clear.

Make the Closet Easier to Use Before Making It Prettier
The most useful closet isn’t the one with the most shelves, bins, or organizers. It’s the one where each category has the right kind of storage and there’s enough empty space to actually reach everything.
Start with what overflows today. Fix that category first, then improve the shelves, lighting, walls, and visual consistency only where they make the routine easier.
Save or pin this post before starting your closet makeover so you can come back to the organization ideas while you measure and plan.